
User Interface
Selector Dialogs
In RiverWare, a common selector dialog is used to select objects, slots, accounts and supplies. The selector can be used for the following activities:
• Simple selections, like selecting a slot to plot.
• Complicated selections like dynamically creating lists of slots in which to import or export using database DMI’s.
• Choosing a previously created Slot Set.
Selector Features
The appearance of the dialog depends on the required selection and the application from which the selector is invoked. For example, in any one invocation of the selector dialog, the user will be selecting only objects, only slots, or only supplies, etc. The following document describes how to use the dialog in each of the selection modes.
When creating a selection, the user starts with a general set of items and narrows it down until they can select the item they wish. In general, this is done from left to right and top to bottom. There are two main actions the user must take when making a selection: displaying the items and selecting them as described in the following section.
Note: Selecting slots in a Slot Set is performed from the Use Slot Set checkbox; see “Use Slot Set” for details.
Displaying Items and Filtering
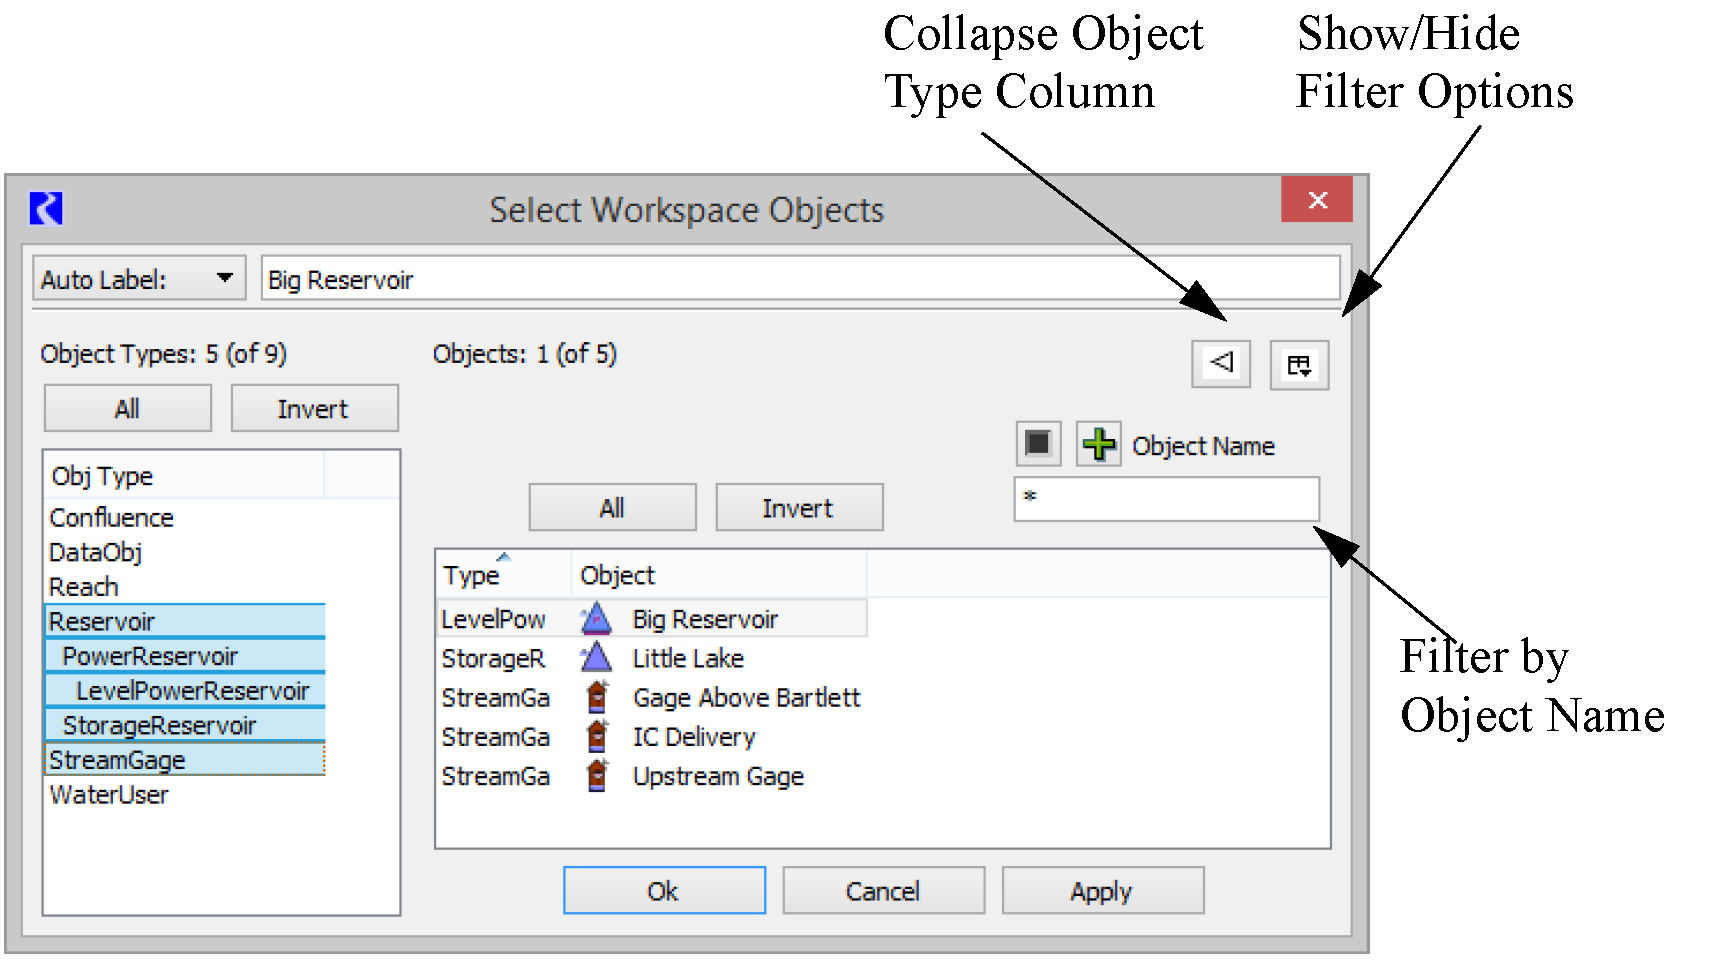
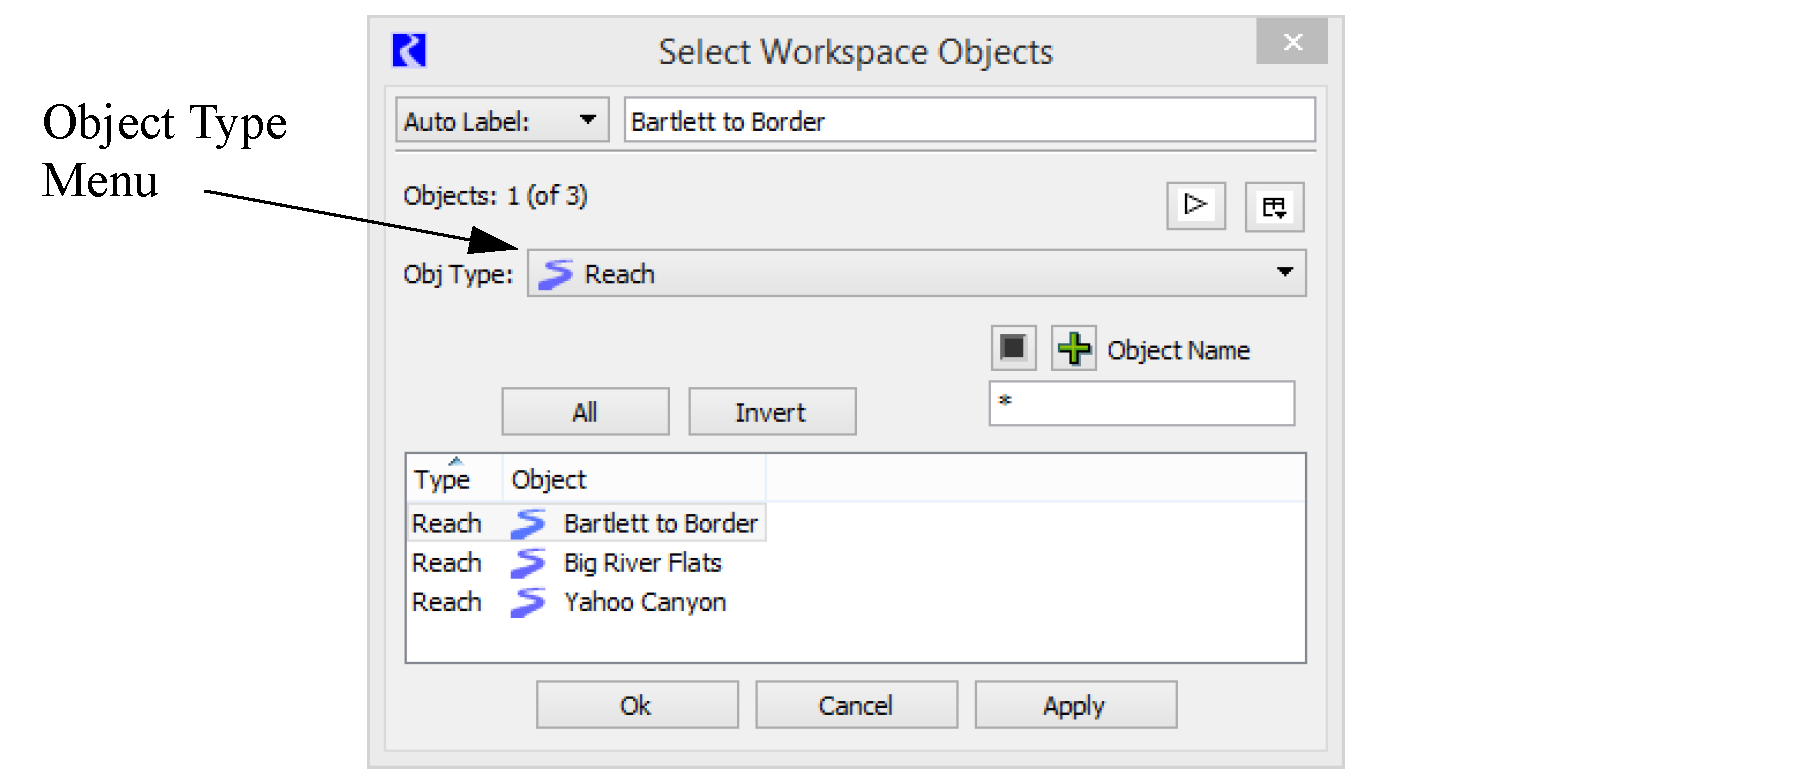
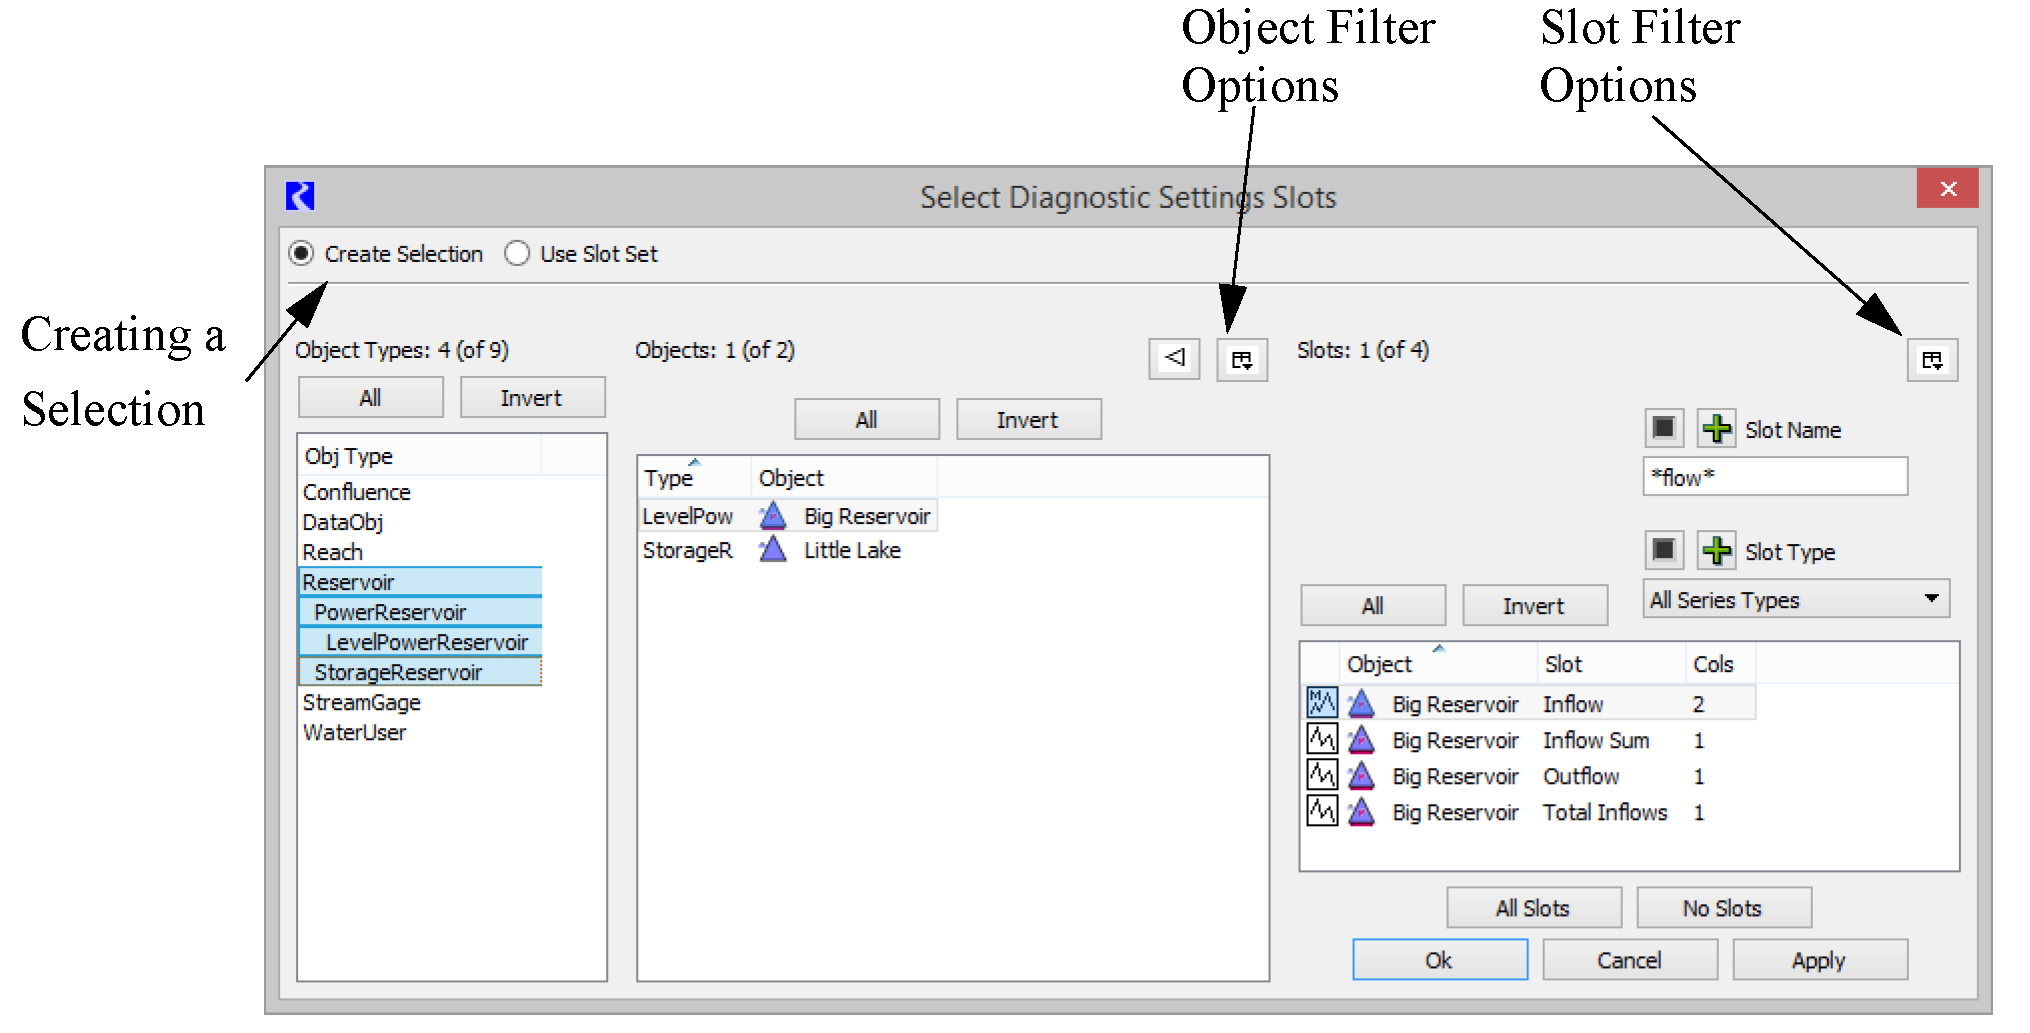
Displaying items is accomplished from general to specific. If the user is selecting a slot, they first start on the left by highlighting one or more Object Types, and then they are able to highlight a specific object or set of objects, and then they are able to highlight the specific slot or set of slots on those objects. These items are displayed by selecting the appropriate Object Types, Objects, and Slots or using the All buttons to select all. In Figure 7.1, we have highlighted all Reservoirs (including Level Power and Storage) in the left most pane. Then we have highlighted the Big Reservoir object in the center pane. Shown in the right pane are all of the slots on this object.
Note: Multiple items can be highlighted in each pane.
Figure 7.1
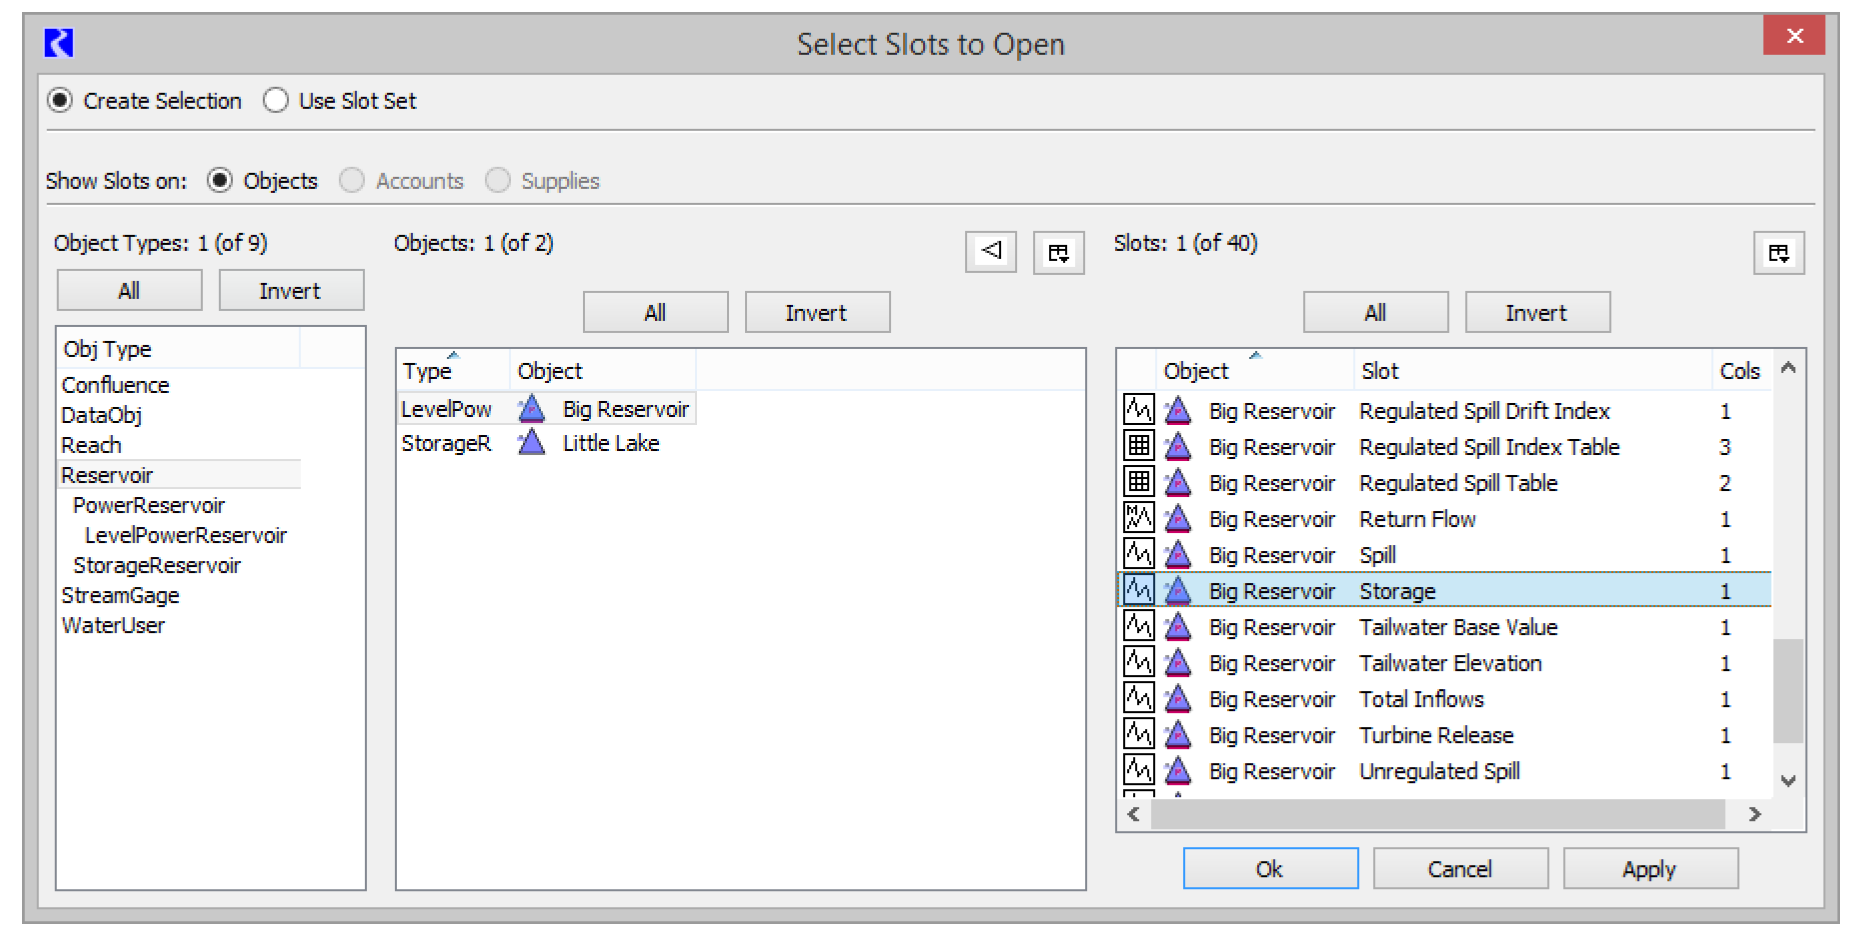
In addition to highlighting items one at a time, there are filters which can be used to constrain the set of items displayed based on different criteria. The filters are turned on by selecting the Filter button  , then selecting the appropriate filter. Each filter field makes use of the following two buttons:
 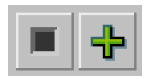 . Selecting the gray square disables that filter option. Selecting the green Plus symbol (thereby changing it to a red minus symbol) will result in an inverse filter. This is the equivalent of displaying those objects that do not match the filter:
 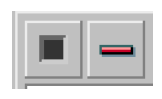 .
.
, then selecting the appropriate filter. Each filter field makes use of the following two buttons: . Selecting the gray square disables that filter option. Selecting the green Plus symbol (thereby changing it to a red minus symbol) will result in an inverse filter. This is the equivalent of displaying those objects that do not match the filter: .The filters for each type of selection (Objects, Slots, Accounts, and Supplies) is described in the each selection’s section.
Making a Selection
After displaying a set of items, the user must then select the desired ones. Selecting the items consists of highlighting the desired items and selecting OK or Apply. The All and Invert buttons help the user select all items or invert the selection items. Depending on the application, the user can also select one item, select Apply, then make additional selections finally selecting OK or Cancel.
Also, in certain situations, wildcards are allowed to select all of the displayed items; see “Wildcards” for details.
In the above example, to select the Storage slot, we highlight the line Big Reservoir Storage and select OK or Apply.
Selecting Objects
Many actions in RiverWare require the user to select an Object. For example, on the Workspace, then Objects, then Select Objects menu, the user can highlight a set of objects which can then be deleted, added to a subbasin, etc.
Filters can be enabled through the Show/Hide Filter Options button. These features exist for each of the various configurations of the selector dialog (object selector, slot selector, account selector, and supply selector).
Figure 7.2
The Object Name filter field allows the user to type a part of the object name and use wildcard symbols (i.e. *) for name completion. For example, typing Lake* in the Object Name field will display only those objects that begin with “Lake”. By default, a * exists in the Object Name field and all objects will be displayed.
Table 7.1 summarizes the Object selector filters.
Object Filter | Description | Screenshot |
|---|---|---|
Object Name | Filters to only the Object which matches the text entered in the text-field. If the text is entered within asterisks (like so: *text*), then will filter only to Objects which contain that fragment of text. | 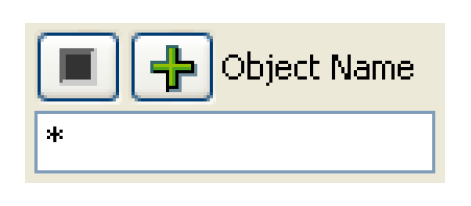 |
Has Account | If the model is an accounting model, the Has Account field can be used to show only those objects that contain a specified account. The drop down list allows the user to choose the account used for filtering. By default, the Any option is enabled and those objects that contain any account will be displayed Note: Objects that do not contain an account will not be displayed). The Any: Agg & Elements option is more inclusive than the Any option. This option will display aggregate objects that do not contain accounts if their elements do contain accounts. In the Any option, aggregate objects that do not contain accounts will not be displayed even if their elements contain accounts. | 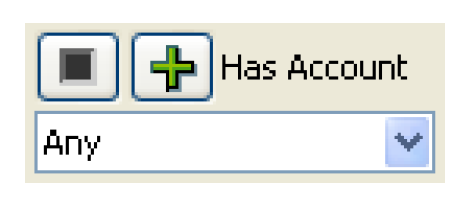 |
In SubBasin | The In Subbasin field allows the user to select a user-defined subbasin and only show objects in that subbasin. | 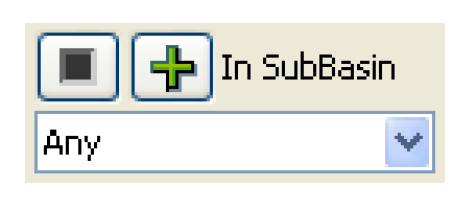 |
In Object Cluster | The In Object Cluster field allows the user to select a user defined Object Cluster and only show objects in that cluster. See “Object Clusters” for details on clusters. | 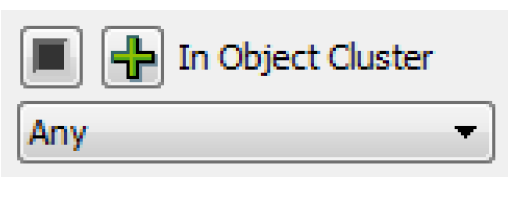 |
Has Attribute Value | The Has Attribute Value filter allows the user to select an Attribute/Value pair and only show objects that have that pair. See “Object Attributes” for details on object attributes. | 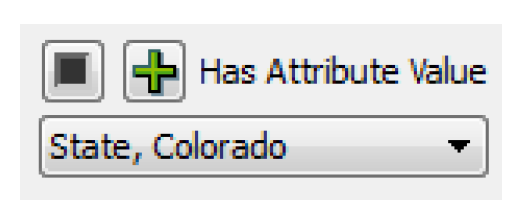 |
Show Object Types in an Option Menu
The user can choose to collapse the object type column into an option menu by selecting the  button. Figure 7.3 shows the object selector when this option is enabled.
button. Figure 7.3 shows the object selector when this option is enabled.Figure 7.3
All modes of the selector dialog (object selector, account selector, slot selector, supply selector) have the option of collapsing the object type column into an option menu. While each of the dialogs may have a slightly different appearance, the function of the  button remains the same.
button remains the same.All Objects and No Objects
If appropriate, for example when selecting objects in the Diagnostics Settings dialog for filtering diagnostics by object, the All Objects and No Objects buttons will be available. If either of these options are selected, either all of the objects (regardless of filtering or selections) or none of the objects are automatically selected and the dialog is closed.
Selecting Slots
Selecting slots is one of the most common operations in RiverWare, whether for plotting, snapshots, or DMI’s. To select a slot, you must also select an Object, so the Selecting Objects section is relevant here too.
When using the selector, you generally work from top to bottom and left to right. The first choice is whether to Create Selection or to Use Slot Set as shown in the image:
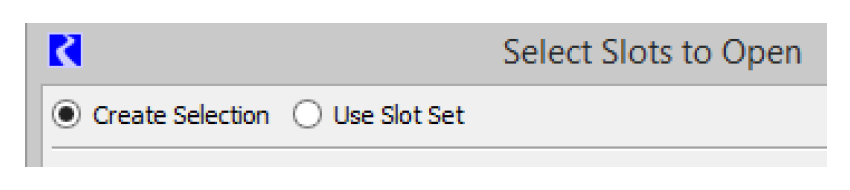
Create a selection if you want to choose slots on objects. Use a Slot Set if you want to use a previously defined set of slots. See “Use Slot Set” for details on this approach.
Creating a Selection
When creating a selection, you choose the object type and objects on which the slots reside. Then you choose the slots from a panel that lists the slots. Similar to the object selector, the slot selector has fields for selecting and filtering by object and object type. These sections work the same in both the object selector and the slot selector. In addition, there are toggle buttons at the top of the dialog to specify whether or not the slots are on objects, accounts, supplies, or exchanges. Depending on the invocation of the slot selector dialog (the dialog from where the selector dialog is being invoked), these options may not be present. For example, sometimes the slot selector applies only to slots on objects or slots on accounts. In these cases, the toggle options will not be present and the dialog will appear in the appropriate configuration.
Table 7.2 summarizes the slot selector filters. Any text can be entered with the wildcard asterisks (like so: *text*), then the filter will only show Slots which contain that fragment of text.
Slot Filter | Description | Screenshot |
|---|---|---|
Slot Name | Filters to only the Slots whose Name matches the text entered in the text-field. | 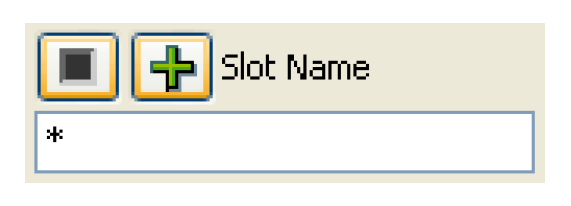 |
Slot Column Label | Filters to only Slots which have a column label that matches the text entered in the text field. | 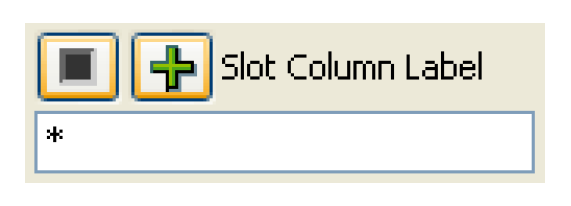 |
Slot Unit Type | Filters to only the Slots which have the specific Unit type selected from the drop down menu. (i.e. Flow, Length, Time, etc.) |  |
Slot Type | Filters to only the Slots which are of the specific Slot type selected from the drop down menu (i.e. Series, All Table Types, Series with RPL Expression, etc.) | 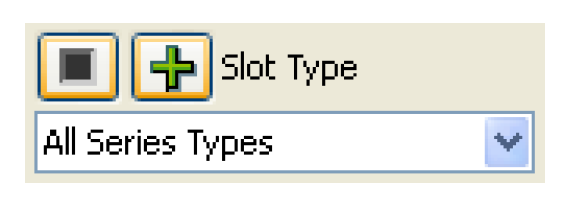 |
Has RPL Expr | Filters to only the Slots which have a RPL expression (such as a SeriesSlot with Expression or Scalar Slot with Expression). | 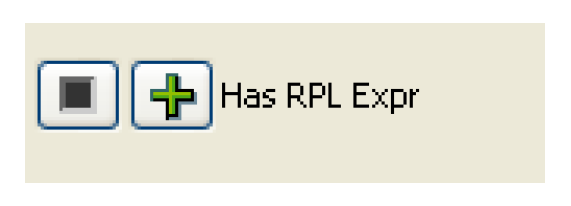 |
Timestep Size | Filters to only the Slots which have the timestep length selected in the drop-down menu. |  |
Allows Flag | Filters to only the Slots which allow a specific flag selected from the drop-down menu (such as the Target flag on Storage or Pool Elevation Slots, or the Max Capacity flag on Outflow or Energy slots). |  |
Slot Attrib | The Slot Attrib option will filter to show only slots that are Dispatch slots or RBS Governing slots. Dispatch slots are linkable slots that trigger object dispatching when they receive a value. RBS Governing slots are the slots that dictate the solution direction (on a particular object) during rulebased simulation. They are the dispatch conditions (knowns and unknows) associated with the dispatch methods. If these options are hidden or disabled, no filtering takes place. | 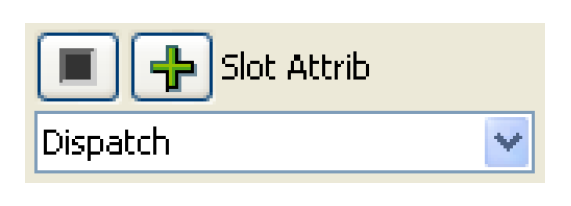 |
Has Description | This filter finds slots which have the specified search text. Leave the field blank to locate all slots which have a non-blank description | 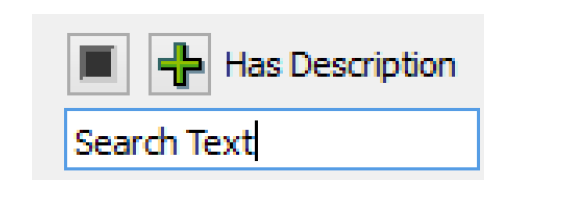 |
Supports Opt Limits | This filter is used to find table slots that are verified in optimization based on specified min and max limits. |  |
Is Custom | Filters to show only Custom slots; i.e. those created by the user that are not Simulation Slots. | 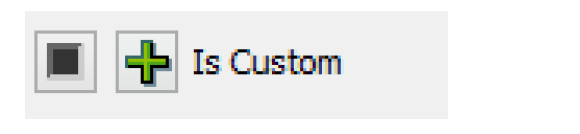 |
Slot Set | Filters to show slots that are part of the selected Slot Set. | 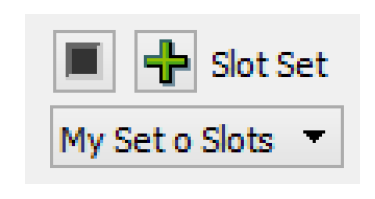 |
Has Flag | Filters to only the Slots which have a specific flag. Except for the User Input (Init Period) and User Input (Run Period), the slot will be shown if it has the specified flag at any timestep in its range. | 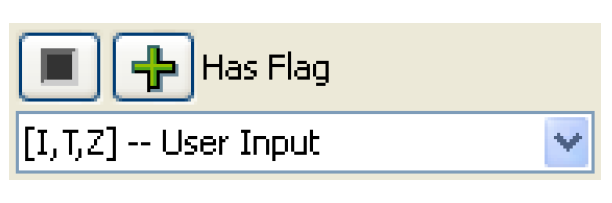 |
Has Priority | In a rulebased simulation model, filter to only show slots that have a priority equal to the specified priority. The slot will be shown if it has the priority at any timestep in the range. | 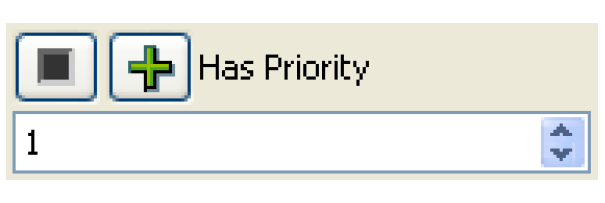 |
Name Uniqueness | When selecting slots on multiple objects, this filter will only show the first instance of a slot name. For example, on two reservoirs, it will only show the first reservoir’s Storage slot. | 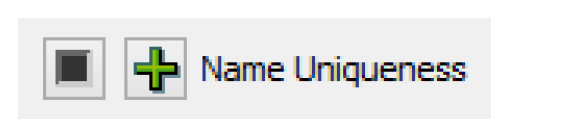 |
If appropriate, for example when selecting slots in the Diagnostics Settings dialog for filtering diagnostics by slot, the All Slots and No Slots buttons will be available. If either of these options are selected, either all of the slots (regardless of filtering or selections) or none of the slots are automatically selected and the dialog is closed.
Figure 7.4
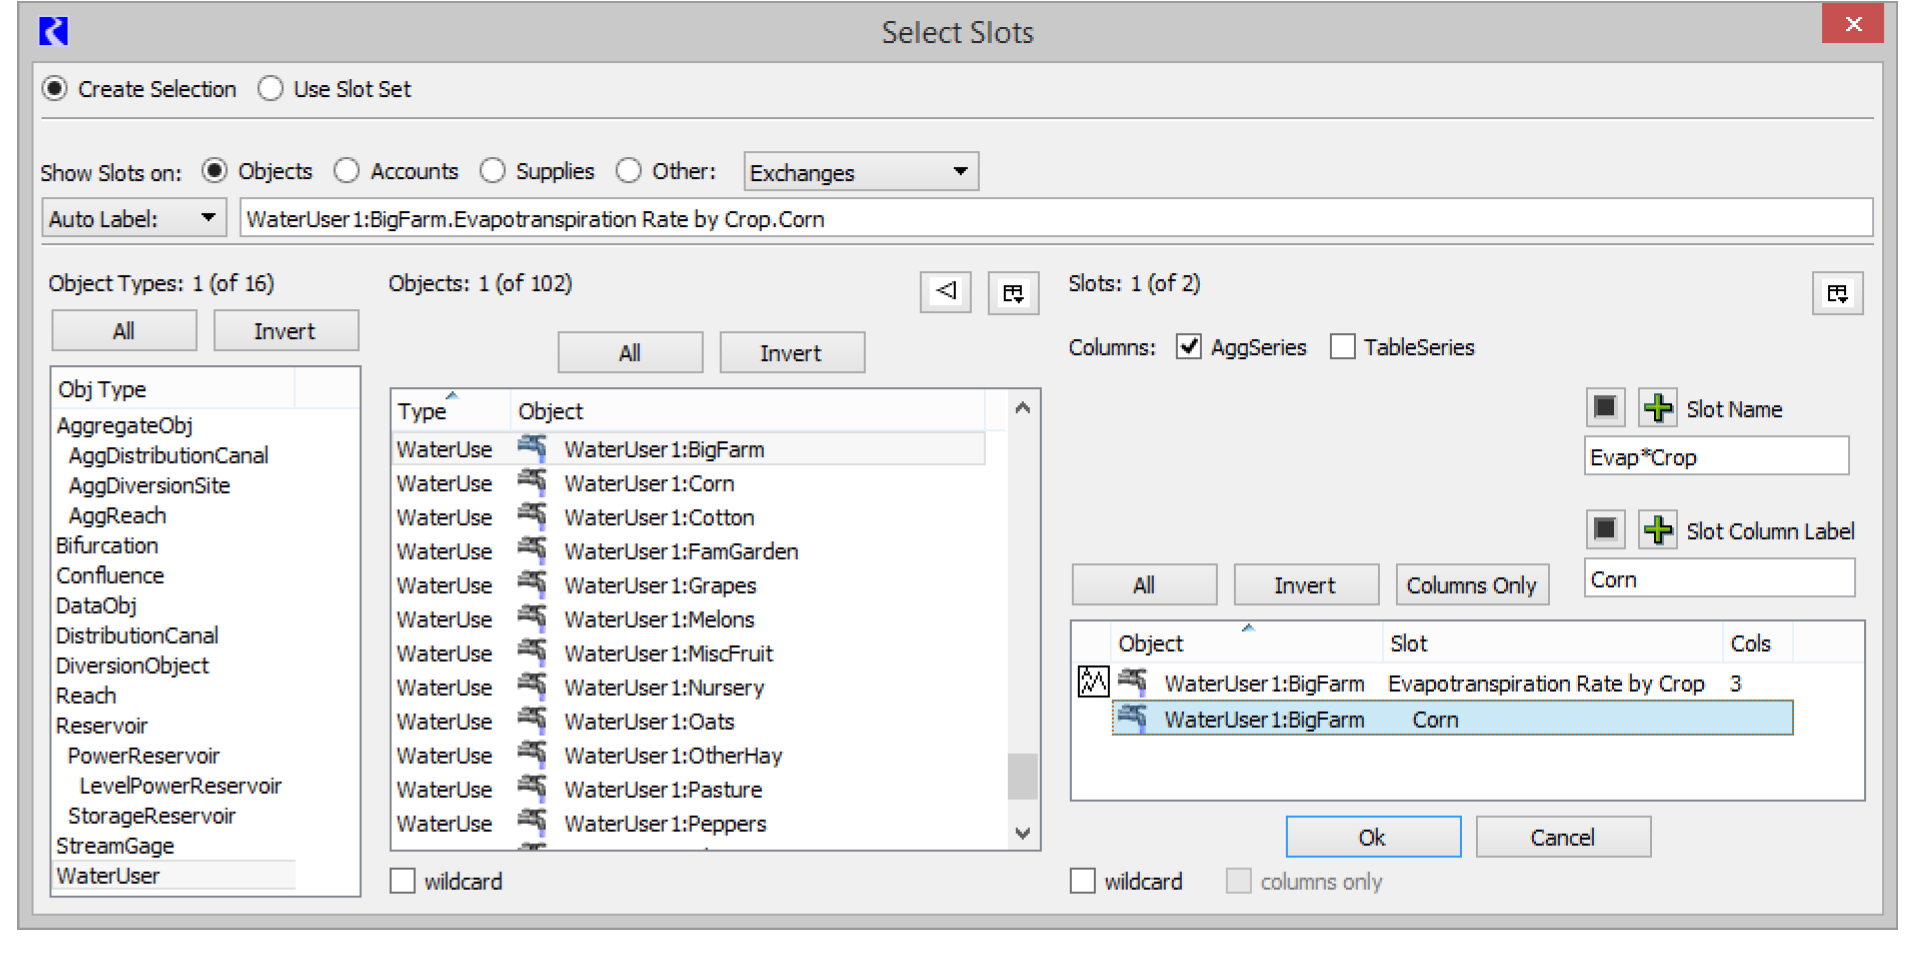
When selecting columns of an Agg Series Slots, Table Slots or Table Series Slots, the Slot Column Label Filter can be used. This is available in, for example, Database DMI Name Maps where the user can select to import column 2 of an Agg Series Slot. In addition, a push button was added to highlight Columns Only on the selection. The Wildcard checkbox also works for this type of selection. A Columns Only checkbox next to the Wildcard checkbox allows the user to specify that in the wildcard selection, only the columns should be selected and not the overall slot.
Following is an example of how this could be used: A user configures 5 agg series slots to contain crop water requirements for 10 different crops. (5 slots * 10 columns = 50 timeseries) When creating a name map for use in importing via the database DMI, the user sets the filter to select each of the columns that are labeled “Crop 1” across the multiple slots. The user can then specify that “Crop 1” maps to “corn” in the database Name Map. This enables the user to set up only 10 Name Maps, one for each crop, instead of the 50 that were previously required. Figure 7.5 shows the selector with the Slot Column Label Filter, and Columns Only button and wildcard options.
Figure 7.5
In addition to the Columns: AggSeries checkbox shown in the previous example, the selector has a TableSeries checkbox. If checked, TableSeries slot columns are displayed in the selector dialog.
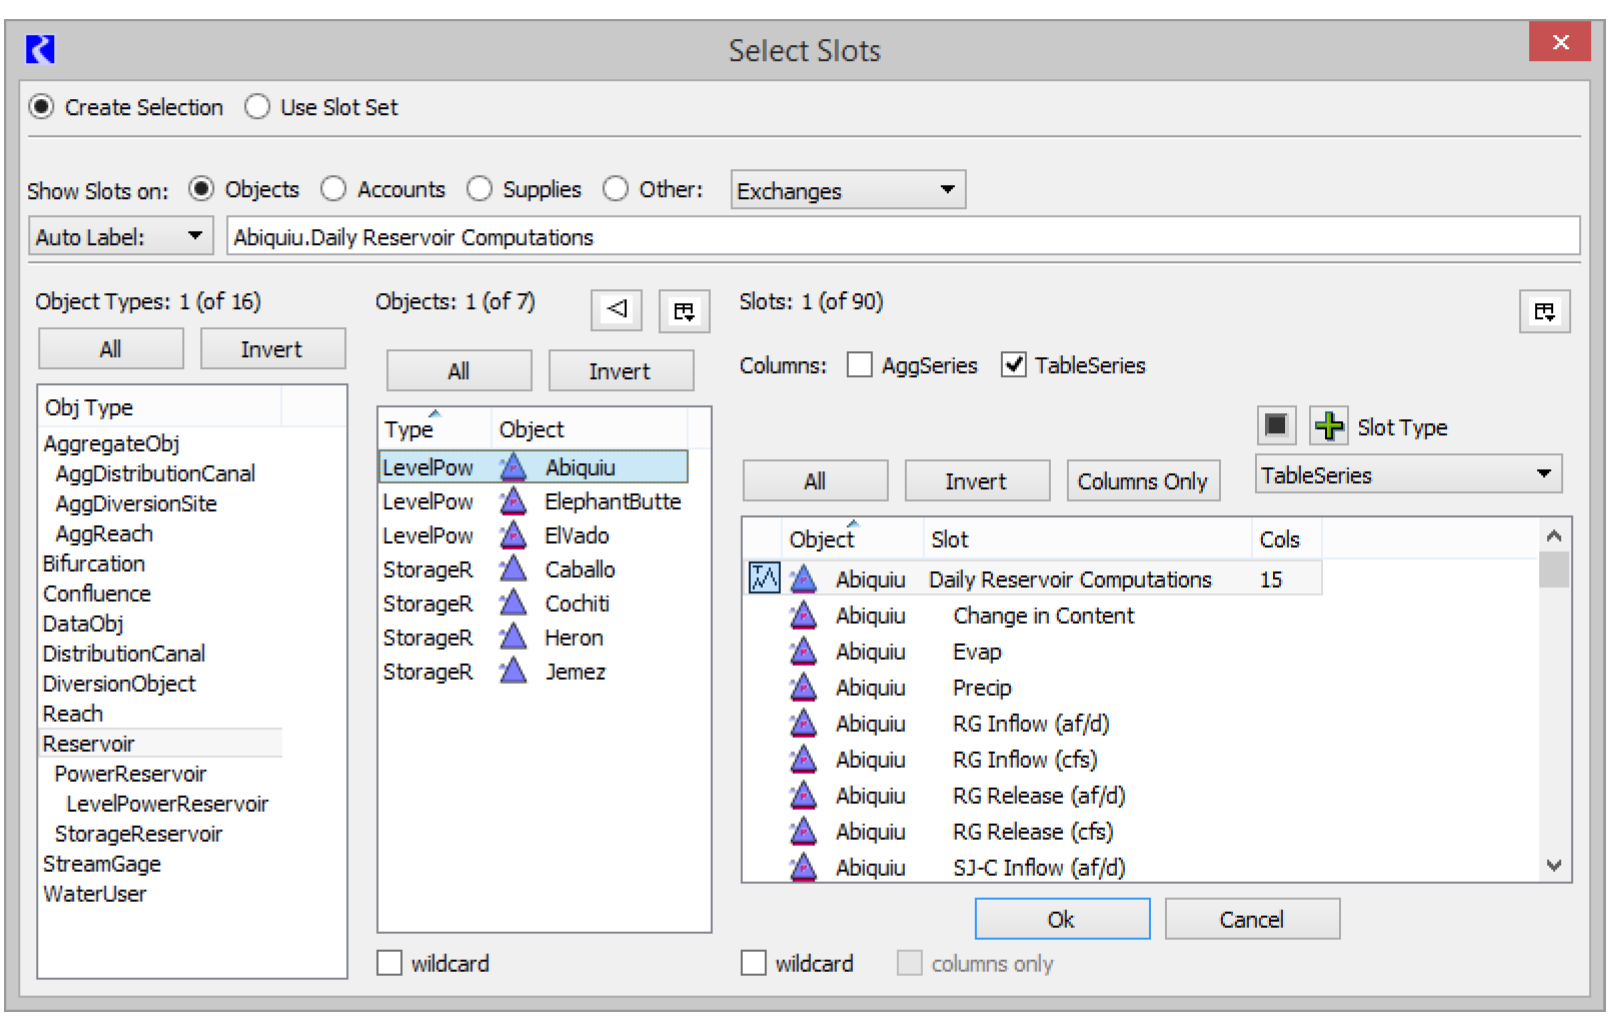
The Columns Only button and the Columns only checkbox behave for TableSeries slot columns as they do for AggSeries slot columns, as described above.
Note: When you select objects or slots for the database DMI (in the Name Map, Dataset or Database DMI dialogs) you have the option of providing a descriptive name for the selection in the Custom Label menu and text box. If you don’t provide a custom label then RiverWare will provide an Auto Label, which frequently is not as readable (or user-friendly) as a custom label.
Use Slot Set
Slot Sets are named collections of slots. See “Slot Sets” for details. To use the slots that are in a Slot Set, select the Use Slot Set option.
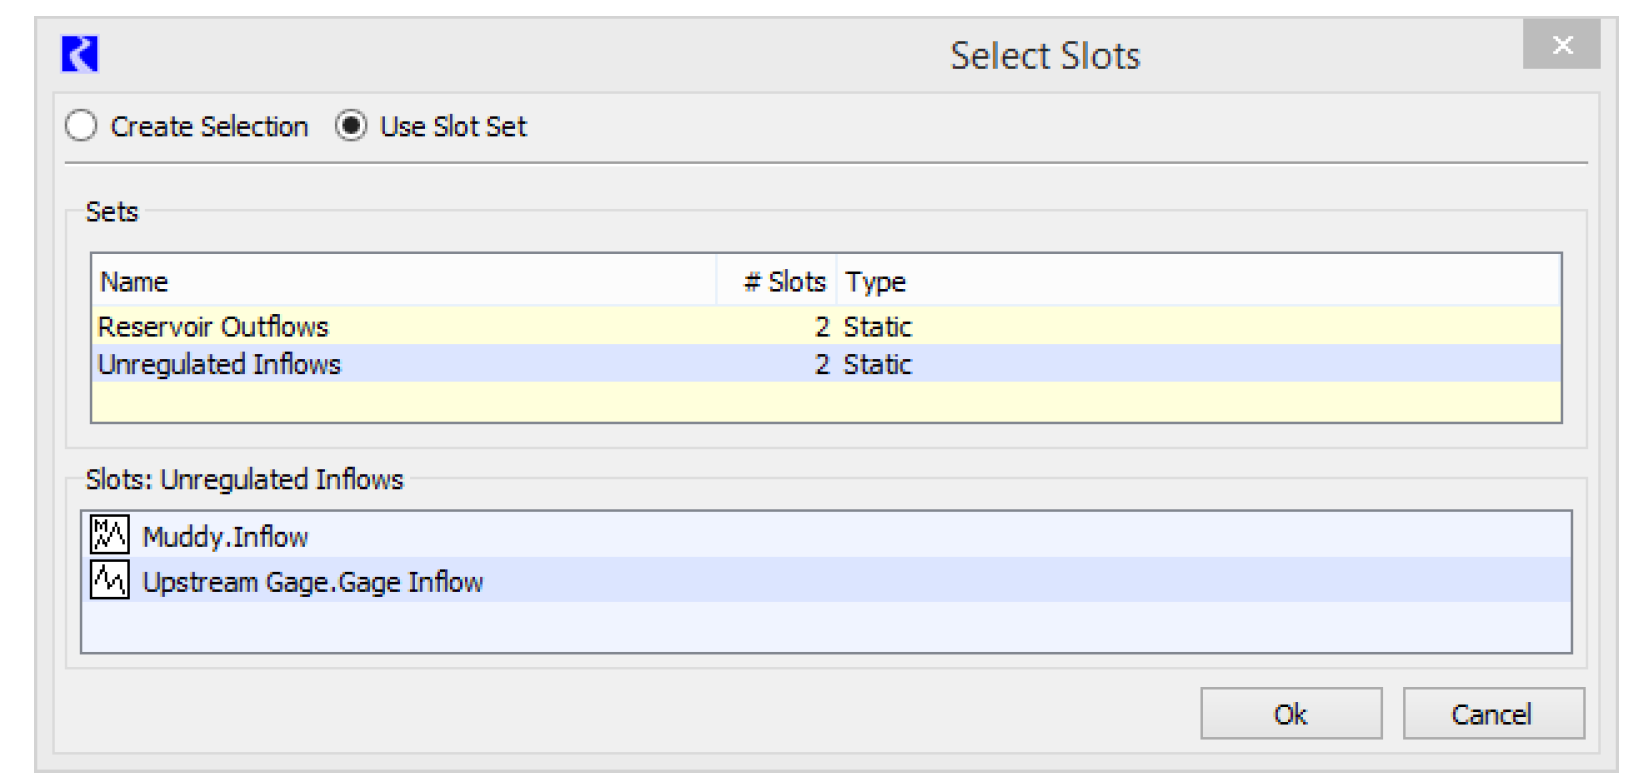
With this option selected, the selector dialog shows a list of the defined Slot Sets in the upper panel.
When one of these rows is selected, the lower panel displays the slots that are contained in that set. The lower panel is for informational purposes only. There is no way to manipulate slots in the set from the selector. All edits to slot sets must be made from the Slot Set Manager.
Choose the desired slot set from the upper panel and select OK.
Note: When the application only needs one slot (like adding a curve to a plot), the first slot in the Slot Set is used.
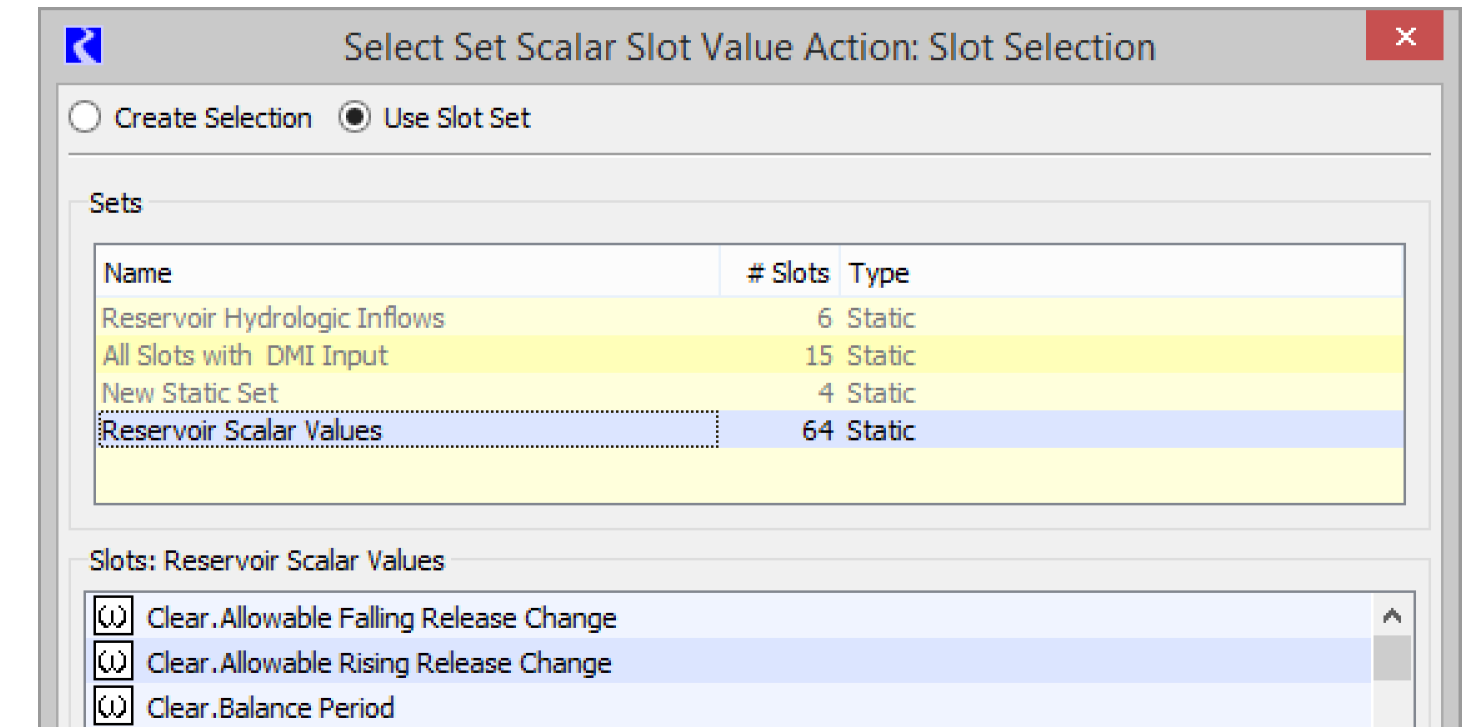
With Slot Sets, you can create sets that are not applicable for a particular selection. For example, in Figure 7.6, the Script action Set Scalar Slot Values requires Scalar Slots. Rows in the upper panel are disabled (dimmed and not selectable) because those slot sets contain one or more slots that are inconsistent with the selection criteria. Only the Slot Set named Reservoir Scalar Values is applicable and valid.
Figure 7.6
Selecting Accounts
When selecting accounts, the selection operation is as follows: Object Type, then Objects, then Accounts. There are additional fields for filtering by account. The checkbox options allow the user to show Storage Accounts, Diversion Accounts, and/or Pass Through Accounts. Also, the Show/Hide Filter Options button enables filtering by Account Name, Water Type, Water Owner, Junior To, and Senior To.
Figure 7.7
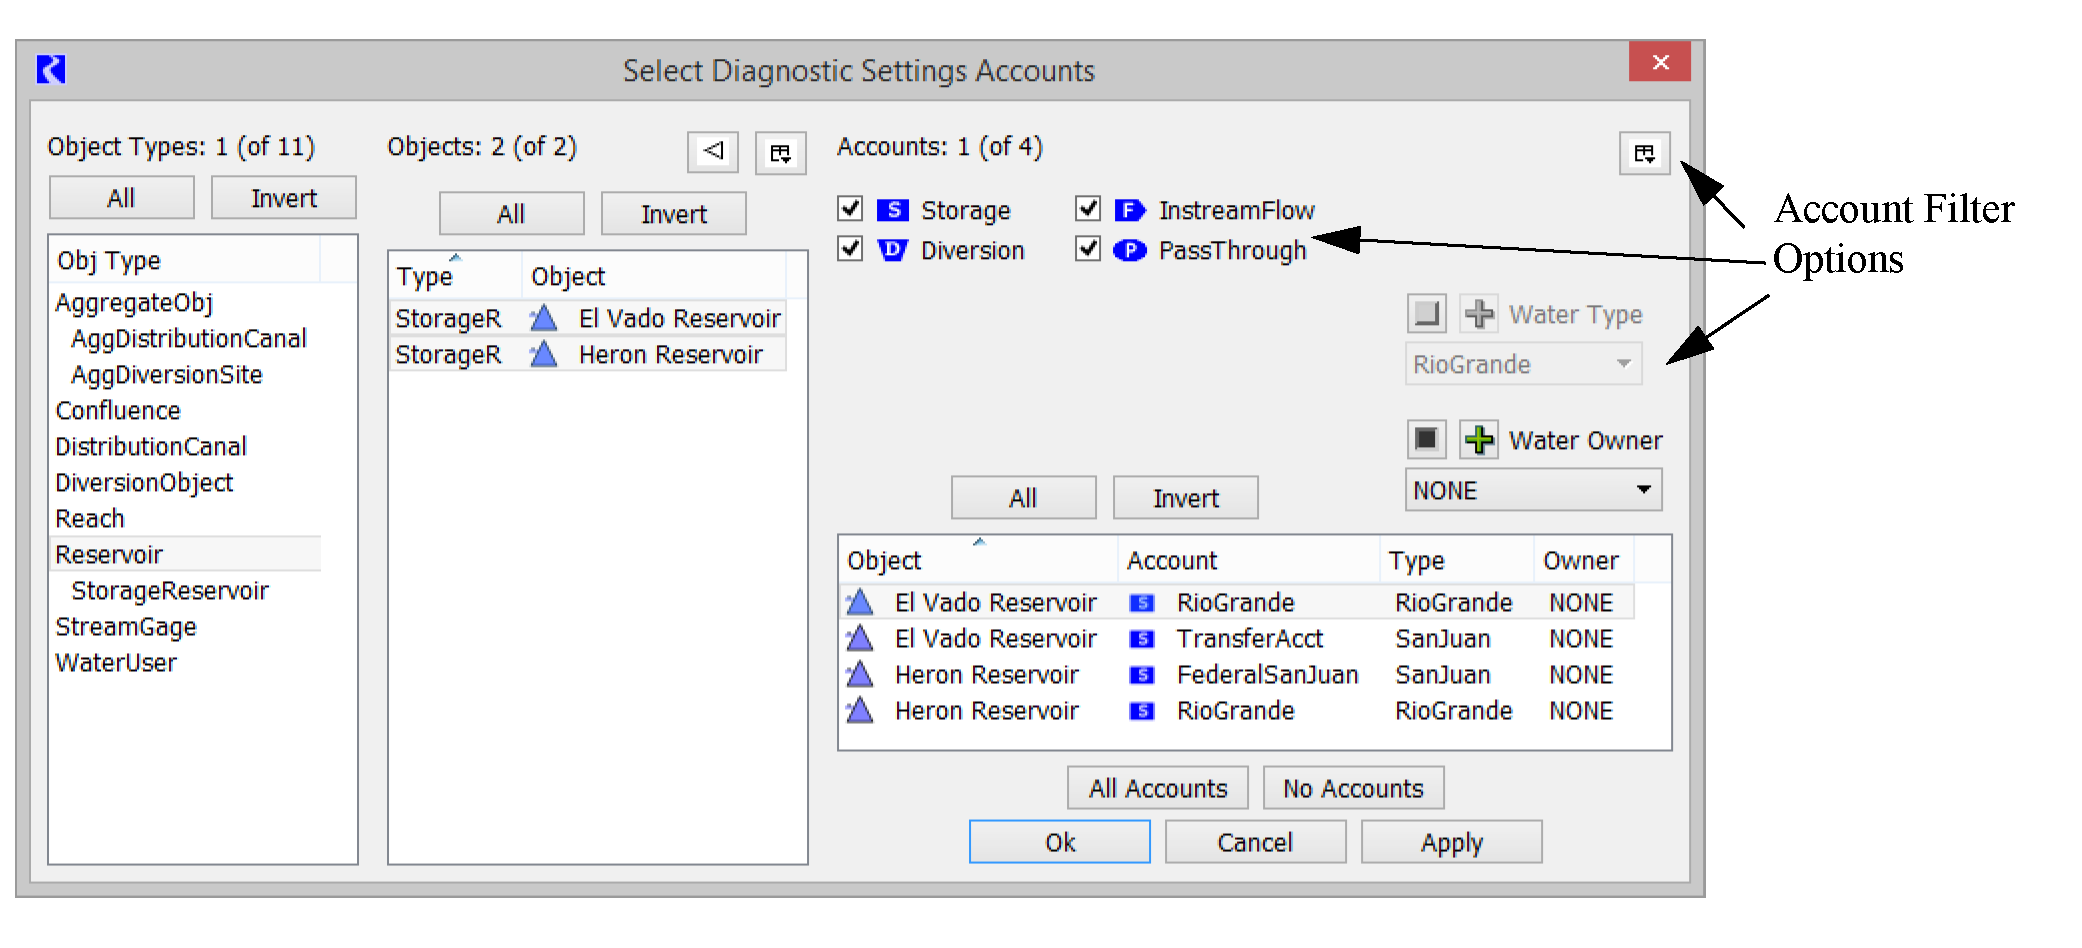
Table 7.3 summarizes the Account selector filters.
Account Filter | Description | Screenshot |
|---|---|---|
Account Name | Filters to only the Account which matches the text entered in the text-field. If the text is entered with the wildcard asterisks (like so: *text*), then the filter will show any Accounts which contain that fragment of text. | 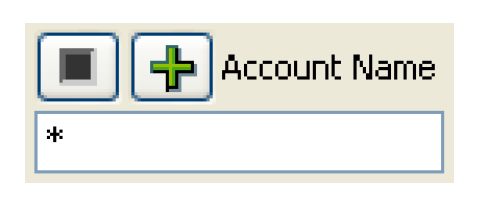 |
Water Type | Filters to only the Accounts which contain the specific Water type selected from the drop down menu. | 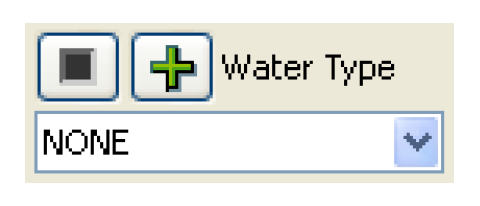 |
Water Owner | Filters to only the Accounts which contain water owned by the specific Water owner selected from the drop down menu. | 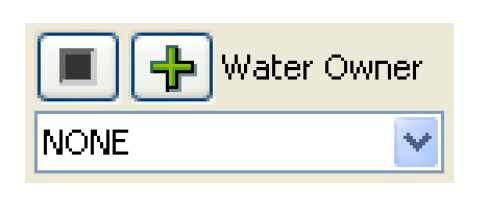 |
Junior To | Filters to only Accounts which have a priority date Junior (at a later date) than the date specified. | 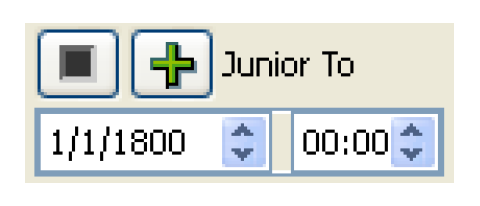 |
Senior To | Filters to only Accounts which have a priority date Senior (at an earlier date) than the date specified. | 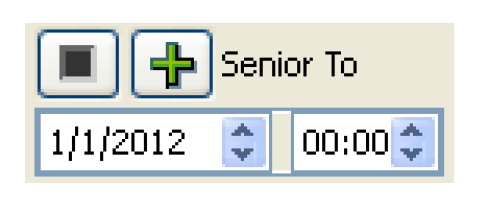 |
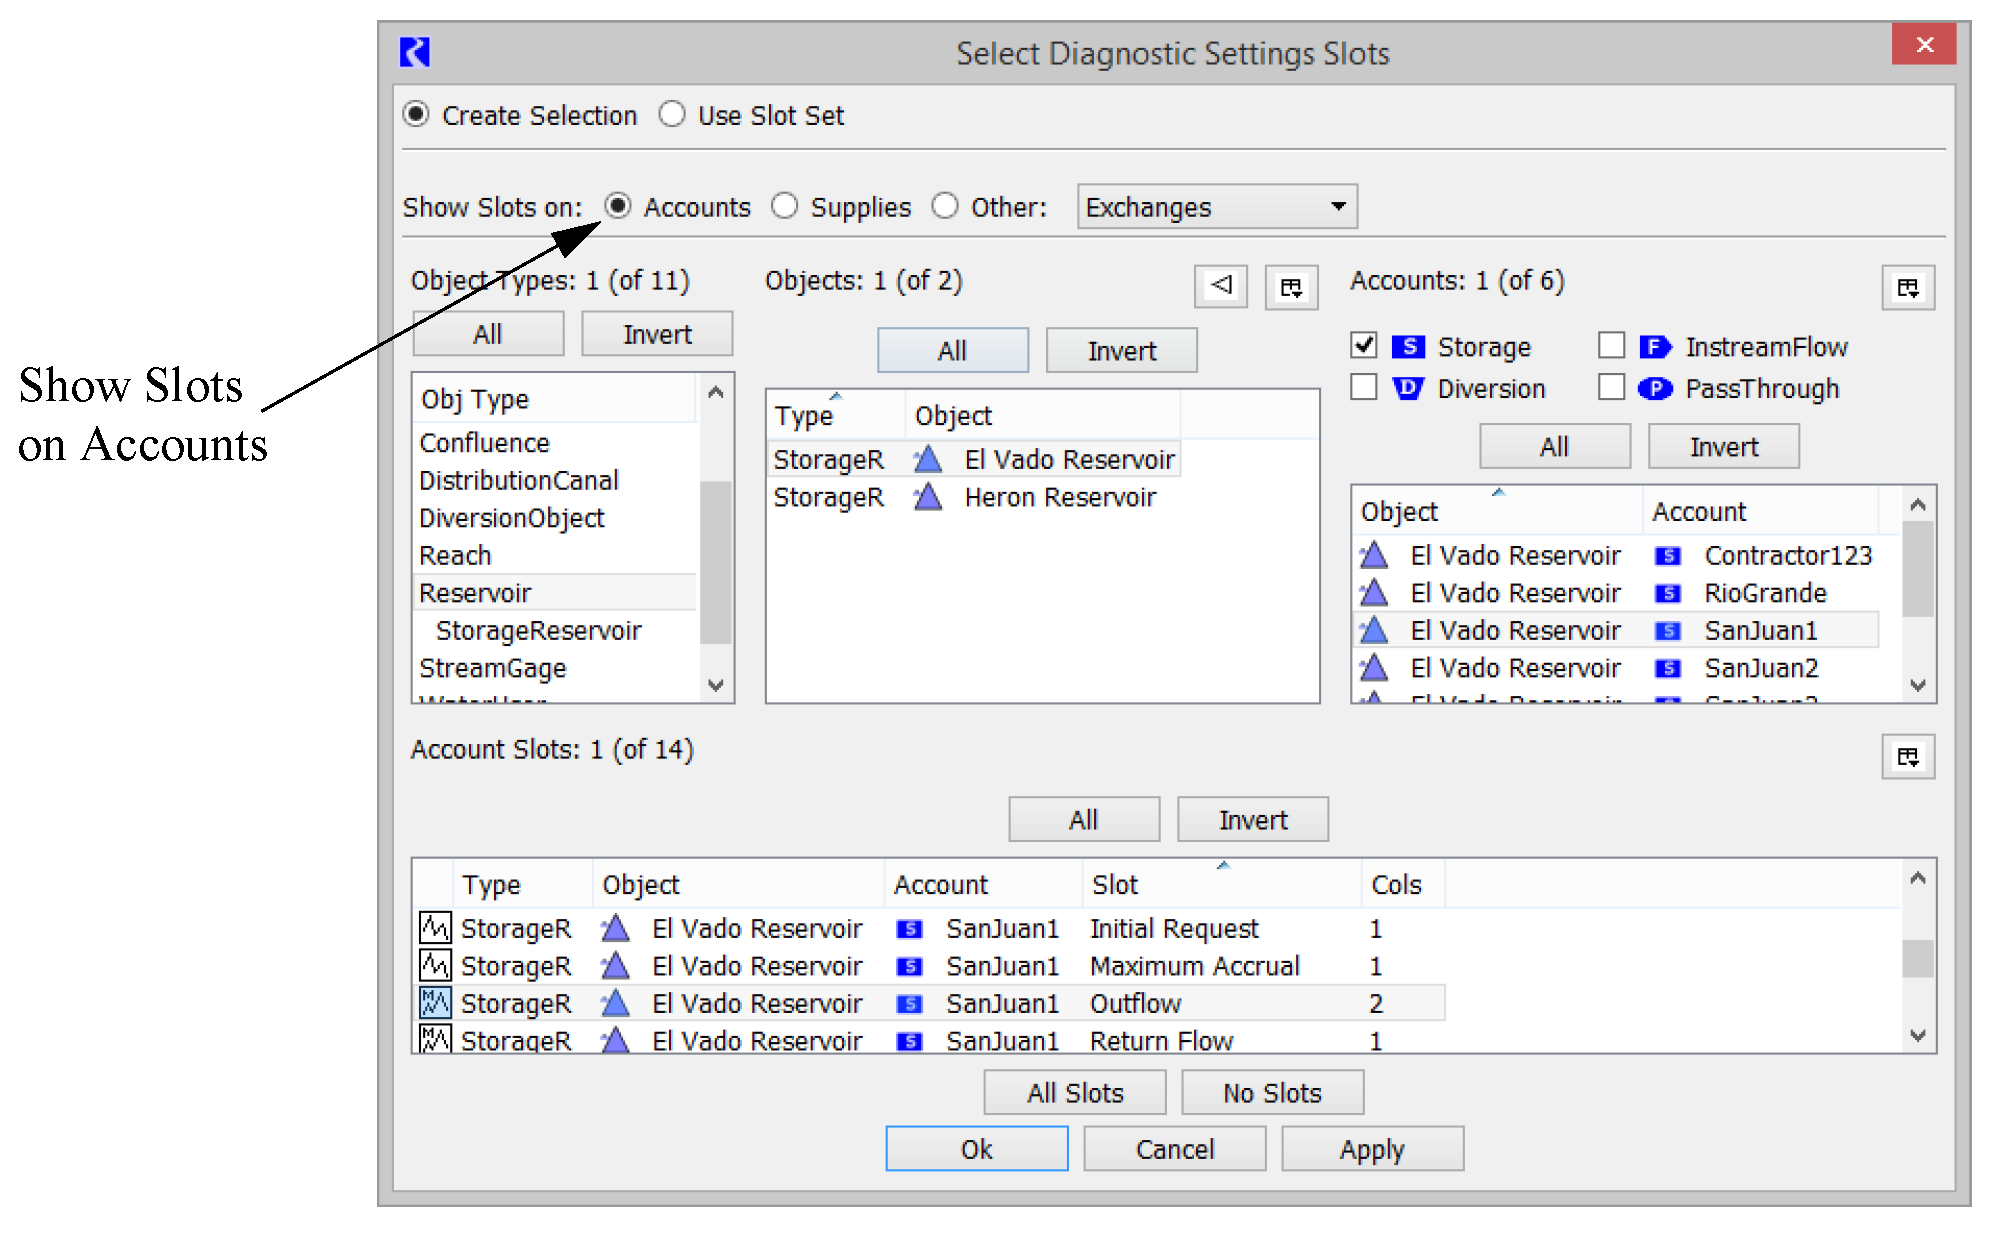
Selecting Slots on Accounts
The dialog for selecting slots on accounts is similar to the dialog for selecting slots on objects, but these slots are on accounts, so there is an additional level of selection. The selection operation is as follows: Object Type, then Objects, then Accounts, then Account Slots. Filtering options are the same as for Objects, Accounts, and Slot. Figure 7.8 shows the selector.
Figure 7.8
Selecting Supplies
When selecting supplies (accounting links), the selection operation is as follows: Object Type, then Objects, then Accounts, then Supplies. The dialog for selecting supplies is similar to the dialog for selecting slots on accounts. The same filtering options exist for object type, objects, and accounts (see the previous sections for these details). However, the section of the dialog for selecting supplies is a bit different. The user has the option to either show supplies from the specified accounts or to the specified accounts. Then supplies can be filtered based on Supply Types, Supply Name, Release Type, Destination, and Supply Role.
Figure 7.9

Table 7.4 summarizes the Supply selector filter.
Supply Filter | Description | Screenshot |
|---|---|---|
Supply Name | Filters to only the Supply which matches the text entered in the text-field. If the text is entered within asterisks (like so: *text*), then will filter only to Supplies which contain that fragment of text. | 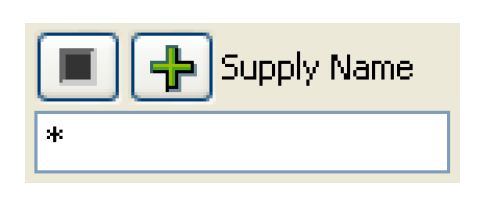 |
Release Type | Filters to only the Supplies which have the Release Type specified in the drop-down menu. | 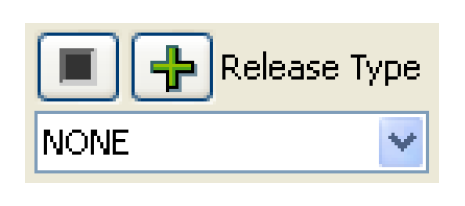 |
Destination | Filters to only the Supplies which have the Destination Type specified in the drop-down menu. | 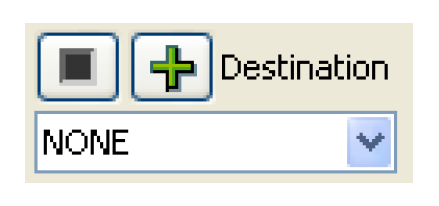 |
Supply Role | Filters to only the Supplies which have the Role specified in the drop-down menu. | 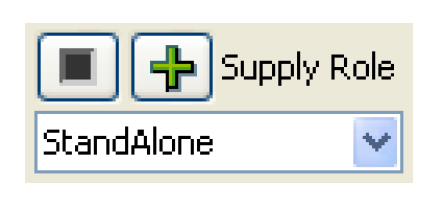 |
Allows Flag | Filters to only the Slots which allow a specific flag selected from the drop-down menu. | 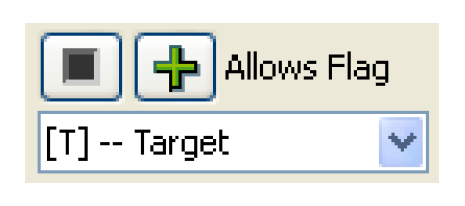 |
Wildcards
There are two types of wildcards that can be used in the selector dialogs: wildcards in filters and using wildcards on whole selections. In each of the filters, the user can type in “*” to replace a portion of the text. For example, in an object name filter, typing Lake* in the Object Name field will display only those objects that begin with “Lake” thereby displaying Lake Mead and Lake Powell. By default, a * exists in the Object Name field and all objects will be displayed.
The second type of filter occurs in certain types of slot selections including DMI Name Maps and Database DMI’s slot selections. A Wildcard checkbox exists at the bottom of the slot selector. The wildcard indicate that every item matching the filters (i.e. the items shown) should be selected. When the Wildcard checkbox is checked, the selection buttons (All, Invert, etc) are removed and each of the displayed items are selected. This operation is useful in Name Maps/Database DMI’s as the selection becomes dynamic. For example, if you use a filter to show all slots named Pool Elevation, then specify that you want to wildcard the whole selection. you can then import/export all slots named Pool Elevation. If you then add a reservoir to the model, the new reservoir’s Pool Elevation slot will then be part of the selection because of the wildcard and imported/exported as defined.
Examples
The best way to learn how to use the selector dialogs is to experiment with the various filters, checkboxes, and options. Shown in the following sections are examples of common selections.
Finding Slots in a Model
A modeler might wish to find all of the slots in a model that have a certain attribute. The modeler might need to change all of these slots or might just wish to show them all in one SCT. Example 7.1 illustrates this type of action.
Example 7.1
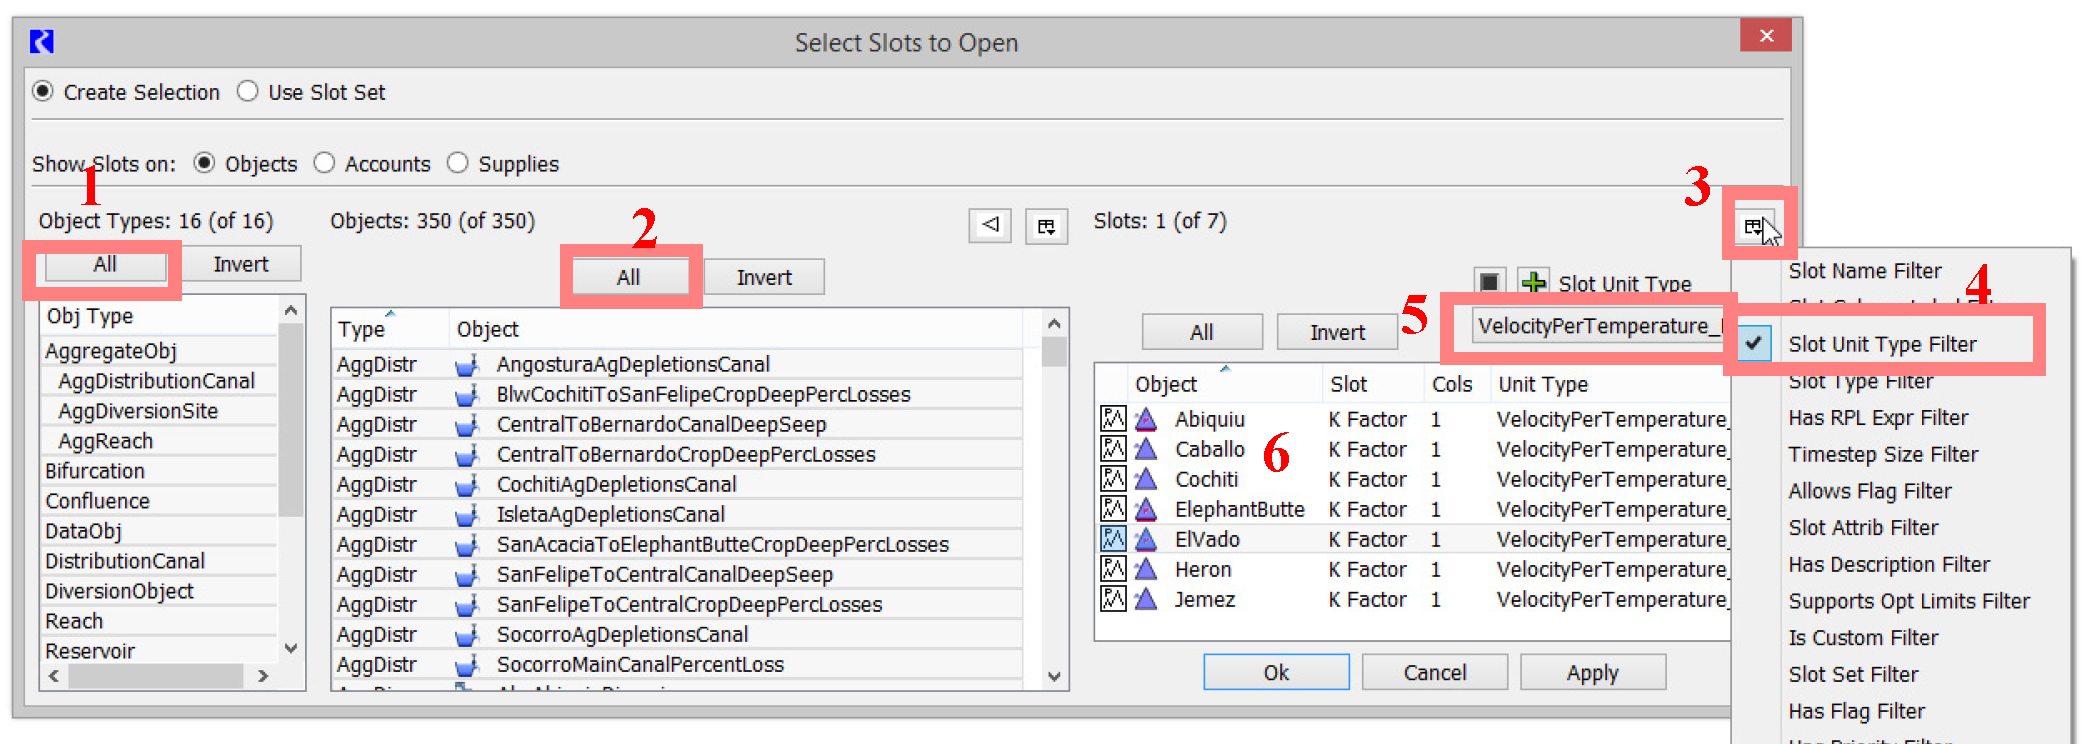
In this case we are trying to find all of the slots that have the VelocityPerTemperature_F unit type.
From the main workspace, select Workspace, then Slots, then Open Slot to bring up the slot selector.
Figure 7.10 shows the slot selector configured to select slots with this unit type.
1. In the Slot Selector, select the All button in the Object Types column (1) and the All button in the Objects column(2).
2. Then select the Slot Filter button  (3) and select Slot Unit Type Filter (4).
(3) and select Slot Unit Type Filter (4). 3. In the Slot Unit Type menu, select VelocityPerTemperature_F (5).
4. Any slots that appear in the slot area (6) have this unit type. Select one of them, and select OK to bring up the Open Slot for that slot. If you were making this selection from the SCT, you would have been able to select all and then show them in the SCT. To find slots that have a different attribute (or multiple attributes) use any of the other filters. For example, you could enable the Slot Name Filter and find only slots that have a certain name.
Figure 7.10
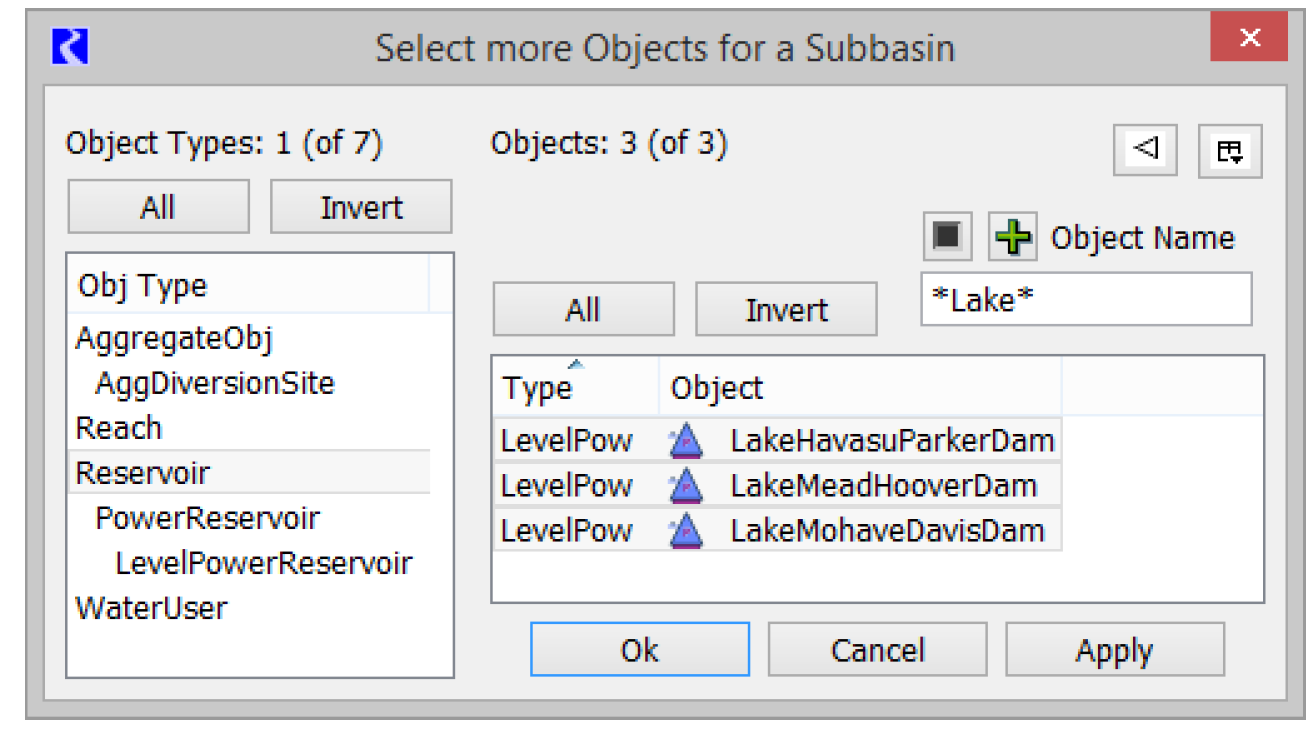
Adding Objects to a Subbasin
Example 7.2
In this example, we will use the selector to create a subbasin of all of the reservoir objects with the word “Lake” in their name.
1. First, create a new subbasin from the subbasin manager (Workspace, then Edit Subbasins, Subbasin, then Append New Subbasin).
2. Then, from the subbasin manager, select Subbasin, then Invoke Member Selector to bring up the object selector.
3. In the left column select the Reservoir object type.
4. Next select the Filter button and select Object Name Filter.
5. In the text box, type “*Lake*” to specify that the word Lake can occur anywhere in the name.
6. Select the All button to select all of those reservoir and select OK.
You have just added those reservoirs to the subbasin. Figure 7.11 shows this selection.
Figure 7.11
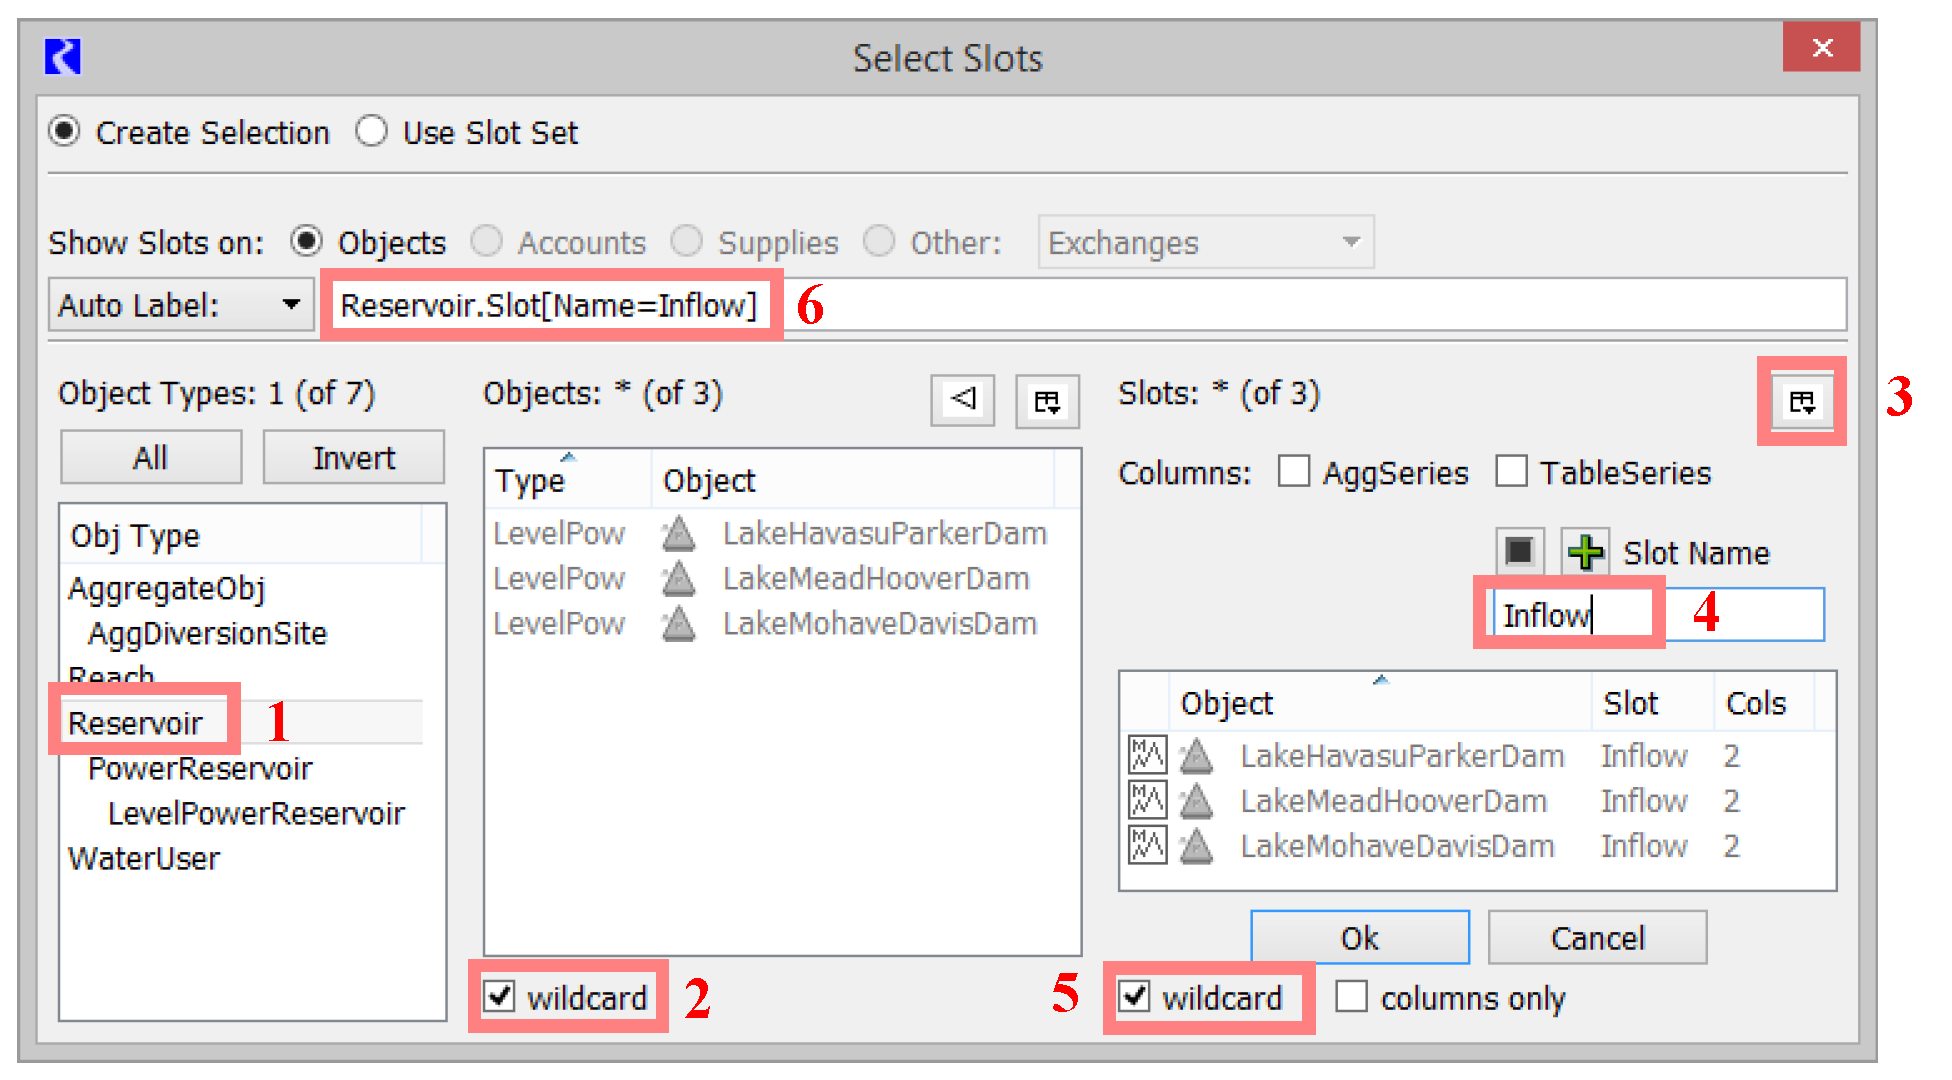
Creating a Name Map of All Reservoir.Inflow Slots
Example 7.3
In the Database DMI interface, we want to create a name map that says that all of the Reservoir.Inflows are called RES-INFLOW in our database. See “Name Mapping” in Data Management Interface (DMI) for details.
1. First add a name map; see “Configuring Name Mapping” in Data Management Interface (DMI) for instructions.
When you select the Select Slot option, it brings up the slot selector.
2. To select all Reservoir Inflows do the following; Figure 7.12 illustrates the steps.
1. In the left pane, Obj Type, select Reservoir (1).
2. In the center pane, Objects, select the Wildcard button on the bottom center (2). This specifies that we will do this for any reservoir.
3. In the right pane, select the Filter icon (3) and select Slot Name Filter. Type “Inflow” into the filter box (4).
4. Instead of selecting each slot or selecting All, select the Wildcard checkbox at the base of the dialog (5).
Note: Once you do this, the Name Map Auto Label becomes Reservoir.Slot(Name=Inflow) (6).
This indicates that this name map will apply to all Reservoir.Inflow slots. Figure 7.12 shows the selector for this application.
Figure 7.12
Revised: 11/11/2019