
Action Type Settings Reference
This section provides details about settings specific to each type of action.
Analyze Ensemble Data Set
Compute a specified statistic for slots in an ensemble data set. For more information on Ensemble Data Sets, see Ensemble Data Tool in Solution Approaches. Statistics are computed for each selected slot at each timestep across traces. The outcome is a single results time series slot for each selected slot.
Setting | Type | Notes |
|---|---|---|
Which Data Set TO Analyze | Selection | Indicates how the ensemble data set will be specified. Select either “Most Recently Opened” or “Specified by Name”. |
Analysis Data Set Name | Text | If the above selection is 'Specified by Name', then this setting is used to specify the name of the data set. |
How to Filter Slots | Selection | How to filter the analysis data by slot. Options in include All Slots and Include Only Specific Slots |
Slots To Include | Slot Selection | When “Include Only Specific Slots” is selected, this setting defines the slots. |
How to Filter Dates | Selection | How to filter the analysis data by date. Options include All Dates, Include Only Dates In A Specific Range |
Start Date | Datetime | When “Dates in a Specific Range” is selected, this setting defines the start date. See Datetime Information for details. |
End Date | Datetime | When “Dates in a Specific Range” is selected, this setting defines the end date.See Datetime Information for details. |
Allow Start Date Editing | Yes/No | Yes indicates that users should be allowed to override the start date in the Dashboard. |
Allow End Date Editing | Yes/No | Yes indicates that users should be allowed to override the end date in the Dashboard. |
How To Filter Traces | Selection | How to filter the analysis data by traces. Options in include All Traces, Trace Range, and Include Specific Traces. |
First Trace Index | Integer | When “Trace Range” is selected, this setting defines the first trace number of the trace range to be included in the analysis. |
Last Trace Index | Integer | When “Trace Range” is selected, this setting defines the last trace number of the trace range to be included in the analysis. |
Trace Selection | Integer List | When “Include Specific Traces” is selected, this setting defines which traces are included in the analysis. Click in the setting field and open up a trace selector dialog to select which trace numbers should be included. |
How To Handle NaNs | Selection | Options include Ignore NaNs, Error If Any NaNs and Error if All NaNs. |
Analysis Type | Selection | Specify the statistic to compute for the selected ensemble data. Options are: Max, Mean, Median, Min, Percentile, or Sum |
Percentage (0% - 100%) | Number (as a percent) | When Percentile is the Analysis Type, this setting is the percentile. That is, for the trace values with a given slot and date, the percentile the lowest value that is greater than or equal to that of the values. |
Write Results to Simulation Objects | Yes/No | Yes indicates that the results will get written to the same object as the original source slot. The default is Yes in the script editor. |
Write Results to Data Set | Yes/No | Yes indicates that the results will get written to a results ensemble data set object. The default is No in the script editor. |
Results Data Set Name | Text | The name of the results data set object to which the results will get written. If the object does not exist, it will get created. |
Save Results Data Set With Model | Yes/No | If Yes, the object specified in the Results Data Set Name setting will get saved in with the model when the model is saved. If No, the object and its slots and data will not get saved and will no longer be present when the model is reloaded. The default is Yes. This setting could change the object’s current configuration if it already exists. |
Results Data Set Slot Group | Text | Specify the name of the slot group on the results data set object in which the results slots will get added. If the slot group does not already exist, it will get created. |
Results Slot Tag | Text | This text string is added to the results slot name, see below. |
Results Slot Column | Integer | If the results slot is an Agg Series slot and the results slot column value is other than zero, the results are written to that column of the results slot. |
Warning: Ensemble data analysis is not supported for aggregate series slots and accounting slots. Including aggregate series slots or accounting slots in ensemble data analysis will result in an error.
Results are written to a set of series slots or agg series slots, one for each slot included in the analysis. Results can be written to the same object as the source slot, a results data set object, or both. When written to the same object as the source slot, the results slot’s name is created using the template: “<slot’s object>.<slot name> <results slot tag>”. For example, if the slot “Res A.Inflow” participates in the analysis and the Results Slot Tag is “Median”, then results associated with that slot will be written to the slot “Res A.Inflow Median”.
When written to a results data set object, the results slot name is created using the template: “<results data set name>.<slot’s object> <slot name><results slot tag>. For the same example of the slot “Res A.Inflow” and the Results Slot Tag of “Median” and a Results Data Set Name “Analysis Data Set,” the results will be written to the slot “Analysis Data Set.Res A Inflow Median”.
If the Write Results to Simulation Objects is “yes”, the action will create the data set series slot if it does not already exist and, if it does exist, resize it as necessary to the minimum required dimensions. All values are given the input (I) flag. If the results slot is an agg series slot and the results slot column value is other than zero, the results are written to that column of the results slot.
If the Write Results to Data Set is “yes”, the action will create the data set series slots on a new or existing Ensemble Data Object with the given tag in the slot name. All values are given the output (O) flag but are read only.
Note: In general, there are multiple ways to compute a percentile. In the context of this script action, the percentile is computed as follows. The values are sorted from smallest to largest. The rank index is then computed as the specified percentile multiplied by the number of values, rounded up to the nearest integer. Then the result is selected from the sorted list based on the rank index. If Median is selected for the Analysis Type, it is the equivalent of selecting Percentile and 50%.
Apply Window Layout
Apply a window layout created with the Window Layout Manager. See Window Layouts in User Interface.
Setting | Type | Notes |
|---|---|---|
Layout Name | Text | Enter the name of the Window Layout. An error in script execution will occur if the specified layout does not exist. |
Clear DMI Values
Clear the values set by a DMI (by using the DMI invocation manager functionality).
Setting | Type | Notes |
|---|---|---|
DMI Name | Text | Enter the DMI name or choose the DMI using the menu. |
Clear Scalar Slot Values
Clear the values on a set of Scalar Slots (i.e. set them to NaN).
Setting | Type | Notes |
|---|---|---|
Slots | Slot Selection | Enter or choose one or more scalar slots for which you wish to clear the values. |
Clear Table Slot Values
Clear certain values on a set of Table slots (i.e. set them to NaN).
Setting | Type | Notes |
|---|---|---|
Slots | Slot Selection | Enter or choose one or more table slots. The values in these slots will be cleared. |
Row | Text | Specify the row as either the row number (zero based) or the row heading |
Column | Text | Specify the column as either the column number (zero based) or column heading |
Compute Duration Curve
Compute duration curves for a set of series slots across multiple traces and timesteps from an ensemble data set. (For more information on Ensemble Data Sets, see Ensemble Data Tool in Solution Approaches.) The results are written to table slots (one results table slot for each input slot) with a format similar to a statistical table slot using the Duration Curve function (see Statistical Table Slots in User Interface) with all of the slot values sorted (ranked) from largest to smallest. The results table has five columns: Percent of observations equaled or exceeded, the slot values, Rank, Date, and Trace.
Setting | Type | Notes |
|---|---|---|
Which Data Set TO Analyze | Selection | Indicates how the ensemble data set will be specified. Select either “Most Recently Opened” or “Specified by Name”. |
Analysis Data Set Name | Text | If the above selection is 'Specified by Name', then this setting is used to specify the name of the data set. |
How to Filter Slots | Selection | How to filter the analysis data by slot. Options in include All Slots and Include Only Specific Slots |
Slots To Include | Slot Selection | When “Include Only Specific Slots” is selected, this setting defines the slots. |
How to Filter Dates | Selection | How to filter the analysis data by date. Options include All Dates, Include Only Dates In A Specific Range |
Start Date | Datetime | When “Dates in a Specific Range” is selected, this setting defines the start date. See Datetime Information for details. |
End Date | Datetime | When “Dates in a Specific Range” is selected, this setting defines the end date.See Datetime Information for details. |
Allow Start Date Editing | Yes/No | Yes indicates that users should be allowed to override the start date in the Dashboard. |
Allow End Date Editing | Yes/No | Yes indicates that users should be allowed to override the end date in the Dashboard. |
How To Filter Traces | Selection | How to filter the analysis data by traces. Options in include All Traces, Trace Range, and Include Specific Traces. |
First Trace Index | Integer | When “Trace Range” is selected, this setting defines the first trace number of the trace range to be included in the analysis. |
Last Trace Index | Integer | When “Trace Range” is selected, this setting defines the last trace number of the trace range to be included in the analysis. |
Trace Selection | Integer List | When “Include Specific Traces” is selected, this setting defines which traces are included in the analysis. Click in the setting field and open up a trace selector dialog to select which trace numbers should be included. |
How to Handle NaNs | Selection | Options include Ignore NaNs, Error If Any NaNs, Error If All NaNs. |
Write Results to Simulation Objects | Yes/No | Yes indicates that the results will get written to the same object as the original source slot. The default is Yes. |
Write Results to Data Set | Yes/No | Yes indicates that the results will get written to a results data set object. The default is No. |
Results Data Set Name | Text | The name of the results data set object to which the results will get written. If the object does not exist, it will get created. |
Save Results Data Set With Model | Yes/No | If Yes, the object specified in the Results Data Set Name setting will get saved in with the model when the model is saved. If No, the object and its slots and data will not get saved and will no longer be present when the model is reloaded. The default is Yes. This setting could change the object’s current configuration if it already exists. |
Results Data Set Slot Group | Text | Specify the name of the slot group on the results data set object in which the results slots will get added. If the slot group does not already exist, it will get created. |
Results Slot Tag | Text | This text string is added to the results slot name, see below. |
Warning: The Compute Duration Curve action does not support aggregate series slots and accounting slots. Including aggregate series slots or accounting slots will result in an error.
Results are written to a set of table slots, one for each slot included in the analysis. Results can be written to the same object as the source slot, a results data set object, or both. When written to the same object as the source slot, the results slot’s name is created using the template: “<slot’s object>.<slot name> <results slot tag>”. For example, if the slot “Res A.Inflow” participates in the analysis and the Results Slot Tag is “Duration Curve”, then results associated with that slot will be written to the slot “Res A.Inflow Duration Curve”.
When written to a results data set object, the results slot name is created using the template: “<results data set name>.<slot’s object> <slot name><results slot tag>. For the same example of the slot “Res A.Inflow” and the Results Slot Tag of “Duration Curve” and a Results Data Set Name “Analysis Data Set,” the results will be written to the slot “Analysis Data Set.Res A Inflow Duration Curve”.
The action will create the results table slot if it does not already exist and, if it does exist, resize it and change column units and column labels as necessary.
Compute Regression
Perform a multiple linear regression analysis on an ensemble data set. (For more information on Ensemble Data Sets, see Ensemble Data Tool in Solution Approaches.) The dependent variable and independent variables must be scalar slots. The primary outputs, the regression coefficients, are written to one table slot. Four other table slots are written out with statistical information about the solution quality. Details are provided below.
Setting | Type | Notes |
|---|---|---|
Which Data Set TO Analyze | Selection | Indicates how the ensemble data set will be specified. Select either “Most Recently Opened” or “Specified by Name”. |
Analysis Data Set Name | Text | If the above selection is 'Specified by Name', then this setting is used to specify the name of the data set. |
Dependent Variable Slot | Slot Selection | Specify the dependent variable for the regression. It must be a scalar slot in the data set. |
How To Specify Independent Variables | Selection | Options are List of Slot Names and RPL Function |
Independent Variable Slots | Slot Selection | When “List of Slot Names” is selected for How to Specify Independent Variables, this setting becomes available to specify one or more independent variables for the regression. The independent variables must be scalar slots in the data set. |
Independent Variables RPL Function | Single Function Selection | If the “RPL Function” option is selected in the How to Specify Independent Variables setting, use the RPL function chooser to select the function. The function must be in an open global functions set at the time of execution, must have no arguments, and must evaluate to a list of scalar slots that are in the data set. |
How To Filter Traces | Selection | How to filter the analysis data by traces. Options in include All Traces, Trace Range, and Include Specific Traces. The resulting number of traces must be at least one more than the number of independent variables. |
First Trace Index | Integer | When “Trace Range” is selected, this setting defines the first trace number of the trace range to be included in the analysis. |
Last Trace Index | Integer | When “Trace Range” is selected, this setting defines the last trace number of the trace range to be included in the analysis. |
Trace Selection | Integer List | When “Include Specific Traces” is selected, this setting defines which traces are included in the analysis. Click in the setting field and open up a trace selector dialog to select which trace numbers should be included. |
How to Handle NaNs | Selection | Options include Ignore NaNs, Error If Any NaNs, Error If All NaNs. If Ignore NaNs is selected, if a NaN is encountered in any variable for a trace, that trace is omitted from the regression. An error will still be issued if the resulting number of traces is not at least one more than the number of independent variables. |
Force Zero Intercept | Yes/No | Specify whether to force the intercept (constant) in the regression to zero. The default is No. When yes is selected, output table slots will still contain a column for the intercept, but the values will be NaN. |
Write Results to Simulation Objects | Yes/No | Yes indicates that the results will get written to an existing non-data set object on the workspace. The default is Yes. |
Results Simulation Object Name | Single Object Selection | Select the object to which results will get written |
Write Results to Data Set | Yes/No | Yes indicates that the results will get written to a results data set object. The default is No. |
Results Data Set Name | Text | The name of the results data set object to which the results will get written. If the object does not exist, it will get created. |
Save Results Data Set With Model | Yes/No | If Yes, the object specified in the Results Data Set Name setting will get saved in with the model when the model is saved. If No, the object and its slots and data will not get saved and will no longer be present when the model is reloaded. The default is Yes. This setting could change the object’s current configuration if it already exists. |
Results Data Set Slot Group | Text | Specify the name of the slot group on the results data set object in which the results slots will get added. If the slot group does not already exist, it will get created. |
Write Results to Simulation Objects | Yes/No | Yes indicates that the results will get written to the same object as the original source slot. The default is Yes. |
Coefficient Estimates Slot Name | Text | Specify the name of the results slot for the primary result of the regression analysis, the regression coefficient estimates. The default name is “Coefficient Estimates.” |
Coefficient Variability Slot Name | Text | Specify the name of the results slot that reports the variability of the regression coefficients: standard error, and lower and upper 95th percentile. The default name is “Coefficient Variability.” |
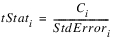
Coefficient Probabilities Slot Name | Text | Specify the name of the results slot that reports the significance of the regression coefficients: the T-statistic and P-value. The default name is “Coefficient Probabilities.” |
Summary Statistics Slot Name | Text | Specify the name of the results slot that reports general statistics on the regression quality. The default name is “Summary Statistics.” |
Residuals Slot Name | Text | Specify the name of the results slot that reports the residuals from the regression analysis, the difference between the predicted and observed values. The default name is “Residuals.” |
The Compute Regression action uses the ordinary least squares approach to compute the regression coefficients for a linear equation of the following form.

The dependent variable and independent variables are scalar slot outputs from an ensemble that are part of an existing ensemble data set.
Note: The number of traces included in the regression must be at least one more than the number of independent variables. Otherwise an error will be issued.
Regression Results Slots
Results can be written to an existing object on the workspace (not an ensemble data set object), a results data set object, or both.
The five results table slots from the Compute Regression action must be specified in the associated five settings. Leaving one of the result slot name settings empty will result in an error when the action is executed. If the results slot does not exist, it will be created when the script action executes. If the results slot does exist, it will be resized as necessary to fit the regression results. The units on each of the columns of the results slots will be modified as necessary to have the appropriate units from the regression analysis. For results slots on standard objects (non-data set objects) row and column labels can be edited. Any existing column and row labels will be maintained. Results slots written to results data set objects will always have default column and row labels that cannot be edited. The five results slots are described below.
• Coefficient Estimates Slot
This is the primary result from the regression. The table slot has a single row, a column for the computed intercept (C0), and a column for the computed coefficient for each of the independent variables (C1 to CN). The units of the intercept column are the units of the dependent variable. If the “Force Intercept to Zero” setting is “Yes,” the intercept value will be NaN. The units of the independent variable columns are the units of the dependent variable divided by the unit of that independent variable. If the resulting unit type for one of the coefficients is not an existing unit type in RiverWare, the script action will fail with an error message.
• Coefficient Variability Slot
This result table slot has the same columns and units as the Coefficient Estimates slot. It contains three rows. The first row contains the standard error for each coefficient. The second and third rows contain the lower and upper bounds on the 95% confidence interval for each coefficient. If the “Force Intercept to Zero” setting is “Yes,” all of the values in the intercept column will be NaN.
• Coefficient Probabilities Slot
This result table slot has a column for the intercept and a column for each independent variable. The unit type for all columns is NONE. The table has two rows:
– T-statistic: The first row contains the Student’s t-statistic for each coefficient, which is computed as the estimated coefficient value divided by the standard error of the coefficient.
– P-Value: The second row contains the P-value for each coefficient, which is the probability of generating the t-statistic with a null hypothesis that the real coefficient is zero. A low P-value indicates that you can reject the null hypothesis. In other words, a low P-value indicates that the relationship between the independent variable and dependent variable is statistically significant, and thus, the independent variable is a meaningful predictor for your regression model. 0.05 is a commonly used threshold to determine if an estimated coefficient value is significant.
Tip: P-values are often on the order of 10-4 or smaller. For this reason, it is recommend that the display unit settings for all columns in the Coefficient Probabilities Slot use the scientific format. This can be configured either in the individual slot configuration (select View then Configure Columns Identically... in the table slot dialog) or by adding an exception to the Unit Scheme (see Unit Schemes in User Interface).
• Summary Statistics Slot
This result table slot has a single row with a column for each of the following statistics.
– Multiple R: The multiple correlation coefficient between three or more variables, the square root of R2
– R Squared: The coefficient of determination, a measure of the proportion of the variance of the dependent variable that is explained by the independent variables.
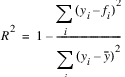
where y is the vector of observed values for the dependent variable, f is the vector of predicted values for the dependent variable from the regression model, and  is the mean of the observed values for the dependent variable.
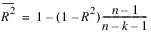
is the mean of the observed values for the dependent variable.– Adjusted R Squared: Corrects for the effect of improving R2 as additional independent variables are added
When a non-zero intercept (constant) is used, Adjusted R Squared is computed as
When the intercept is forced to zero (no constant term), Adjusted R Squared is computed as
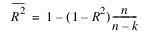
where n is the number of observations, and k is the number of independent variables.
– Standard Error: The average distance that observed values are from the predicted value
– Observations: The number of trials (traces) included in the regression analysis
The Standard Error column has the units of the dependent variable. All other columns have a unit type of NONE.
• Residuals Slot
This table slot reports on the difference between the observed value of the dependent variable and the predicted value for each observation given the coefficient estimates. It has one row for each observation (trace) included in the regression analysis and the following columns.
– Trace: The trace number of the observation (unit type of NONE)
– Observation: The observed value for the dependent variable for each trace, which is the dependent variable slot value in the ensemble data set for each trace (units of the dependent variable)
– Predicted: The predicted value for the dependent variable using the computed regression coefficients and the observed values for the independent variables (units of the dependent variable)
– Residual: The Predicted value minus the Observed value (units of the dependent variable)
– Standard Residual: The Residual divided by the standard deviation of the residuals (units of NONE)
– Independent Variables: One column for each independent variable with the observed value for that variable, which is the slot value in the ensemble data set for each trace (units of the independent variable)
Configure MRM Index Sequential
For the specified MRM configuration, modify the configuration in terms of Index Sequential. This is shown on the Input tab in the MRM configuration. See Index Sequential in Solution Approaches for details.
Setting | Type | Notes |
|---|---|---|
MRM Configuration | Text | Enter or choose the name of an MRM configuration defined in the MRM Run Controller |
Number of Runs | Integer | Specify the Number of Runs |
Initial Offset | Integer | Specify the Initial Offset |
Interval | Integer | Specify the Interval |
Configure MRM Input DMI
For the specified MRM configuration, modify the configuration in terms of Input DMIs, particularly the repeat count. This is shown on the Input tab in the MRM configuration. See Input in Solution Approaches for details.
Setting | Type | Notes |
|---|---|---|
MRM Configuration | Text | Enter or choose the name of an MRM configuration defined in the MRM Run Controller. |
DMI Name | Text | Choose the Input DMI to configure. This should already be selected in the MRM configuration. |
Repeat Count | Integer | Specify the Repeat Count. |
Allow Repeat Count Editing | Yes/No | Yes indicates that users can override the Repeat Count from the dashboard. |
Configure MRM Output
For the specified MRM configuration, modify the configuration in terms of the Output. This is shown on the Output tab in the MRM configuration. See Output in Solution Approaches for details.
Setting | Type | Notes |
|---|---|---|
MRM Configuration | Text | Enter or choose the name of an MRM configuration defined in the MRM Run Controller. |
Control File | File Chooser | Enter the file path. See Filename Information for details. |
Generate CSV Files | Yes/No | Specify whether or not to generate CSV output |
Generate NetCDF Files | Yes/No | Specify whether or not to generate NetCDF output |
Allow Control File Editing | Yes/No | Specify if you would like the control file to be editable on the dashboard. |
Configure MRM Traces
For the specified MRM configuration, modify the first trace and number of traces.
Setting | Type | Notes |
|---|---|---|
MRM Configuration | Text | Enter or choose the name of an MRM configuration defined in the MRM Run Controller. |
First Trace | Integer | Specify the first trace of the range of traces to be simulated. |
Number of Traces | Integer | Specify the number of traces to simulate. |
Allow Number of Traces Editing | Yes/No | Yes indicates that users can override the Number of Traces from the dashboard. |
Configure Trace Directory DMI
For the specified Trace Directory DMI, set the Trace Number to use when the DMI is executed outside of MRM. See Trace Directory DMI in Data Management Interface (DMI) for details.
Setting | Type | Notes |
|---|---|---|
DMI Name | Text | Choose the Input DMI to configure. It must be a Trace Directory DMI. |
Trace Number | Integer | Specify the Trace Number to use if the DMI is executed outside of MRM. |
Allow Trace Number Editing | Yes/No | Yes indicates that users can override the Trace Number from the dashboard. |
Create Ensemble Data Set
Create an ensemble data set object from an RDF file. This action will create an ensemble data set object on the workspace and will add the data set to the Ensemble Data Tool. For more information on Ensemble Data Sets, see Ensemble Data Tool in Solution Approaches.
Setting | Type | Notes |
|---|---|---|
RDF File Name | Text | Enter the file path. See Filename Information for details. |
Ensemble Data Set Name | Text | The name to give to the data set object on the workspace when it is created |
Save With Model | Yes/No | If Yes, the ensemble data set object created on the workspace by this action will get saved in the model when the model is saved. If No, the object and its slots and data will not get saved and will no longer be present when the model is reloaded. The default is Yes. Ensemble data sets can be very large, so it may not always be desirable to save them with the model. |
If an ensemble data set or any object with the same name already exists, an error will be issued. A Delete Ensemble Data Set action can be included before this action to always guarantee that any existing ensemble data set with this name will get deleted before trying to create the new ensemble data set.
Create Slot Cache
Creates a slot cache that contains the current values of all series slots on the workspace, in the range of the current controller. See Slot Cache in User Interface for details on the cache.
Note: The slot cache is under development. Contact riverware-support@colorado.edu for details and the current status of this feature.
Setting | Type | Notes |
|---|---|---|
None |
Create Snapshot
Create a Snapshot of the specified slots.
Setting | Type | Notes |
|---|---|---|
Slots | Slot Selection | Enter or choose one or more slots for which you wish to take a snapshot. |
Snapshot Name | Text | Specify the name of the snapshot object to create. |
Replace Existing Snapshot? | Yes/No | Choose to replace a snapshot of the same name. If No, then a unique name for the snapshot will be created. |
Delete Ensemble Data Set
Remove an ensemble data set. This will delete the associated object and slots from the workspace. For more information on Ensemble Data Sets, see Ensemble Data Tool in Solution Approaches.
Setting | Type | Notes |
|---|---|---|
Which Ensemble Data Set to Delete | Selection | Indicates how the ensemble data set will be specified. Select either “Most Recently Opened” or “Specified by Name”. |
Ensemble Data Set Name | Text | If the above selection is 'Specified by Name', then this setting is used to specify the name of the data set. |
Data Set Must Exist | Yes/No | Choose whether the Ensemble Data Set must exist or not. If “No” (the default), the set does not need to exist and the action will succeed even if the set doesn’t exists. If “Yes”, an error will be issued if there is no set to delete. |
Delete Link
Delete a link between the two specified slots. For more information on links, see Linking Slots on Objects in Getting Started Building a Model. It is not an error if the two slots are not linked. See also the complimentary action to Link Slots.
Note: Interactively, when you delete the last link between two objects and there are underlying accounting supplies, you are presented with a dialog to choose to Delete, Delete and Show Supply Manager, or Cancel the delete. When using the Delete Link action, the script will delete the link without any confirmation or options.
.
Setting | Type | Notes |
|---|---|---|
Slot 1 | Slot Selection | This is the slot at one end of the link. |
Slot 2 | Slot Selection | This is the slot at the other end of the link. |
Delete Optimization Restore Points
Delete all of the optimization restore points currently in existence. For more information on optimization restore points, see Restore Point in Optimization.
Setting | Type | Notes |
|---|---|---|
None |
Divider
This item adds a divider to the Script Editor and Script Dashboard. It does not do anything in script execution; it is strictly for to provided a visual separation between actions. The Display Text can be used to add text to the divider.
Setting | Type | Notes |
|---|---|---|
Divider Color | Color Chooser | Use the color chooser to select the background color for the divider. |
Enable Dispatching
For the specified objects, enable or disable the dispatch method execution. When disabled, the object icons on the workspace and in other dialogs appear dimmed.
Setting | Type | Notes |
|---|---|---|
Objects | Object Selection | Choose the desired objects using the object selector. |
Enable or Disable? | Enable Dispatching / Disable Dispatching | Specify Enable to enable dispatching. Specify Disable to disable dispatching of those objects. |
Enable MRM Distributed Runs
For the specified MRM configuration, specify whether to distribute concurrent runs to multiple processors on the same machine. See Distributed Concurrent Runs in Solution Approaches for details on distributed MRM.
Setting | Type | Notes |
|---|---|---|
MRM Configuration | Text | Enter or choose the name of an MRM configuration defined in the MRM Run Controller. |
Enable or Disable? | Enable / Disable | Specify Enable to run in distributed mode. Specify Disable to run the concurrent runs on a single processor. |
Enable RPL Item
Enable or disable a RPL item (policy group, rule, method, or goal).
Setting | Type | Notes |
|---|---|---|
Set | Single Selection | Choose the set to which the RPL item belongs. |
Item | Single Selection | Use the RPL item chooser to select the item. |
Enable or Disable? | Yes/No | Specify Yes to Enable or No to disable the specified item. |
Evaluate Expression Slots
Evaluate a set of expression slots.
Setting | Type | Notes |
|---|---|---|
Slots | Slot Selection | Choose the slots using the selector. |
Execute DMI
Invoke a DMI or DMI group.
Setting | Type | Notes |
|---|---|---|
DMI Name | Text | Enter the DMI name or choose the DMI using the menu. |
Execute MRM Run
Execute the runs for the specified MRM configuration. The script dashboard displays the overall and/or individual run progress and status. For example, for a concurrent MRM, the dashboard shows the following:
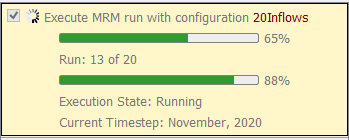
For distributed MRM, the run status will be shown in the separate Distributed MRM Controller, not in the script dashboard.
Setting | Type | Notes |
|---|---|---|
MRM Configuration | Text | Enter the name of an MRM configuration you wish to run. |
Allow Distributed MRM | Yes/No | If “Yes” and the MRM configuration is configured to use distributed MRM, the multiple run will be executed via distributed MRM. (See Distributed Concurrent Runs in Solution Approaches) If “Yes” and the MRM configuration is not configured to use distributed MRM, this setting does nothing. If “No” and the MRM configuration is configured to use distributed MRM, an error will be issued. |
Close the distributed MRM interface | Selection | This setting is available when “Yes” is selected for Allow Distributed MRM. The options are Always, Never, and After a successful run. When “Always” is selected, the Distributed MRM Controller will automatically close after the multiple run completes, and the script execution will continue. When “Never” is selected, the Distributed MRM Controller must be closed manually after the multiple run completes before the script execution will advance. When “After a successful run” is selected, when the multiple run completes successfully, it behaves as for the “Always” selection. If the multiple run fails, the Distributed MRM Controller remains open until closed manually. This provides an interface to view the diagnostic messages from the failed distributed run. |
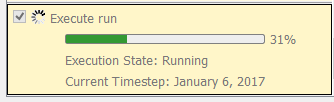
Execute Run
Run the model using the currently selected controller. The script dashboard displays the run progress and status.
Setting | Type | Notes |
|---|---|---|
None |
Execute Script
Execute a script from within this script.
Note: The script called by this action can have additional Execute Script actions, up to 5 levels deep. Rephrased, a script can call a script that calls another script, but only 5 Execute Script levels in total.
See Display of Execute Script and Sub-actions for more information on how sub-actions are displayed.
Setting | Type | Notes |
|---|---|---|
Script Name | Text | Type the script name or choose the desired single script from the script selector. |
Expand in Dashboard by default | Yes/No | If 'Yes', then the sub-actions will be expanded by default on the Script Dashboard. If ‘No’, the sub-actions on the dashboard will be collapsed. Regardless of the setting, the actions can be collapsed or expanded on the dashboard. |
Export Database DMI
Export Database Data Management Interfaces (DMIs) to a file and optionally include name maps and datasets. See Export in Data Management Interface (DMI) for more information. Also, see Import Database DMI for information on the script action to import the Database DMI.
Setting | Type | Notes |
|---|---|---|
File Name | Text | Enter the file path to create or overwrite. See Filename Information for details. |
DMI Names | Text | Select one or more DMIs using the DMI Selector. |
Include Datasets and Name Maps | Yes/No | Select Yes to also export the Datasets and Name Maps referenced by Database DMI. Select No to export only the Database DMI and not the referenced Datasets and Name Maps. See Export in Data Management Interface (DMI) for more information |
Export Objects
Export Objects to a file and optionally include links, object attributes, slot notes and accounting items. See Export in User Interface for more information on exporting objects. The options described in that section correspond to settings in this script action. Also, see Import Objects for information on the script action to import Objects from a file.
Setting | Type | Notes |
|---|---|---|
File Name | Text | Enter the file path to create or overwrite. See Filename Information for details. |
Objects | Object Selection | Choose the desired objects using the object selector. Note, exporting clusters is not supported within a script. |
Include Links | Yes/No | Yes indicates workspace links between slots will also be exported. |
Include Attributes | Yes/No | Yes indicates object attributes will be exported. |
Include Text Notes | Yes/No | Yes indicates series slot text notes will be exported. |
Include Storage Accounts | Yes/No | Yes indicates storage accounts on specified reservoir objects will be exported. |
Include Diversion Accounts | Yes/No | Yes indicates diversion accounts on the specified objects will be exported. |
Include Instream Flow Accounts | Yes/No | Yes indicates instream flow accounts on specified control points will be exported. |
Include Passthrough Accounts | Yes/No | Yes indicates passthrough accounts on specified objects will be exported. |
Include Supplies | Yes/No | Yes indicates supplies (accounting links) between accounts will be exported. |
Export Optimization Restore Point
Export the specified optimization restore point to a file. For more information on optimization restore points, see Restore Point in Optimization and see Export a Restore Point in Optimization for details on exporting a restore point. Also see Import Optimization Restore Point for details to import a restore point from a file. The named restore point does not need to exist when the script action is configured, but it must exist when the script action is executed. Otherwise an error will be issued.
Setting | Type | Notes |
|---|---|---|
File Name | Text | Enter the file path to create or overwrite. See Filename Information for details. Optimization restore point files typically use the .orp file extension |
Restore Point Name | Text | Enter the name of the restore point to be exported. The restore point does not need to exist when the setting is configured, but it must exist when the script action is executed. |
Confirm Overwrite? | Yes/No | Yes requires interactive confirmation when exporting the restore point to a preexisting file. |
Export Table Slot as CSV
Export the selected table slot to a comma-separated values (CSV) file. The data will always be exported to the CSV file with display precision. The first column of the CSV file will be the row headers of the table slot. The first row of the CSV file will be the column headers of the table slot with units included in parentheses. Periodic table slots and statistical table slots can be exported to CSV files as well as standard table slots.
Setting | Type | Notes |
|---|---|---|
File Name | Text | Enter the file path for the CSV file to create or overwrite. See Filename Information for details. |
Table Slot | Slot Selection | Choose the table slot to export using the selector. |
Generate Output Device
Generate the specified Output Device. This could be a file based device like a Model Report or a graphical device like a Plot Page.
Setting | Type | Notes |
|---|---|---|
Device Name | Text | Enter or choose the name of a output device (plot, file, report, chart) |
Global Time Scroll
Scroll time and series displays to the specified symbolic date/time.
Setting | Type | Notes |
|---|---|---|
Scroll to DateTime | Datetime | See Datetime Information for details. |
Allow Editing | Selection | Yes indicates that users should be allowed to override the start date in the Dashboard. |
Import Database DMI
Import Database Data Management Interfaces (DMIs) from a file and specify how to handle conflicts. See Import in Data Management Interface (DMI) for more information on the feature. See also Export Database DMI for information on the script action to export the Database DMI.
Setting | Type | Notes |
|---|---|---|
File Name | Text | Enter the file path to the file containing the exported DMIs. See Filename Information for details. |
Resolve Conflicts | Selection | Select either “Import the DMI items, replacing those in the model” or “Import the DMI items with unique names”. These choices correspond to the Import conflicts with a unique name option described in Import in Data Management Interface (DMI). |
Import Objects
Import Objects from a file and specify how to import object attributes, slot notes and object clusters, and how to locate the imported objects. See Import in User Interface for more information on importing objects. The options described in that section correspond to the settings on this action. See also Export Objects for information on the script action to export Objects.
Setting | Type | Notes |
|---|---|---|
File Name | Text | Enter the file path to the file containing the exported objects. See Filename Information for details. |
Import Attributes | Yes/No | Yes indicates object attributes will be imported. |
Import Text Notes | Yes/No | Yes indicates series slot text notes will be imported. |
Object Clusters | Selection | Specify how exported object clusters are imported. There are two choices “Import member objects and cluster configuration” and “Import cluster configuration only”. |
Import Location | Selection | Choose either “Use exported coordinates” or “Near object”. |
Near Object | Object Selection | When the Import Location setting above is “Near object”, select an object. The imported objects will be imported just to the right of the specified object. |
Import Optimization Restore Point
Import an optimization restore point from the specified file. For more information on optimization restore points, see Restore Point in Optimization and see Import a Restore Point in Optimization for details on importing a restore point. Also see Export Optimization Restore Point for details to export a restore point to a file.
Setting | Type | Notes |
|---|---|---|
File Name | Text | Enter the file path to the file containing the restore point. See Filename Information for details. |
Rename New Restore Point | Yes/No | No indicates that the restore point will be imported with the name that it has in the file, the name it had when exported. Yes allows you to give the restore point a different name on import than it has in the file. |
New Restore Point Name | Text | This setting is available when “Yes” is selected for “Rename New Restore Point.” Enter the desired name to give the restore point on import. |
Name Conflict Strategy | Selection | Choose from three options for how to handle cases that the restore point being imported has the same name as an existing restore point. • Replace the Existing Restore Point - overwrites an the existing restore point with the restore point being imported • Rename the Existing Restore Point - the existing restore point will be given a new name to make it unique, and the restore point being imported will maintain the name from the file (or the name specified in the New Restore Point Name setting) • Treat as an error - the script execution will terminate with an error |
Link Slots
Link the two specified slots. The slots must be physical slots (non-accounting) on two different objects. For more information on links, see Linking Slots on Objects in Getting Started Building a Model. It is not an error if the two slots are already linked. See also the complimentary action to Delete Link.
.
Setting | Type | Notes |
|---|---|---|
Slot 1 | Slot Selection | The first slot to link. Only physical (non-accounting) series slots can be linked. |
Slot 2 | Slot Selection | The second slot to link. Only physical (non-accounting) series slots can be linked. |
Load Goal Set
Open and load a goal set (for Optimization runs).
Setting | Type | Notes |
|---|---|---|
File name | Text | Enter the file path. See Filename Information for details. |
Confirm Replacement | Yes/No | Yes indicates that if the specified set is already open, a dialog should be presented to confirm replacement of the existing set. |
Show Dialog | Yes/No | When this setting is Yes, the RPL set dialog is shown when the action is executed. Otherwise, the set is loaded into the model, but not shown. |
Load Ruleset
Open and load a ruleset (for Rulebased Simulation runs).
Setting | Type | Notes |
|---|---|---|
File name | Text | Enter the file path. See Filename Information for details. |
Confirm Replacement | Yes/No | Yes indicates that if the specified set is already open, a dialog should be presented to confirm replacement of the existing set. |
Show Dialog | Yes/No | When this setting is Yes, the RPL set dialog is shown when the action is executed. Otherwise, the set is loaded into the model, but not shown. |
Memo
Pause script execution and optionally open a confirmation dialog with your user specified message. While script execution is paused, you can interact with RiverWare or other applications in ways not directly supported by scripts. Select the script Continue button to resume the script execution.
Setting | Type | Notes |
|---|---|---|
Explanation | Multi-line text | Enter the desired text. This will optionally be displayed in the memo dialog and or the Dashboard dialog along with the Display Text. |
Pause Execution | Yes/No | Yes indicates that script execution will pause when the memo is reached. Select the Continue button to resume the Script execution. 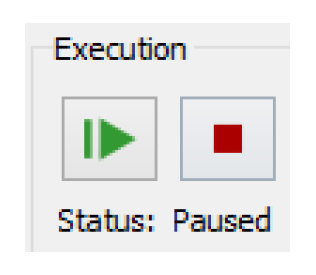 |
Show Memo Dialog | Yes/No | Yes indicates that memo execution will open a dialog which presents the memo display and explanation texts. |
Show Explanation in the Dashboard | Yes/No | Yes indicates that the explanation text will be displayed with the display text in the Dashboard. |
Open Ensemble Data Tool
Open the Ensemble Data Tool and bring it to the top of the windows. For more information on this tool, see Ensemble Data Tool in Solution Approaches.
Setting | Type | Notes |
|---|---|---|
None |
Open File
Open the specified external file using the windows file association. If you would like to pause script execution after opening the file, add a Memo action, described at Memo, after the Open File action.
Setting | Type | Notes |
|---|---|---|
File name | Text | Enter the file path. See Filename Information for details. The file will be opened using the application associated with the file's extension in Windows. For example, temp.xlsx will be opened using Excel. |
Open Global Functions Set
Open a global function set.
Setting | Type | Notes |
|---|---|---|
File name | Text | Enter the file path. See Filename Information for details. |
Confirm Replacement | Yes/No | Yes indicates that if the specified set is already open, a dialog should be presented to confirm replacement of the existing set. |
Show Dialog | Yes/No | When this setting is Yes, the RPL set dialog is shown when the action is executed. Otherwise, the set is opened into the model, but not shown. |
Open Objects
Open the specified objects’ dialogs.
Setting | Type | Notes |
|---|---|---|
Objects | Object Selection | Choose the objects to open. |
Open SCT
Open a System Control Table (SCT) with the specified filename.
Setting | Type | Notes |
|---|---|---|
File Name | Text | Enter the file path. See Filename Information for details. |
Open Slots
Open the specified slots.
Setting | Type | Notes |
|---|---|---|
Slots | Slot Selection | Choose the slots using the selector. |
Remove RPL Set
Remove a selected RPL set from the model. An RBS Ruleset or Optimization Goal set is unloaded and closed, a Global Function Set is closed, or the Initialization Rules Set is cleared.
Note: If you have any of these sets saved in the model file and you remove them using this action, any changes will be lost! This action should only be used if you have the set saved to a file and wish to remove it from the model and reopen it from the file. Use with caution!
Setting | Type | Notes |
|---|---|---|
Set | Single Selection | Choose the desired RPL set. |
Confirm Removal | Yes/No | Yes indicates that a dialog should be presented to confirm removal of the set. |
Reorder RPL Set
Reorder the items (rules, goals, statements) in a RPL set according to priority or index defined on the specified table slot.
Setting | Type | Notes |
|---|---|---|
Set | Single Selection | Choose the desired RPL set. |
Order Slot | Single Slot Selection | Choose the table slot which specifies the new RPL set ordering. See RPL Reorder Set Action for details. |
Replace Initialization Rules Set From File
Replace the existing Initialization Rules Set from a file. Any changes made to the Initialization Rules in the model will be lost. Use with caution!
Setting | Type | Notes |
|---|---|---|
File name | Text | Enter the file path. See Filename Information for details. |
Confirm Replacement | Yes/No | Yes indicates that a dialog should be presented to confirm replacement of the existing Initialization Rules Set. |
Show Dialog | Yes/No | When this setting is Yes, the RPL set dialog is shown when the action is executed. Otherwise, the set is replaced in the model, but not shown. |
Save Model
Save the model to a file.
Setting | Type | Notes |
|---|---|---|
File Name | Text | Enter the file path. See Filename Information for details. |
Include Output Values | Yes/No | Yes indicates output values will be saved. |
Output Values Precision | Integer | Indicates the precision to use for output values. |
Confirm Overwrite | Yes/No | Yes requires interactive confirmation when saving the model to a preexisting file. |
Set Account Method
Set the selected method in one of an account’s method categories.
Setting | Type | Notes |
|---|---|---|
Account Name | Text | Choose the account using the selector |
Category | Text | Choose the category on the account |
Method | Text | Choose the desired method |
Set Accounting Period
Set the time range of the accounting system (i.e., the Begin Accounting Period and End Accounting Period dates).
Setting | Type | Notes |
|---|---|---|
Start Date | Datetime | See Datetime Information for details. |
End Date | Datetime | See Datetime Information for details. |
Set Controller
Set the current controller.
Setting | Type | Notes |
|---|---|---|
Controller | Selection | Choose the controller from the list |
Run From Restore Point? | Yes/No | Available only when the Optimization controller is selected. Yes indicates that the optimization run will use a Restore Point to give the optimization an advanced start (see Restore Point in Optimization for details). |
Restore Point Name | Text | Available only when the Optimization controller is selected. Enter or choose the name of the optimization restore point to use. If the “Run From Restore Point?” setting is “No,” this setting will be ignored. |
Set Dataset File
Set the DSS file for a specified DSS Dataset or the Excel workbook for a specified Excel Dataset.
Setting | Type | Notes |
|---|---|---|
Dataset | Text | Enter or choose the name of a DSS Dataset or an Excel Dataset defined in the Dataset Manager. |
File Name | Text | Enter or choose the DSS file or Excel workbook. |
Allow File Editing | Selection | Yes means the file can be entered or chosen in the Dashboard. No means that the file cannot be changed in the Dashboard. |
Set Excel Dataset Run Name
For the specified Database DMI Excel Dataset, set the run name type and/or specify a new single run name.
Setting | Type | Notes |
|---|---|---|
Excel Dataset | Text | Enter or choose the name of an Excel Dataset defined in the Dataset Manager. See Excel Datasets in Data Management Interface (DMI) for details on Excel Datasets. |
Run Name Type | Selection | Choose one of the available Run Name Types either: • Single Run Name • Run with MRM Number (i.e. Run0, Run1, ...) • Trace with MRM Trace Number (i.e. Trace1, Trace2,...) |
Single Run Name | Text | This setting is shown when the above setting is set to Single Run Name. Enter a new Single Run Name or choose one from the list; see Run Name Type in Data Management Interface (DMI) for details. In the Script Dashboard you can enter a new Single Run Name or choose one from the same list. |
Set Init. Rules Exec. Flag
Set the Execute Initialization Rules run control flag. This flags controls whether or not the initialization rules are executed as part of the run. The flag is independent for each major controller, Simulation, Rulebased Simulation and Optimization. For more information, see Can I disable the Initialization Rules? in RiverWare Policy Language (RPL).
Setting | Type | Notes |
|---|---|---|
Sim and RBS | Yes/No | Yes = execute initialization rules before each Simulation or Rulebased Simulation run, including those controllers that include Accounting. |
Optimization | Yes/No | Yes = execute initialization rules before an Optimization run. |
Set Method
Set the selected method in the specified category for a set of objects.
Setting | Type | Notes |
|---|---|---|
Object Name | Text | Choose one or more the objects using the selector |
Category | Text | Choose the category on the object. The list shown is for the first object. |
Method | Text | Choose the desired method. If the category or method is not possible on the object, an error will be issued. |
Set MRM Descriptor
In a given MRM configuration, set the specified keyword, value pair MRM Descriptor. The descriptors are shown on the Description tab of the MRM configuration. See Description in Solution Approaches for details.
Setting | Type | Notes |
|---|---|---|
MRM Configuration | Text | Enter or choose the name of an MRM configuration defined in the MRM Run Controller |
Keyword | Text | Specify the Keyword. If the Keyword does not exist in the configuration, a new one is created. |
Value | Text | Specify the desired Value to use with the Keyword. |
Set MRM Ruleset
In a given MRM configuration, set a new file path to a ruleset.The ruleset is shown on the Policy tab of the MRM configuration. See Policy in Solution Approaches for details.
Setting | Type | Notes |
|---|---|---|
MRM Configuration | Text | Enter or choose the name of an MRM configuration defined in the MRM Run Controller |
Ruleset | Integer | Specify which of the rulesets you wish to change. The default is the first ruleset, 1. |
File Name | Text | Enter the file path. See Filename Information for details. |
Set MRM Run Range
Set the time range of the run (i.e. the Run Start and End dates) for the specified MRM configuration. The run range is shown on the Run Parameters tab of the MRM configuration. See Concurrent Runs in Solution Approaches for details.
Setting | Type | Notes |
|---|---|---|
MRM Configuration | Text | Enter or choose the name of an MRM configuration defined in the MRM Run Controller |
Start Date | Datetime | See Datetime Information for details. |
End Date | Datetime | See Datetime Information for details. |
Allow Start Date Editing | Yes/No | Yes indicates that users should be allowed to override the start date in the Dashboard. |
Allow End Date Editing | Yes/No | Yes indicates that users should be allowed to override the end date in the Dashboard. |
Set Optimization Parameter
Set the value of any optimization parameter that is either an integer or a real number.
Setting | Type | Notes |
|---|---|---|
Parameter Name | Text | Specify the name of the parameter to set. The name is not case sensitive. If the specified parameter does not match the parameter type, an error will be issued upon execution. |
Parameter Type | Selection | The available options are Integer, Real Number, and Enumeration. The default is Integer. |
Value | Integer | Specify the value to set. When the Parameter Type is Real Number, scientific notation can be used, for example, 1e-4. When the Parameter Type is Enumeration, the value must be a text string that matches one of the options for that parameter (case sensitive). |
Allow Value Editing | Yes/No | When the Parameter Type is Integer, the is setting is available. Yes allows users to override the value in the Dashboard. Dashboard overrides are not available when the Parameter Type is Real Number. |
When the Parameter Type is Enumeration, the text string specified for the value only needs to uniquely match the initial portion of one option. For example the LPMETHOD parameter has the following options
• Automatic: let CPLEX choose
• Primal simplex
• Dual simplex
• Network simplex
• Barrier
• Sifting
• Concurrent
The Barrier method can be selected by typing the full name, Barrier, or by typing a shortened version such as Bar.
Set Periodic Slot Value
Set the value at the specified row and column on a set of periodic slots.
Setting | Type | Notes |
|---|---|---|
Slots | Slot Selection | Choose the periodic slot using the selector. |
Row | Text | Specify the row as either the row's zero-based integer index or the label for its interval (e.g., “Feb”). |
Column | Text | Specify the column as either the column number (zero based) or column heading |
Set by | Value/Function | This setting indicates how you wish to set the slot, either by specifying values or by a global RPL function. When set to “Value”, the “Value” setting and editing setting, below, are shown. When set to “Function”, the RPL Global Function setting is shown. Note: Only numeric and datetime slots can be set via the “Function” option. |
Value | Value | If the “Value” option is selected in the “Set by” setting, specify the value to set at each timestep specified. This value can remain or be set to NaN. |
Allow Editing | Selection | No indicates that the value can not be changed in the Dashboard, Yes: Editor indicates that it can be changed using a line editor; Yes: Radio Buttons indicate that a set of radio buttons should be presented in the Dashboard to override the value; and Yes: Slider indicates that a slider should be presented to allow changes to the value. |
Minimum Edit Value | Numeric (slot value) | Specify the minimum value that is allowed in the Dashboard (applies to Slider only). |
Maximum Edit Value | Numeric (slot value) | Specify the maximum value that is allowed in the Dashboard (applies to Slider only) |
Encoding Table Slot Name | Slot Selection | The table slot row labels and values establish a textual encoding of values. Applies to Radio Buttons only. See Configuring User Control on the Script Dashboard for details. |
RPL Global Function | RPL function selector | When using the “Function” mode, specify the Global Function to use. Currently, this function must return a Numeric or a Datetime depending on the slot’s unit type. The function is passed the SLOT, row NUMERIC, and column NUMERIC, as arguments. Use these as desired. See Setting Slot Values Using a Global Function for details. |
Set Run Range
Set the time range of the run (i.e., the Run Start and End dates).
Setting | Type | Notes |
|---|---|---|
Start Date | Datetime | See Datetime Information for details. |
End Date | Datetime | See Datetime Information for details. |
Allow Start Date Editing | Yes/No | Yes indicates that users should be allowed to override the start date in the Dashboard. |
Allow End Date Editing | Yes/No | Yes indicates that users should be allowed to override the end date in the Dashboard. |
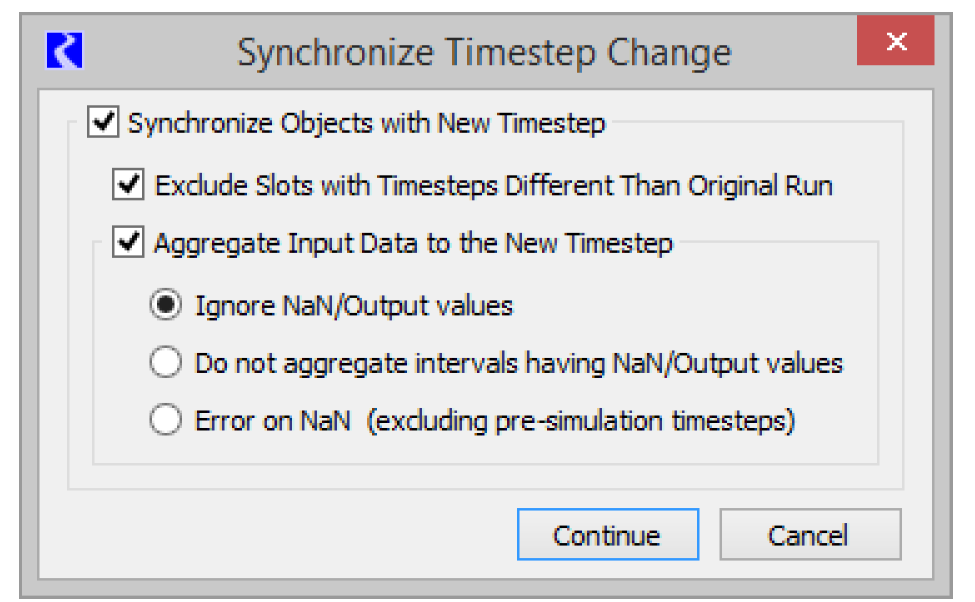
Set Run Timestep
Set the run timestep size. This action is analogous to changing the run control timestep size. The settings in the action are analogous to the options presented in the Synchronize Timestep Change dialog; see Synchronize From Run Control in User Interface for details.
Setting | Type | Notes |
|---|---|---|
Timestep | Selection | Choose from 5 Minute, 15 Minute, 1 Hour, 6 Hour, 12 Hour, 1 Day, 1 Month, or 1 Year. |
Synchronize Objects with New Timestep | Yes/No | Should objects be synchronized to the new timestep? |
Exclude Slots with Timesteps Different Than Original Run | Yes/No | Should slots with a timestep that is different than the original run be synchronized with the new timestep? |
Aggregate Input Data to the New Timestep | Yes/No | When changing to a larger timestep (1 Month or 1 Year), should Input values be aggregated? |
Aggregate NaN Handling | Selection | If aggregating, how should NaN and Output values in input slots be handled? See Synchronize From Run Control in User Interface for details on aggregation. |
Set Scalar Slot Value
Set one or more Scalar Slot values.
Setting | Type | Notes |
|---|---|---|
Slots | Slot Selection | Choose the scalar slots using the selector |
Set by | Value/Function | This setting indicates how you wish to set the slot, either by specifying values or by a global RPL function. When set to “Value”, the “Value” setting and Allow editing setting, below, are shown. When set to “Function”, the RPL Global Function setting is shown. Note: Only numeric or datetime slots can be set via the “Function” option. |
Value | Value | If the “Value” option is selected in the “Set by” setting, specify the value to set at each timestep specified. This value can remain or be set to NaN. |
RPL Global Function | Single Selection | If the “Function” option is selected in the “Set by” setting, use the RPL function chooser to select the function. |
Allow Editing | Selection | No indicates that the value can not be changed in the Dashboard, Yes: Editor indicates that it can be changed using a line editor; Yes: Radio Buttons indicate that a set of radio buttons should be presented in the Dashboard to override the value; and Yes: Slider indicates that a slider should be presented to allow changes to the value. See Configuring User Control on the Script Dashboard for details. |
Minimum Edit Value | Numeric (slot value) | Specify the minimum value that is allowed in the Dashboard (applies to Slider only). |
Maximum Edit Value | Numeric (slot value) | Specify the maximum value that is allowed in the Dashboard (applies to Slider only) |
Encoding Table Slot Name | Slot Selection | The table slot row labels and values establish a textual encoding of values. Applies only to Radio Button display. See Configuring User Control on the Script Dashboard for details. |
Show Current Value | Yes/No | When Allow Editing is Yes, then this setting allows you to show the current value for the scalar slot on the Dashboard. This only works when one scalar slot is specified. |
RPL Global Function | RPL function selector | When using the “Set by:” “Function” mode, specify the Global Function to use. Currently, this function must return a Numeric value or a Datetime. The function is passed the SLOT as an argument. Use these as desired. See Setting Slot Values Using a Global Function for details. |
Set Series Slot Flags
Set the specified flag (input or output) on a set of series slots within the specified time range.
Setting | Type | Notes |
|---|---|---|
Slots | Slot Selection | Enter or choose one or more series slots. The flags in these slots will be set to the specified value. |
Column | Value or Text | For multi-column series slots, specify the column as either the column number (zero based) or column heading. If not specified, the first column is used. |
Start Date | Datetime | The first timestep for which you wish to set the flag. See Datetime Information for details. |
End Date | Datetime | The last timestep for which you wish to set the flag.See Datetime Information for details. |
Allow Start Date Editing | Yes/No | Yes indicates that users should be allowed to override the start date in the Dashboard. |
Allow End Date Editing | Yes/No | Yes indicates that users should be allowed to override the end date in the Dashboard. |
Flag | Selection | The flag to set on each value in the range. |
Set Series Slot Input Mode
Set the input mode (series or periodic) for one or more Series Slots With Periodic Input. More information on these slots can be found in Series Slots With Periodic Input in User Interface.
Setting | Type | Notes |
|---|---|---|
Slots | Slot Selection | Enter or choose one or more series slots with periodic input. Any other type of slot will issue an error when the script is run. |
Input Mode | Series/Periodic | Choose either series or periodic mode. |
Confirm Input Overwrite? | Yes/No | When switching from series mode to periodic mode, it is possible that the input values do not match the periodic values and the series would be overwritten by the periodic values. If this setting is Yes, a confirmation is posted (like in interactive mode) and you can choose to overwrite or skip. If No, the values will be overwritten. |
Set Series Slot With Periodic Inputs
For one or more Series Slots with Periodic Input, set a periodic value at a given row and column. If you’d like to instead set the series value, use Set Series Slot Values. More information on these slots can be found in Series Slots With Periodic Input in User Interface.
Note: This actions does not check if the slots are currently in the Periodic Input Mode; if one of the slot is not in periodic input mode (i.e., it is in Series Input Mode), then executing the action will have no immediate or visible impact. In this case, to see the new periodic input value and for that value to have any impact on the series values, either open the slot dialog for that slot and switch the mode to Periodic or use the Set Series Slot Input Mode. This is described in Set Series Slot Input Mode.
Setting | Type | Notes |
|---|---|---|
Slots | Slot Selection | The series slots with periodic input whose periodic input value will be set. |
Row | Value or Text | The row of the table of periodic input whose value is to be set. Use either the row's zero-based integer index or the label for its interval (e.g., “Feb”). |
Set by | Value/Function | This setting indicates how you wish to set the slot, either by specifying values or by a global RPL function. When set to “Value”, the “Value” setting and allow editing setting, below, are shown. When set to “Function”, the RPL Global Function setting is shown. |
Value | Value | If the “Value” option is selected in the “Set by” setting, specify the value to set. This value can remain or be set to NaN. |
RPL Global Function | RPL function selector | When using the “Function” mode, specify the Global Function to use. Currently, this function must return a Numeric or a Datetime depending on the slot’s unit type. The function is passed the SLOT and row NUMERIC as arguments. Use these as desired. See Setting Slot Values Using a Global Function for details. |
Allow Editing | Selection | No indicates that the value can not be changed in the Dashboard, Yes: Editor indicates that it can be changed using a line editor; Yes: Radio Buttons indicate that a set of radio buttons should be presented in the Dashboard to override the value; and Yes: Slider indicates that a slider should be presented to allow changes to the value. |
Minimum Edit Value | Numeric (slot value) | Specify the minimum value that is allowed in the Dashboard (applies to Slider only). |
Maximum Edit Value | Numeric (slot value) | Specify the maximum value that is allowed in the Dashboard (applies to Slider only). |
Encoding Table Slot Name | Slot Selection | The table slot row labels and values establish a textual encoding of values. Applies to Radio Buttons only. See Configuring User Control on the Script Dashboard for details. |
Set Series Slot Values
Set Series Slot values within a time range.
Note: This action does not support the setting of Text Series Slots.
Setting | Type | Notes |
|---|---|---|
Slots | Slot Selection | Choose the series slot using the selector |
Set by | Value/Function | This setting indicates how you wish to set the slot, either by specifying values or by a global RPL function. When set to “Value”, the “Value” setting and editing setting, below, are shown. When set to “Function”, the RPL Global Function setting is shown. Note: Only numeric or datetime slots can be set via the “Function” option. |
Column | Value or Text | For multi-column series slots, specify the column as either the column number (zero based) or column heading. If not specified, the first column is used. |
Value | Value | If the “Value” option is selected in the “Set by” setting, specify the value to set at each timestep specified. This value can remain or be set to NaN. |
Start Date | Datetime | See Datetime Information for details. |
End Date | Datetime | See Datetime Information for details. |
Allow Editing | Selection | No indicates that the value can not be changed in the Dashboard, Yes: Editor indicates that it can be changed using a line editor; Yes: Radio Buttons indicate that a set of radio buttons should be presented in the Dashboard to override the value; and Yes: Slider indicates that a slider should be presented to allow changes to the value. |
Allow Start Date Editing | Yes/No | Yes indicates that users should be allowed to override the start date in the Dashboard. |
Allow End Date Editing | Yes/No | Yes indicates that users should be allowed to override the end date in the Dashboard. |
Minimum Edit Value | Numeric (slot value) | Specify the minimum value that is allowed in the Dashboard (applies to Slider only). |
Maximum Edit Value | Numeric (slot value) | Specify the maximum value that is allowed in the Dashboard (applies to Slider only). |
Encoding Table Slot Name | Slot Selection | The table slot row labels and values establish a textual encoding of values. Applies to Radio Buttons only. See Configuring User Control on the Script Dashboard for details. |
RPL Global Function | RPL function selector | When using the “Function” mode, specify the Global Function to use. Currently, this function must return a Numeric or a Datetime depending on the slot’s unit type. The function is passed the SLOT and DATETIME as arguments. Use these as desired. See Setting Slot Values Using a Global Function for details. |
Set Table Slot Value
Set a value on a set of Table Slots at the specified row or column.
Setting | Type | Notes |
|---|---|---|
Slots | Slot Selection | Choose the table slot or periodic slot using the selector. Although this action will set periodic slots, see also Set Periodic Slot Value. |
Row | Text | Specify the row as either the row number (zero based) or the row heading. For Periodic slots, use either the row's zero-based integer index or the label for its interval (e.g., “Feb”). |
Column | Text | Specify the column as either the column number (zero based) or column heading |
Set by | Value/Function | This setting indicates how you wish to set the slot, either by specifying values or by a global RPL function. When set to “Value”, the “Value” setting and editing setting, below, are shown. When set to “Function”, the RPL Global Function setting is shown. Note: Only numeric and datetime slots can be set via the “Function” option. |
Value | Value | If the “Value” option is selected in the “Set by” setting, specify the value to set at each timestep specified. This value can remain or be set to NaN. |
Allow Editing | Selection | No indicates that the value can not be changed in the Dashboard, Yes: Editor indicates that it can be changed using a line editor; Yes: Radio Buttons indicate that a set of radio buttons should be presented in the Dashboard to override the value; and Yes: Slider indicates that a slider should be presented to allow changes to the value. |
Minimum Edit Value | Numeric (slot value) | Specify the minimum value that is allowed in the Dashboard (applies to Slider only). |
Maximum Edit Value | Numeric (slot value) | Specify the maximum value that is allowed in the Dashboard (applies to Slider only) |
Encoding Table Slot Name | Slot Selection | The table slot row labels and values establish a textual encoding of values. Applies to Radio Buttons only. See Configuring User Control on the Script Dashboard for details. |
RPL Global Function | RPL function selector | When using the “Function” mode, specify the Global Function to use. Currently, this function must return a Numeric or a Datetime depending on the slot’s unit type. The function is passed the SLOT, row NUMERIC, and column NUMERIC, as arguments. Use these as desired. See Setting Slot Values Using a Global Function for details. |
Synchronize Objects
Set the time range for the specified objects.
Setting | Type | Notes |
|---|---|---|
Objects to Synchronize | Object Selection | Use the selector to choose the desired objects. |
Exclude Slots with Non-run Timestep | Yes/No | Yes indicates that slots with different timesteps will be excluded from the synchronize action. |
Start Date | Datetime | See Datetime Information for details. |
End Date | Datetime | See Datetime Information for details. |
Allow Start Date Editing | Yes/No | Yes indicates that users should be allowed to override the start date in the Dashboard. |
Allow End Date Editing | Yes/No | Yes indicates that users should be allowed to override the end date in the Dashboard. |
Synchronize Slots
Set the time range an timestep size for the specified slots.
Setting | Type | Notes |
|---|---|---|
Slots to Synchronize | Slot Selection | Use the selector to choose the desired slots. |
Start Date | Datetime | See Datetime Information for details. |
End Date | Datetime | See Datetime Information for details. |
Use Run Timestep | Yes/No | Yes indicates that the slot’s timestep size will match the timestep on the run control at the time of script execution. |
Timestep | Selection | When Use Run Timestep is “No” this setting specifies the timestep size that the slot will have. |
Allow Start Date Editing | Yes/No | Yes indicates that users should be allowed to override the start date in the Dashboard. |
Allow End Date Editing | Yes/No | Yes indicates that users should be allowed to override the end date in the Dashboard. |
When the timestep specification is something different than the Run Timestep, symbolic datetime math for the Start Date and End Date settings (for example, Start Timestep - N Timesteps) is computed as follows. Start Timestep and Finish Timestep are the times for the Run Control Start Timestep and Finish Timestep at the time of the script action execution. The N Timesteps are the timestep size for the slot from the Timestep setting. Then the resulting datetime is rounded up to the nearest timestep based on the Timestep setting.
Revised: 01/11/2023