
Creating Supplies
There are two ways to create a supply from a downstream account to an upstream, account, as follows:
• From the Open Account dialog (Account Configuration), switch to the Supplies tab. Select the icon to bring up the Create new Supply to Account dialog. Select the source, edit the Supply name if desired, change any attributes and select OK.
icon to bring up the Create new Supply to Account dialog. Select the source, edit the Supply name if desired, change any attributes and select OK.
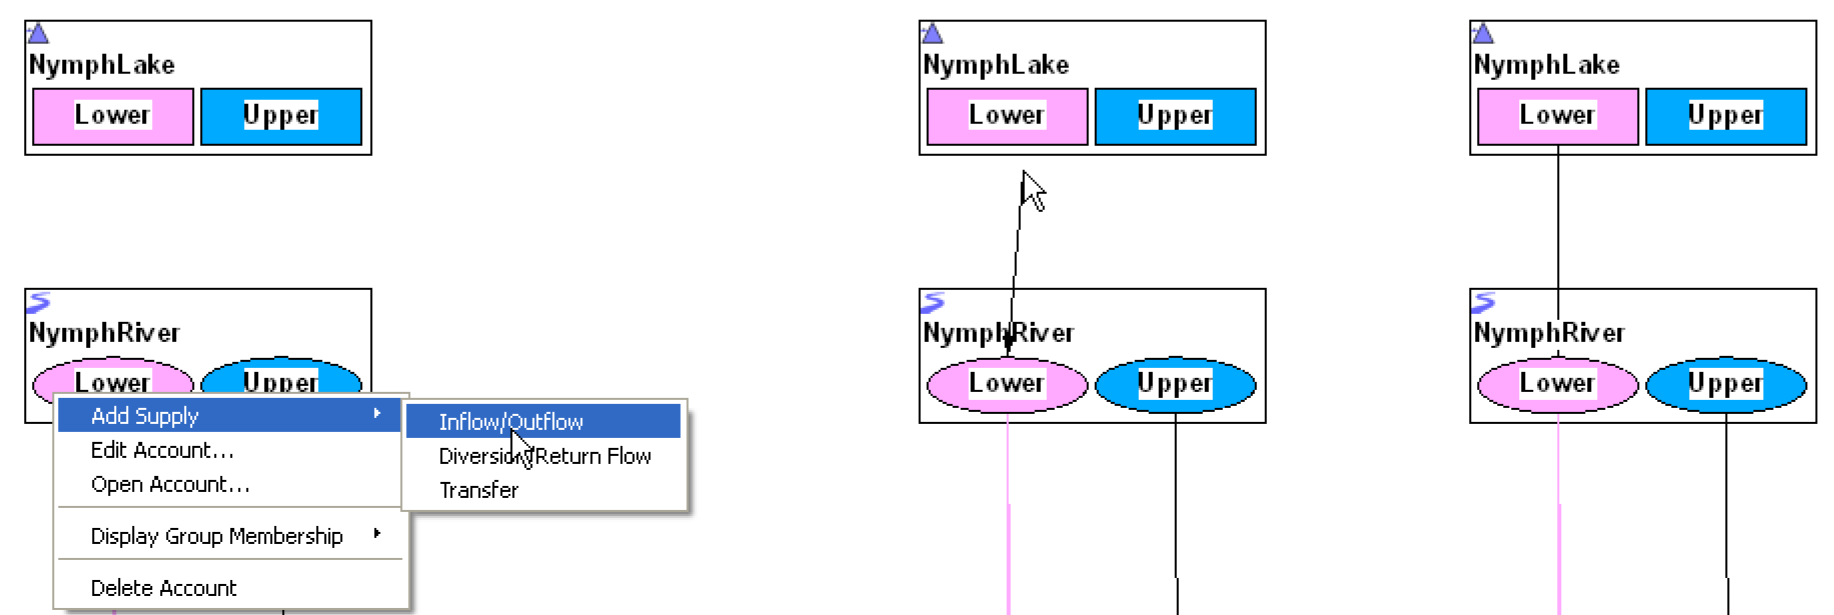
• Right-click on the Account in the Accounting View workspace, then choose Add Supply and then the desired supply type. An arrow appears for the user to select the source. Figure 3.15 illustrates these steps. Right-click on the source account and create the supply. The default supply name and properties are used. If you desire to change these, you must use either the Edit Supply (from the Supplies tab in the Open Account dialog) or the Supplies Manager to change names or properties. If the source account is more than one link upstream, the Create Linked PassThrough Accounts dialog will appear to create linked Passthrough accounts.
Figure 3.15
Note: Before creating supplies, you may want to modify the default Supply Name Format. See Supply Name Format for additional information.
Revised: 07/03/2024