
Creating, Editing, and Running Scenarios
After the creation of a baseline model, no slots can be added or deleted from the scenario slot list. This is done to preserve the integrity of the baseline model.
Note: From this point forward, this document assumes you are a scenario user (i.e. a stakeholder) and you are making scenario runs.
You have the following options:
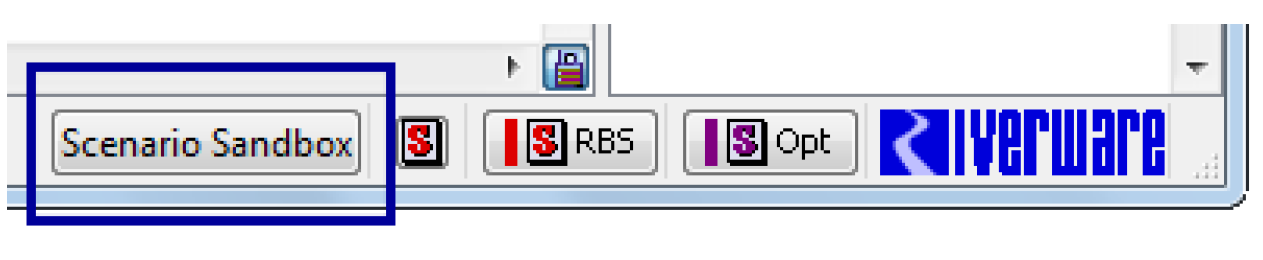
• Use a sandbox (if configured) to define and make scenario runs and compare results (easiest option, but limited controls). A sandbox has been configured if the Scenario Sandbox button appears on the bottom of the main RiverWare workspace. See Scenario Sandbox for details.
• Configure the scenarios yourself. Then run and compare results yourself (harder option, but more controls). See Full Control of Scenarios for details.
Scenario Sandbox
The Scenario Sandbox is accessible from the RiverWare Workspace and from the Scenario Manager. If a Scenario Sandbox has been configured,
• A Scenario Sandbox button appears on the Workspace’s status bar, as shown above
• On the workspace, the Utilities, then Scenario Sandbox menu item is shown.
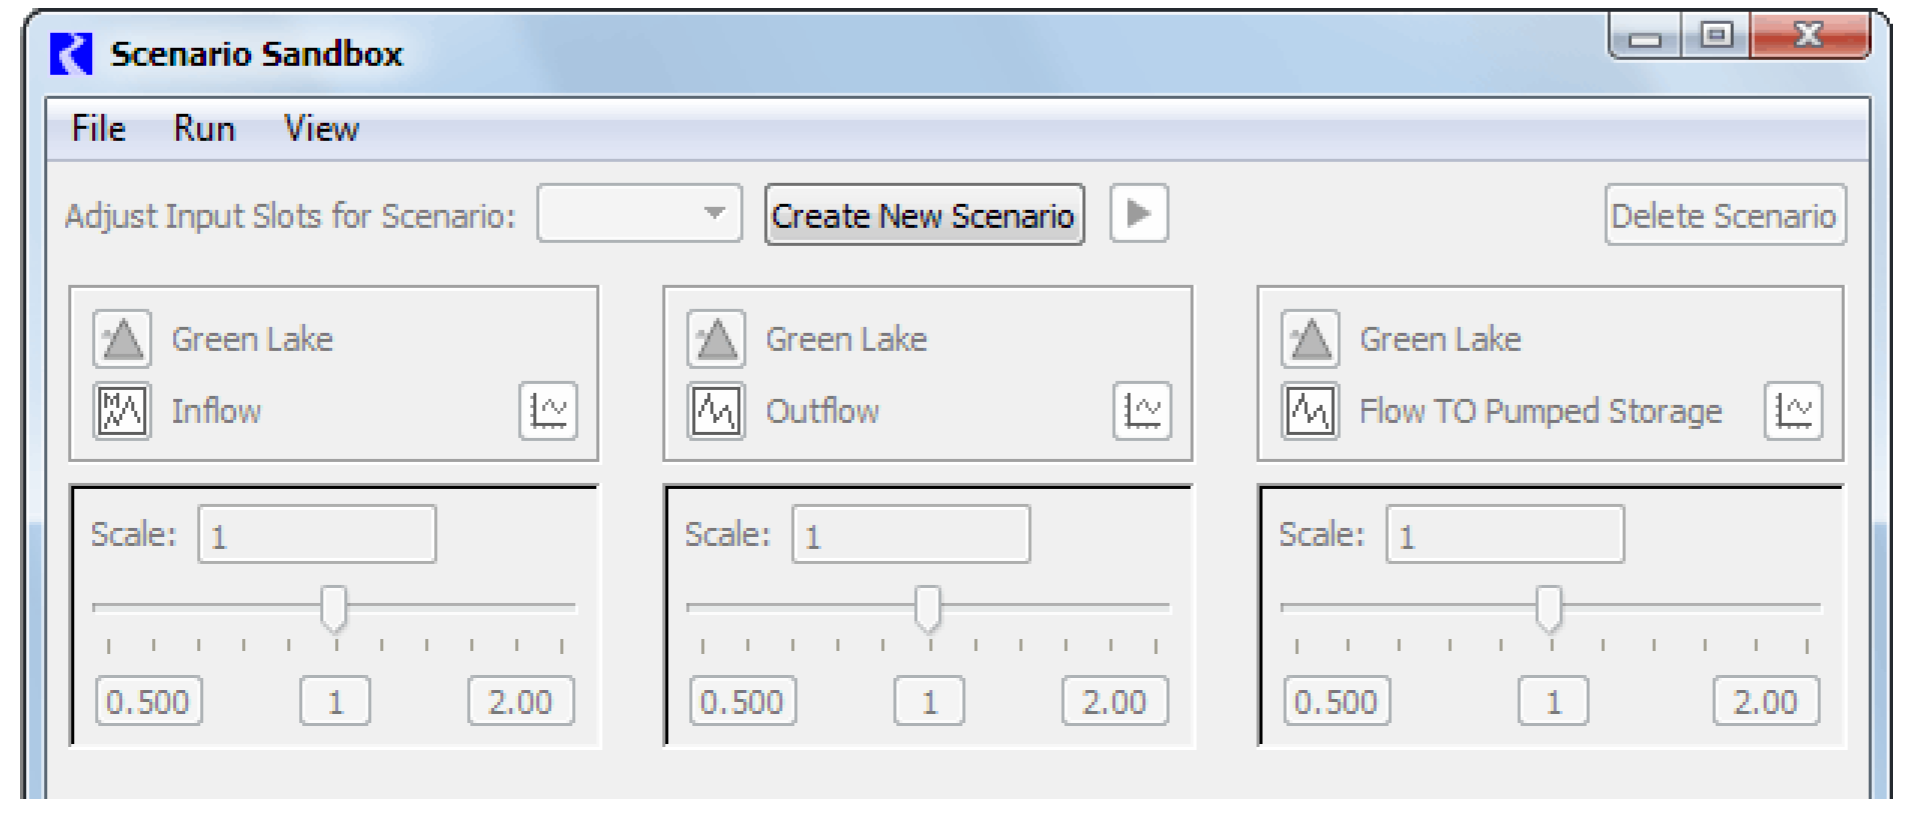
Scenario Sandbox Controls Overview
The Scenario Sandbox presents all the functionality necessary to create and run a scenario within a baseline model.
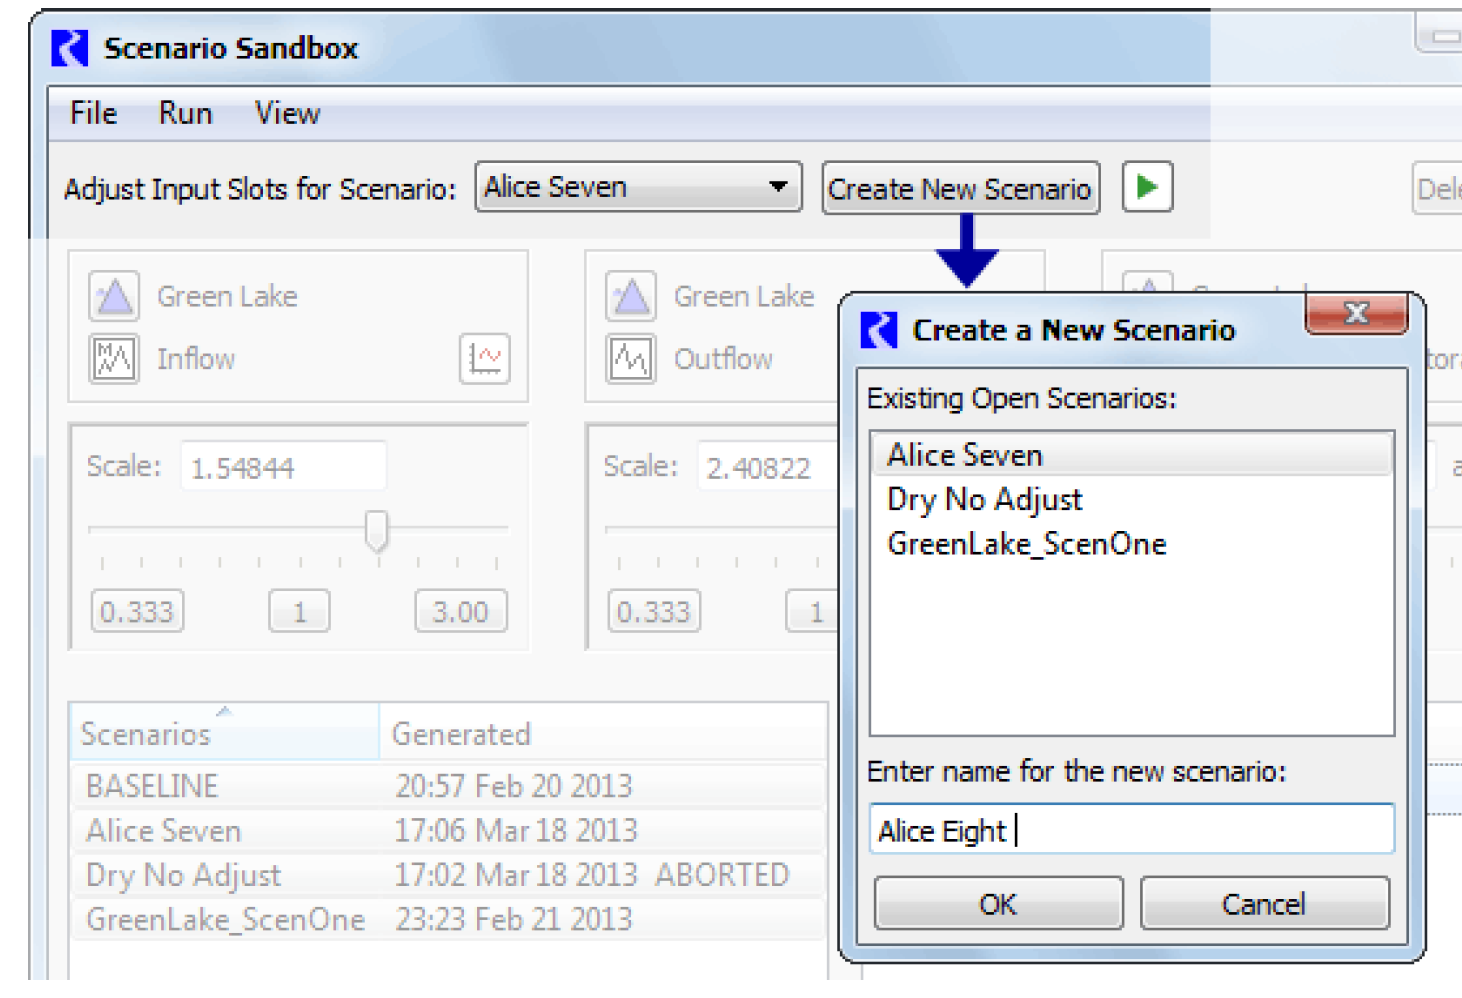
Create a new scenario
Select the Create New Scenario button and enter a new name for the scenario.
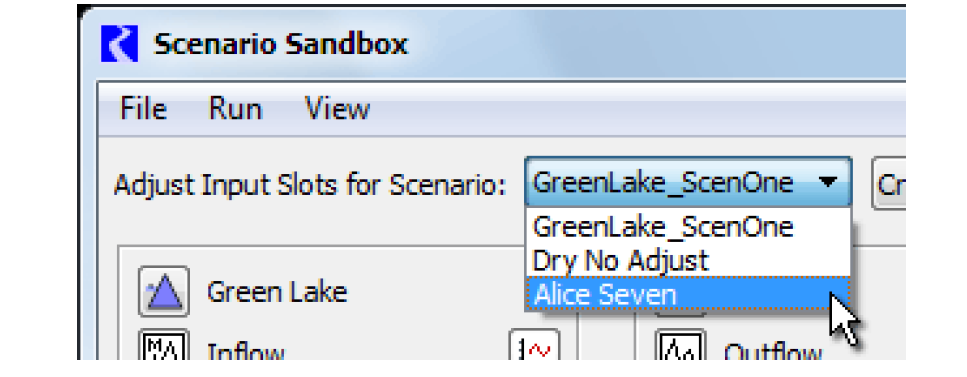
Open an existing scenario
Use the File, then Open Scenario menu to open an existing, previously saved scenario.
You switch between opened scenarios using the pull-down menu.
Scenario Sandbox Input Adjustment Controls
Next adjust values using the sliders for up to three scenario input slots. Changes to the sliders effect those input slots of the currently selected scenario.
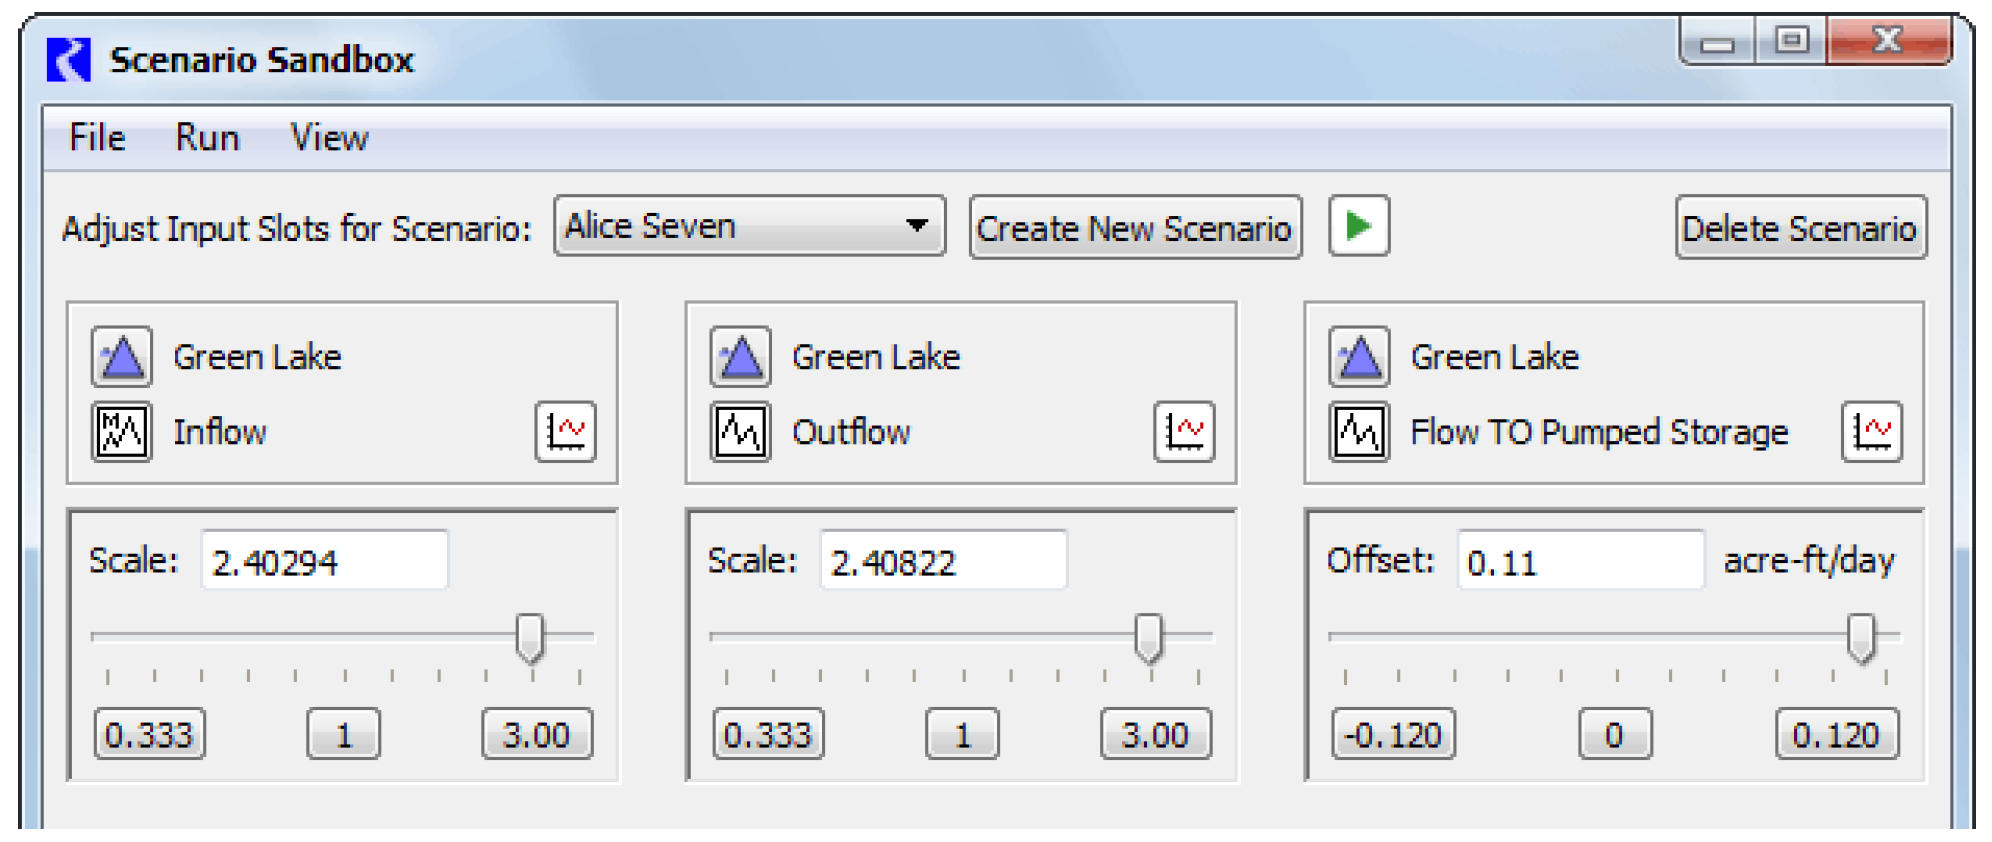
Each input slot panel contains the following controls:
• Slot Name, including type icons and names of the containing object and the slot.
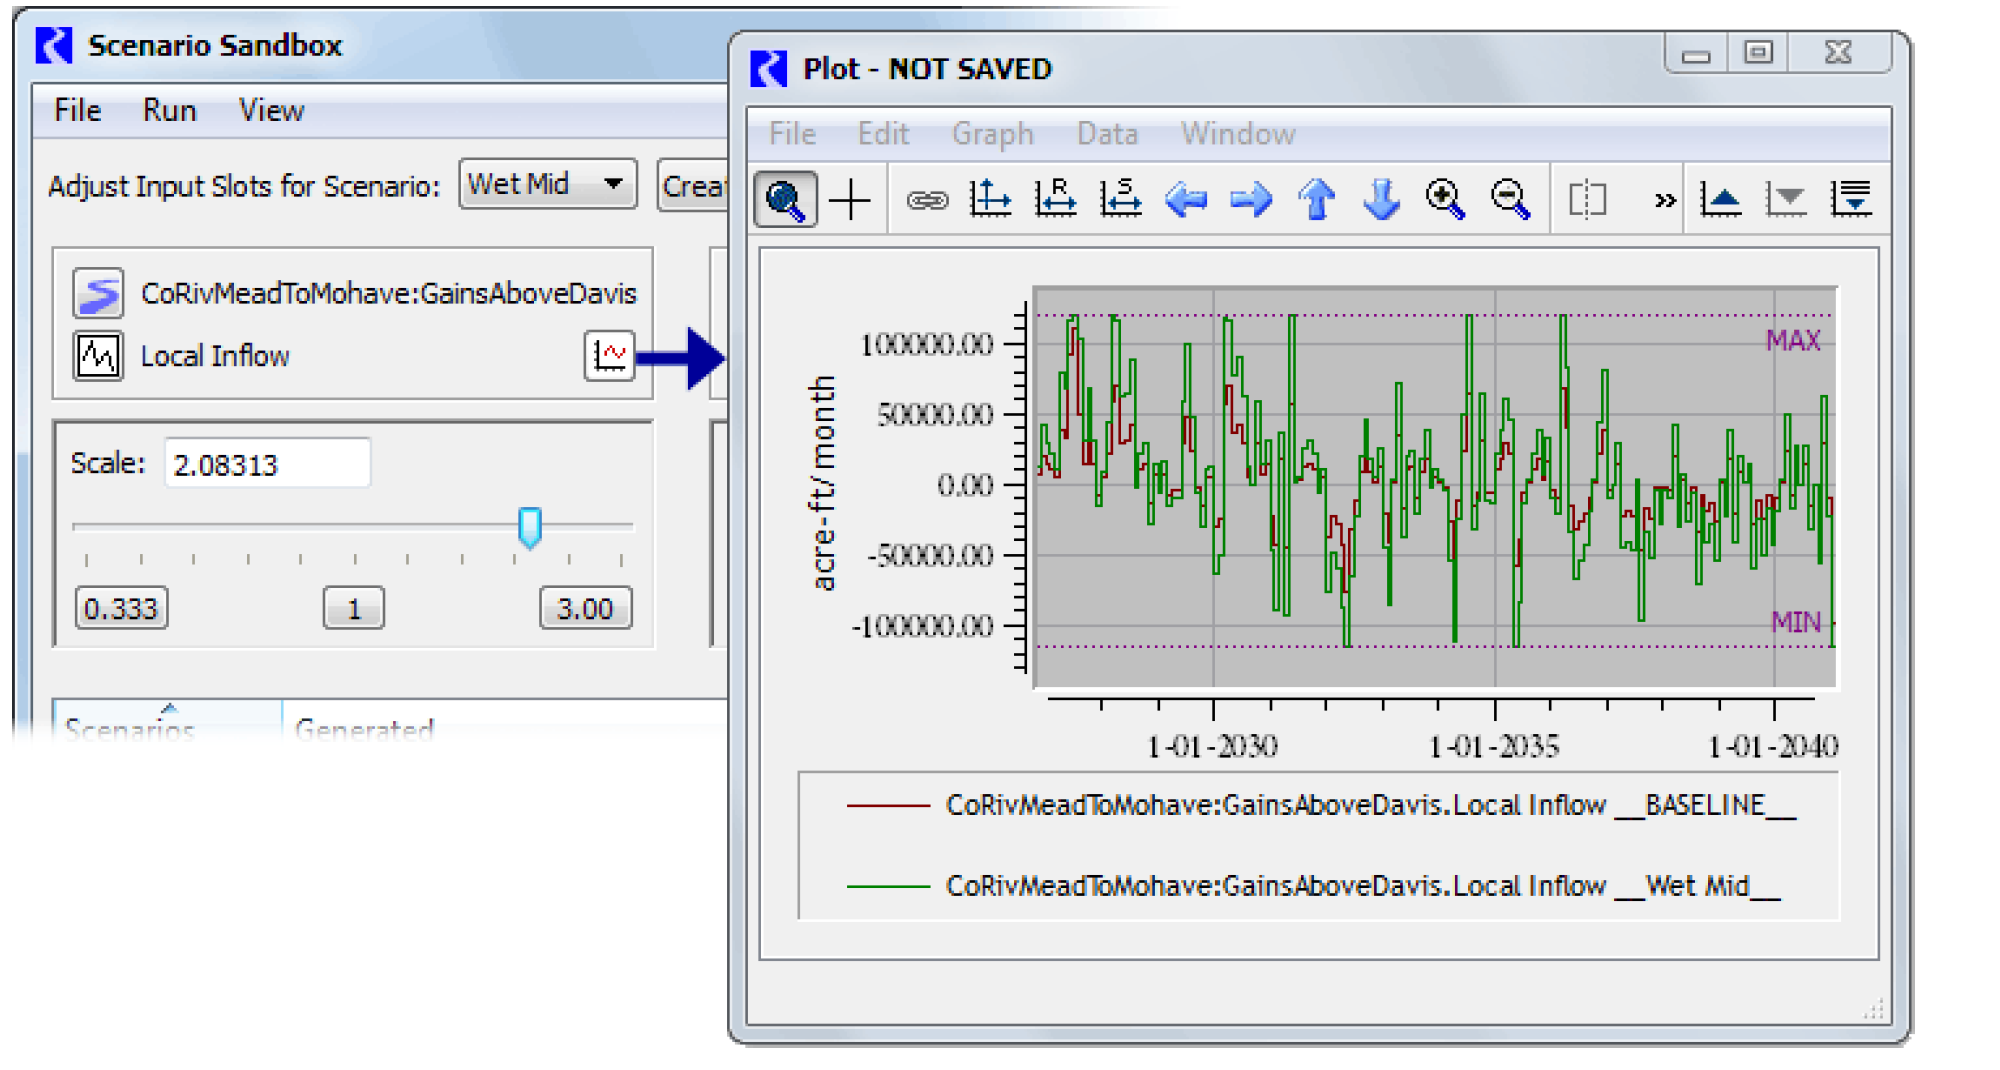
• A plot button to show a plot dialog with both the adjusted scenario slot values and its baseline slot values. If minimum and/or maximum limits are configured for the scenario slot, those limits are shown as horizontal markers in the plot.
• A slider panel, of either the scale or offset type. Each includes the following:
– A numeric field showing the value of the current slider position. The field is directly editable; editing the value sets the position of the slider.
– A horizontal slider control.
– Three numerically labeled buttons. See description below.
The Scale sliders are exponential. The range is based on the upper value set by the scenario engineer. The lower limit of the range is the reciprocal of the specified upper value. The mid-point is always “1”, which results in no difference from the baseline slot values.
Note: Although the scale slider bar’s positions are interpreted exponentially, the slider’s tick marks are evenly spaced.
The Offset sliders are linear, and range from the negative value to the positive value of the adjustment limit value set by the scenario engineer. The midpoint is always zero, which results in no difference from the baseline slot values. The Offset values are in the slot display units.
Note: Offsets are applied in user-units; therefore, in the case of irregular time units, such as acre-feet per month, the adjustment to the underlying standard values (e.g. cms) is different depending on the month or year in which the timestep occurs.
The computed scenario slot values are clipped at the configured minimum and maximum values for the baseline slot, if those have been configured.
Note: This is not considered an error condition.
Note: These minimum and maximum values should not be confused with the adjustment limit values which apply to the coefficients of the linear adjustment transform function. These minimum and maximum values are applied to the results of that function.
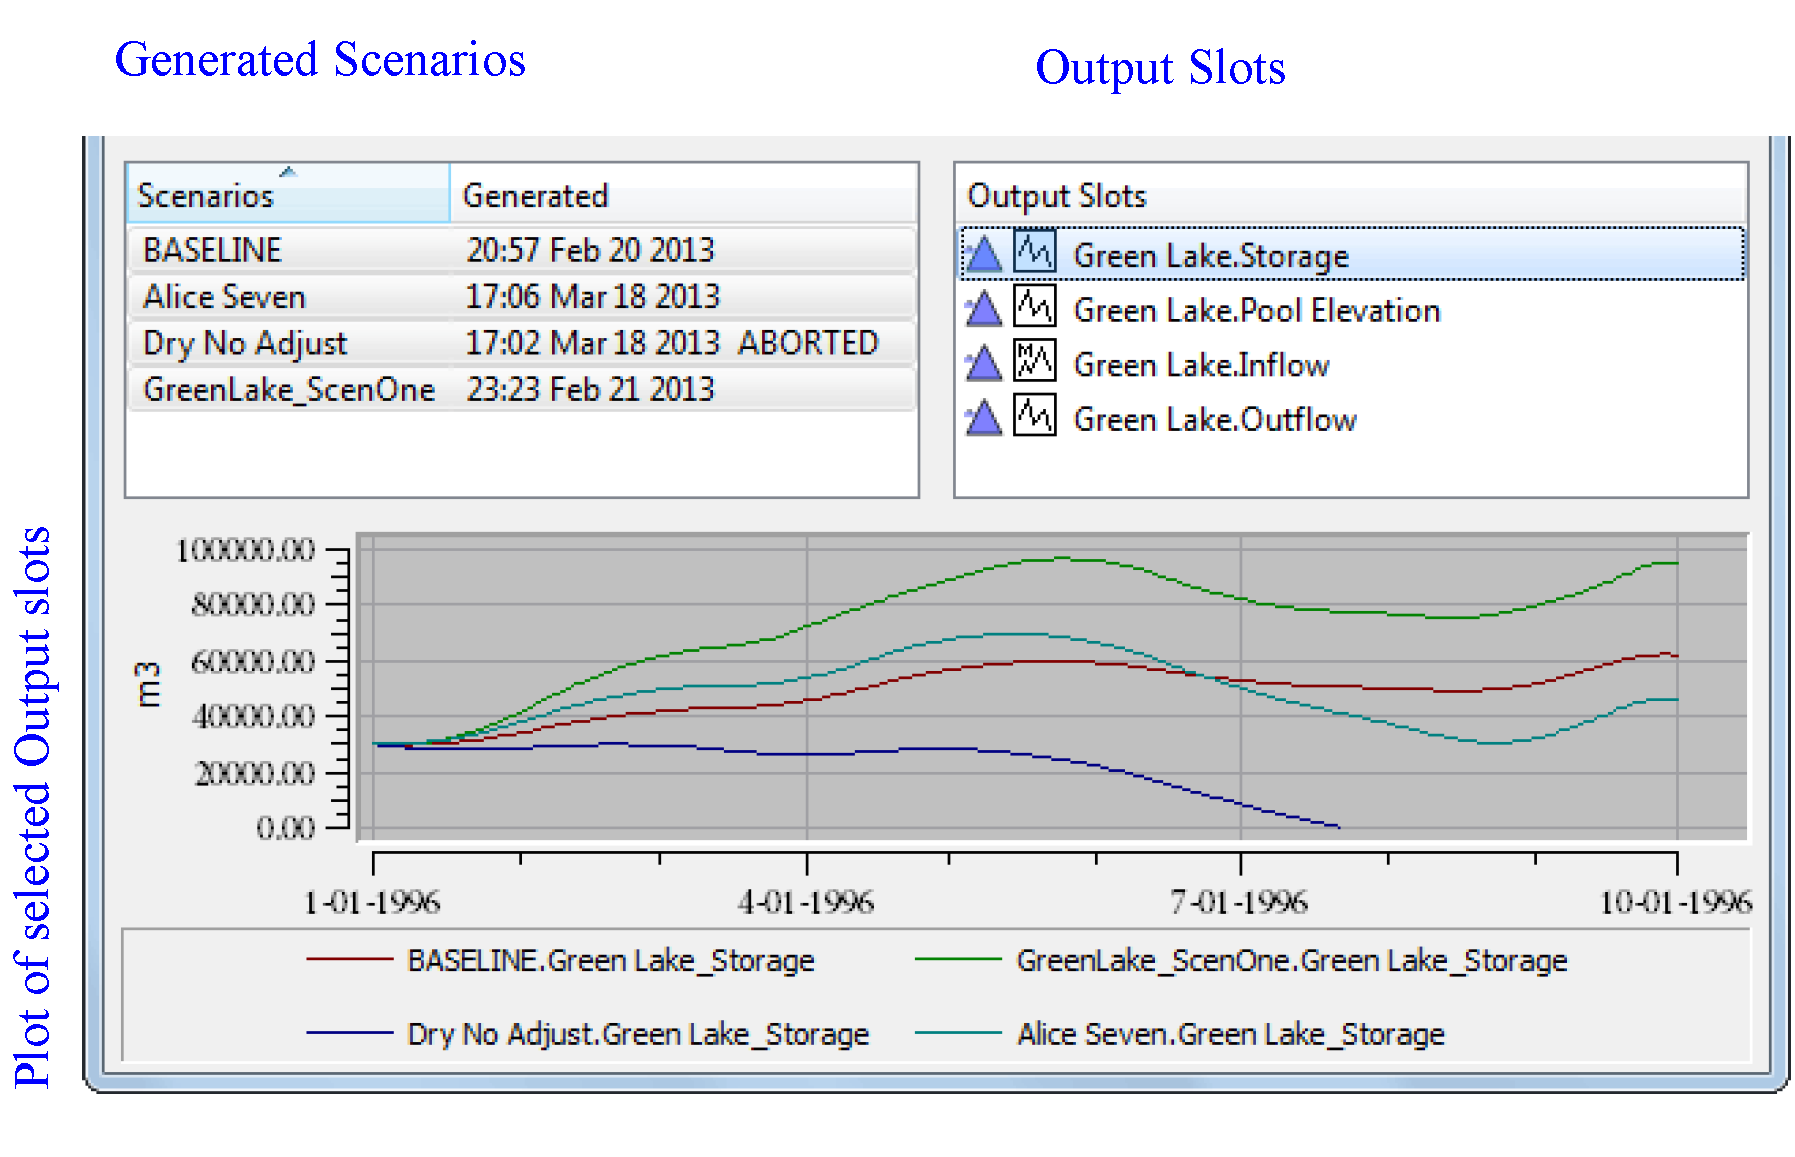
Scenario Sandbox Output Plot Controls
The bottom section of the Scenario Sandbox shows generated scenario results (outputs). Output controls consist of three components:
• A list of the generated scenarios.
• A list of the sandbox's scenario output slots.
• A plot of the selected slots for each scenario selected.
The plot is dynamically updated as the selections in the two lists are changed. A curve is shown for each of the selected scenarios' value of the single selected output scenario slot. A curve for the baseline slot is always shown.
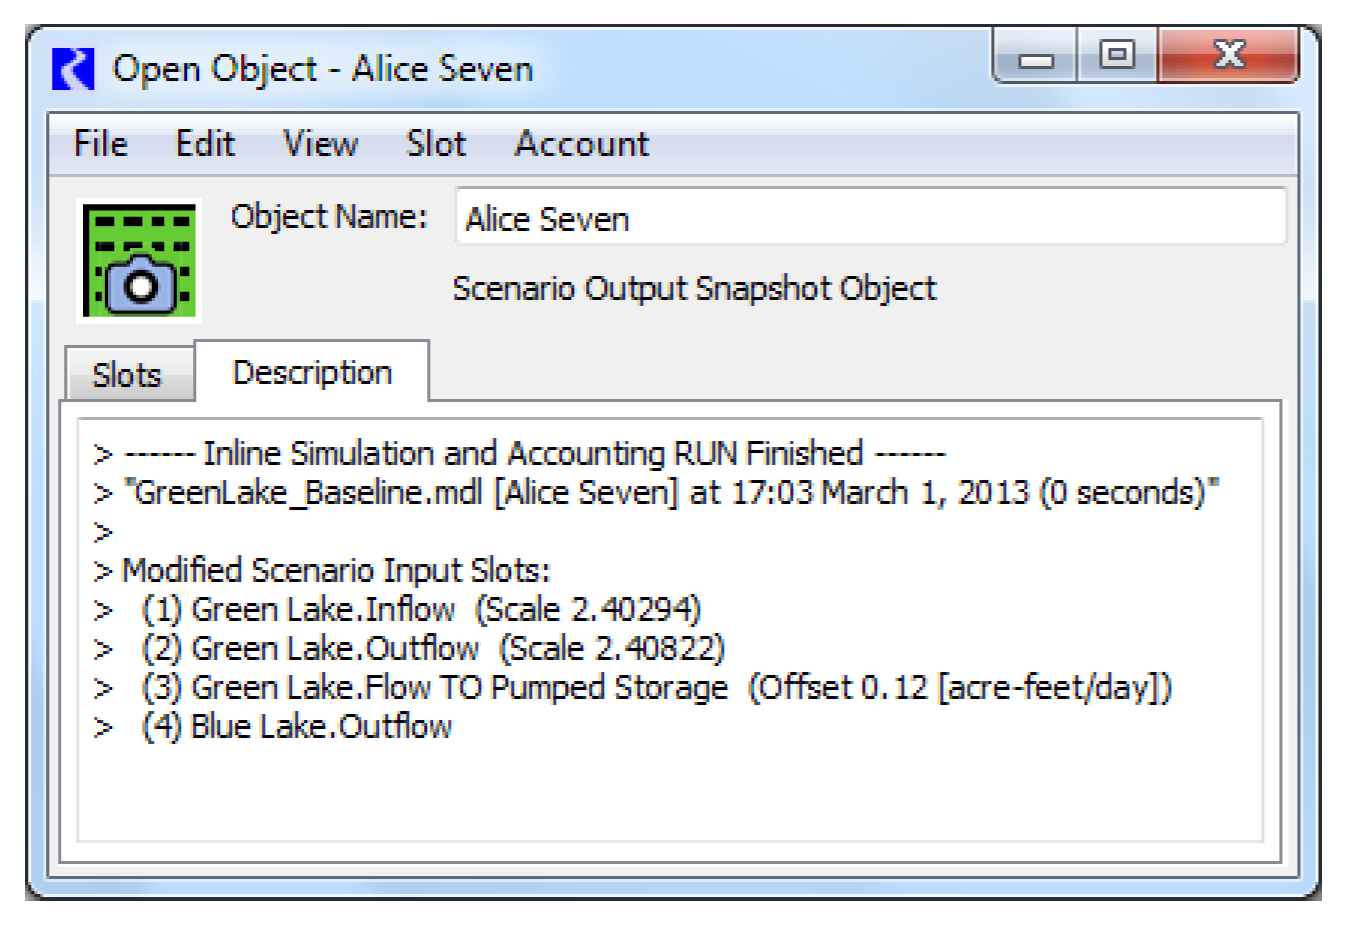
Only scenarios for which a scenario snapshot object has been generated are shown with a “Generated” timestamp. Double-clicking an item on the Generated Scenarios list shows the Open Object Dialog for that snapshot. Figure 8.2 illustrates.
Figure 8.2
Once a new scenario has been created, it must be saved. Use the File, then Save Scenario As and save the scenario in the desired directory. This can be loaded into subsequent BASELINE model runs for additional analysis.
Disabling the Sandbox
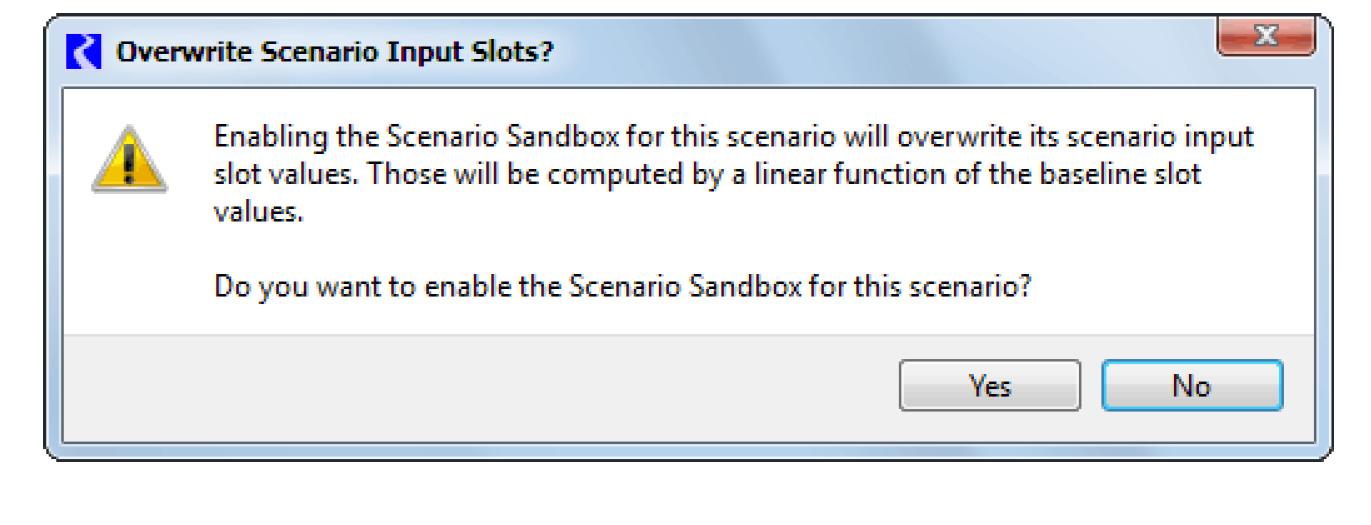
For any particular scenario, full editing of Scenario input slots can be made available by unchecking the checkbox to the left of the Sandbox button on the Scenario Manager. When re-enabling the Sandbox for a scenario, if doing so would effect the values of those input slots, this warning message popup is displayed, providing the option to keep the Sandbox disabled (and preserve the scenario’s input slot values).
Full Control of Scenarios
When a sandbox is not configured or you would like to change more than 3 input slots, you can create a scenario and have more control over the inputs. New scenarios to test permutations of the model can only use the slots specified in the scenario slot list, and all input values must fall within the minimum or maximum constraints (if any) set on the slot.
• To create new scenarios, select Scenarios, then New Scenario from the Scenario Manager menu bar or select the New Scenario button. 
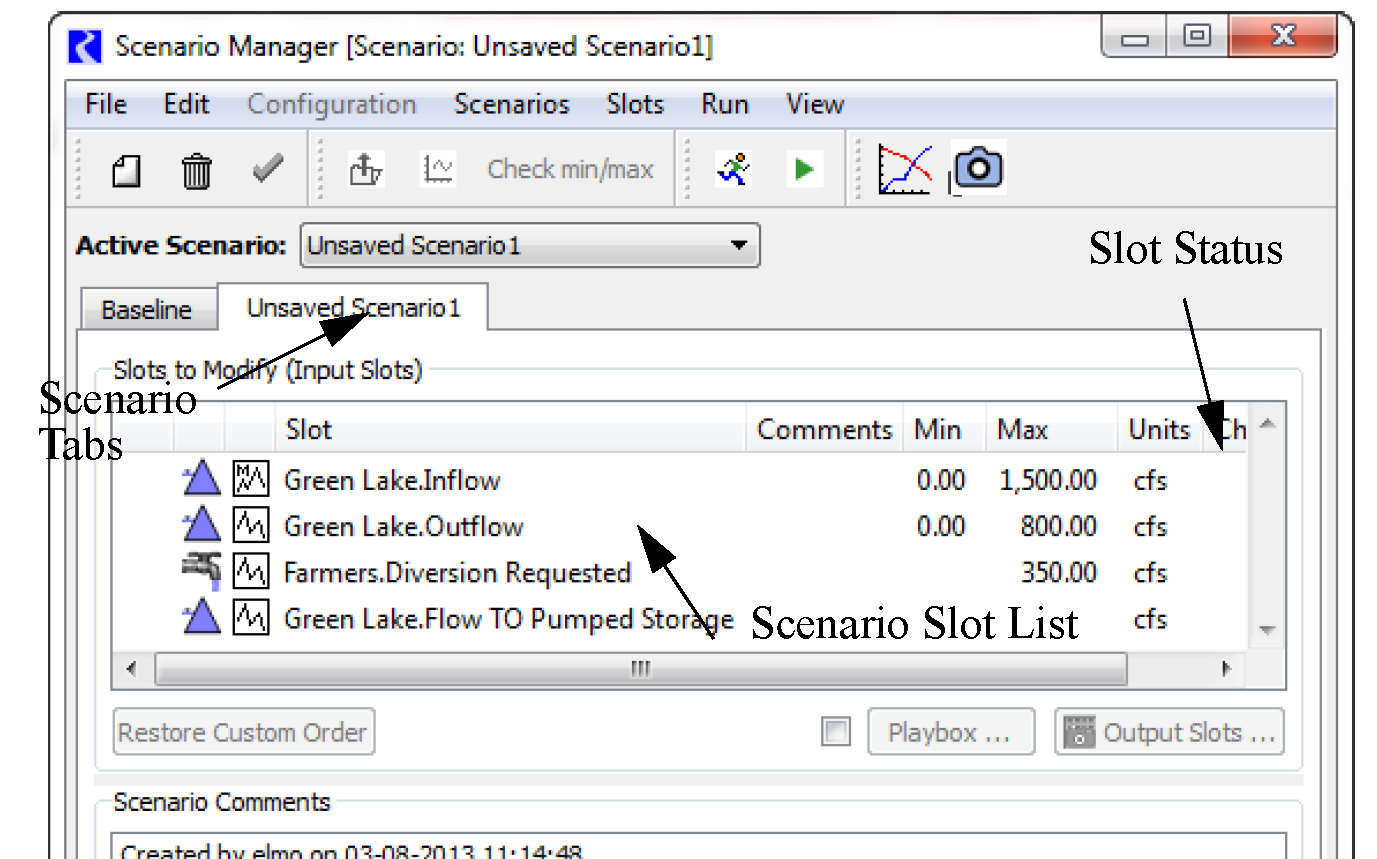
A tab with the name of the new scenario will be added next to the baseline tab in the Scenario Manager. Selecting the tabs allows you to toggle between the baseline scenario and other scenarios.
The name of the scenario corresponds to the scenario file’s name. A newly created scenario will have the default name “Unsaved Scenario.”
• To change the name of a scenario:
Select File, then Save Scenario As from the Scenario Manager menu bar. This will add an additional line to the Scenario Comments field indicating the new name of the scenario file.
• To input new values into a slot in the scenario slot list and create model permutations:
Highlight the slot to which you wish to input values and double select the slot name, select Slots, then Open Slot, or select the Open Slot button in the Scenario Manager toolbar. 
This will bring up the open slot dialog window. You can then import a data file or enter new values by hand for select timesteps or the entire timeseries. Once the slot values have been altered, “Yes” will appear in the slot status Changed field of the Scenario Manager.
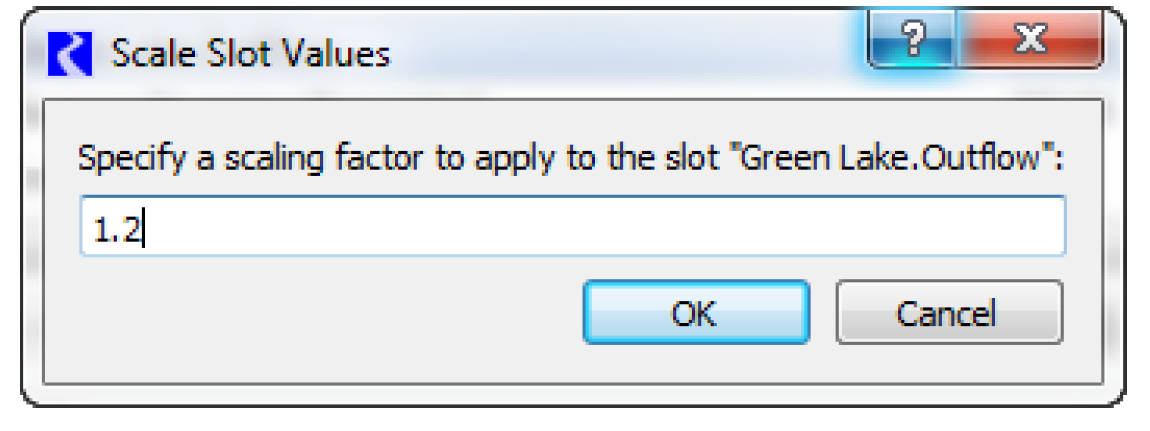
• To scale all the values on a slot, select Slots, then Scale Slot. The values in all the rows and/or columns in the slot will be multiplied by the given scaling factor.
• To restore a slot’s values to the original baseline data, select Slots, then Fill With Baseline Values.
• To ensure that the values entered fall within the minimum or maximum constraints set on the slot, select Scenarios, then Check Min/Max or select the Check Min/Max button. 
A dialog window will appear, indicating whether or not the new scenario contains valid values.
Once a new scenario has been created, it must be saved. The first time a scenario is created, it must be saved with the Save Scenario As option. Subsequent saves can use the Save Scenario option.To save a new scenario:
• Select File, then Save Scenario As and save the scenario in the desired directory.
Finally, a convenient way to compare the differences between a slot in various scenarios is to plot the slot against either the baseline slot values or against the values of the slot in other scenarios. You can also plot the slot for a single scenario only. All the plotting options are located in the menu bar of the Scenario Manager under Slots, then Plot Slot, Slots, then Plot Slot + Baseline, or Slots, then Plot Slot on All Scenarios. The slots are plotted in the familiar RiverWare Plot dialog with all features of the Plot dialog active. A sample graphic is provided below, which compares the selected scenario slot with the baseline slot values. The scenario slot name is distinguished from the baseline slot name by the convention: Slot Name_Scenario Name_.
Running a scenario is fairly straight forward. The scenario with which you wish to run the model must be active. Open scenarios by selecting File, then Open Scenario.
• To make a scenario active, toggle to the desired scenario in the Active Scenario field.
The Scenario Manager will verify that all the slots in the scenario are within the specified minimum/maximum values. If any of the bounds are exceeded, a warning message will be displayed to confirm that this scenario should be loaded.
A confirmation dialog will then appear, explaining to the user that the slot values in the selected scenario will overwrite the current data in the model. If this is not the intended action, the process can be canceled, and the scenario will not be loaded.
Upon activating a scenario, the Diagnostics Output Window will appear with an informational message displaying which scenario is currently active.
There are two options for running an active scenario:
• Select the Start Run button  in the Scenario Manager toolbar or select Run, then Start Run from the menu bar.
in the Scenario Manager toolbar or select Run, then Start Run from the menu bar.• To run the scenario through the Run Control dialog, select the Run Control button in the Scenario Manager toolbar or select Run, then Run Control Dialog from the menu bar.
Comparing Scenario Runs
The Scenario Manager allows for comparisons between slots in the baseline scenario run and various scenario runs or between slots in the various scenario runs. Comparisons are managed through the Snapshot Manager and the Output Manager, which can be accessed through the Scenario Manager.
• To open the Output Manager, select View, then Output Manager from the menu bar of the Scenario Manager or select the Output Manager button in the toolbar. 
• To open the Snapshot Manager, select View, then Snapshot Manager from the menu bar of the  Scenario Manager or select the Snapshot Manager button in the toolbar.
Scenario Manager or select the Snapshot Manager button in the toolbar.Making Scenario Runs
A snapshot object, or Scenario Output Snapshot Object, is automatically created after each scenario run (and also for the baseline run) to capture the values of a prescribed list of slots which generally represent outputs from the run. These new snapshot objects include copies of slots prescribed by the Scenario Engineer.
The association between a scenario and its output snapshot object is based only on the scenario and the object having the same name. This snapshot object will be saved with the scenario when the scenario is saved as a scenario file.
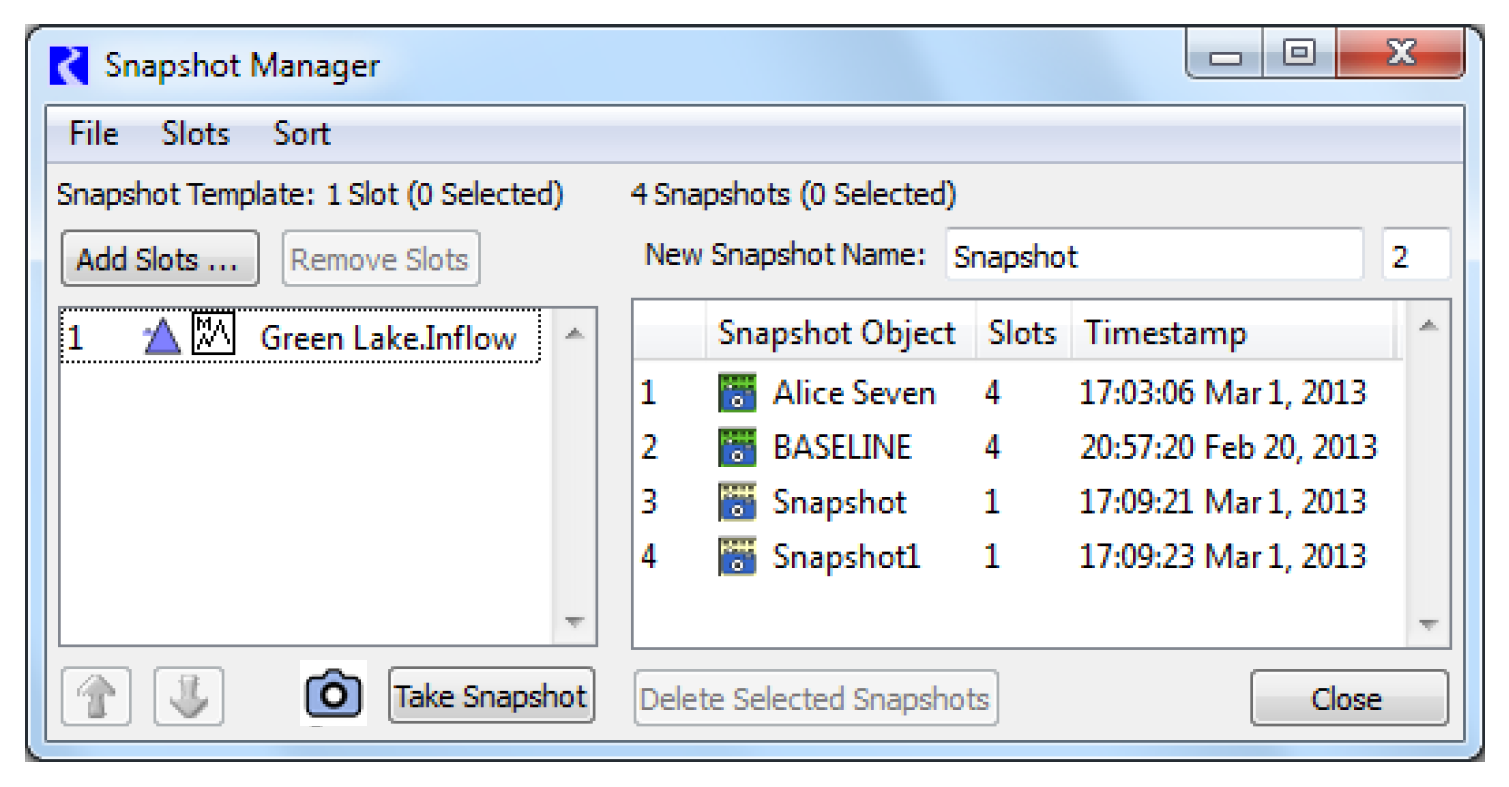
The background color of the snapshot object icon distinguishes the two types of snapshot objects:
• Yellow: Conventional snapshot object created by the user within the Snapshot Manager.
• Green: Scenario Output Snapshot Object automatically created at the end of a baseline or scenario run.
If the Results to Compare (Output Slots) slot list described above is not empty, then, each time a run finishes or aborts, a Scenario Output Snapshot Object having the same name as the active scenario (or else, “BASELINE” in a non-scenario run) is created (or re-created) with the following data:
• Non-editable copies of the slots enumerated in the Results to Compare (Output Slots) list,
• Automatically generated comments in the snapshot object’s description indicating the following:
– A timestamp of the run completion.
– A list of scenario input slots which have modifications with respect to the baseline values.
– For scenario sandbox adjusted slots, also the scale or offset value with which the scenario input slot’s values were computed.
The automatically generated text lines within the snapshot object’s description begin with a special character (“>”) to distinguish them from user-entered comments. All such lines are deleted from the description before generating new comment lines.
Accessing Scenario Output Snapshot Objects
The Open Object Dialog for the scenario’s output snapshot object can be shown by selecting the Output Slots button on the scenario’s tab in the Scenario Manager dialog or in the Scenario Sandbox; see Scenario Sandbox for details. These buttons are disabled if that snapshot object has not yet been generated.
Also, all existing Scenario Output Snapshot Objects are listed in the Snapshot Manager Dialog, with the snapshot items having a green-background snapshot icon.
Scenario Output Snapshot Object Persistence in Scenario Files
Scenarios are saved in their own files, apart from the baseline model. The scenario’s output snapshot object is also saved in that file. When loading a scenario file, the snapshot object is loaded. This will replace any existing snapshot object on the workspace having the same name.
Revised: 01/11/2023