
Use Example
Following is an imaginary use example to show the process. Perhaps, we are a water agency and have a complex ruleset. We want to share this ruleset and documentation with stakeholders in the basin, but we do not want to let them have an easily editable copy of this document. Also, we already have some descriptions entered in the ruleset but no other documentation.
In this example, we want to use view the document with our favorite web browser, and edit the document with Microsoft Word. Once the document is complete, we will post it to a web page so stakeholders can see it. As a result, we will use HTML as the type of document.
We set this up using the following procedure.
1. Define the file associations. We will use FireFox to view the document and MS Word to edit the document. Figure 4.6 shows how we set up the File Type Association Manager; see File Association.
Figure 4.6

Because we are using HTML, we can use anchors to automatically open the HTML file to the right place.; see Anchors in HTML Files. As a result, we only need one document for the entire RPL set. Thus we are using the One Document that Describes the Entire Set structure; see One Document that Describes the Entire Set. We do want to have separate documents for viewing and editing. While making changes to the ruleset and hence the Edit document, we will still have an official View document that stakeholders can use. See Separate View and Edit Documents for a diagram of this structure. Hence, we will need to configure only the top level of the RPL set.
2. From the RPL set, we open the configuration menu using the View, then External Documentation, then Configure menu.
Because we already have some descriptions in our RPL set and we wish to use HTML, we will use the automatically generated template as a starting point. First lets specify a location to put the file, say C:\Temp\docs
3. In the View area, select the Custom toggle for the Directory and enter C:\Temp\docs
Now we will generate the template.
1. In the Configure dialog we choose Utilities, then Generating HTML Template File. It gives us a warning that a file named C:/Temp/docs/Basin-DocTemplate.html will be saved.
Note: Our RPL set is named Basin.rls.gz.
2. We do not like the name of this file (and to avoid overwriting our completed external document with an inadvertently generated template file in the future), we change both the file name and the name in the configuration. We change the file to Basin-Doc.html using windows explorer. In the File area of the configuration, we change the name to Basin-Doc.html and select Apply when complete.
For now we will leave the View document in the C:\Temp\docs folder. Once we are complete we will move this to a web server. Figure 4.7 shows our configuration.
Figure 4.7
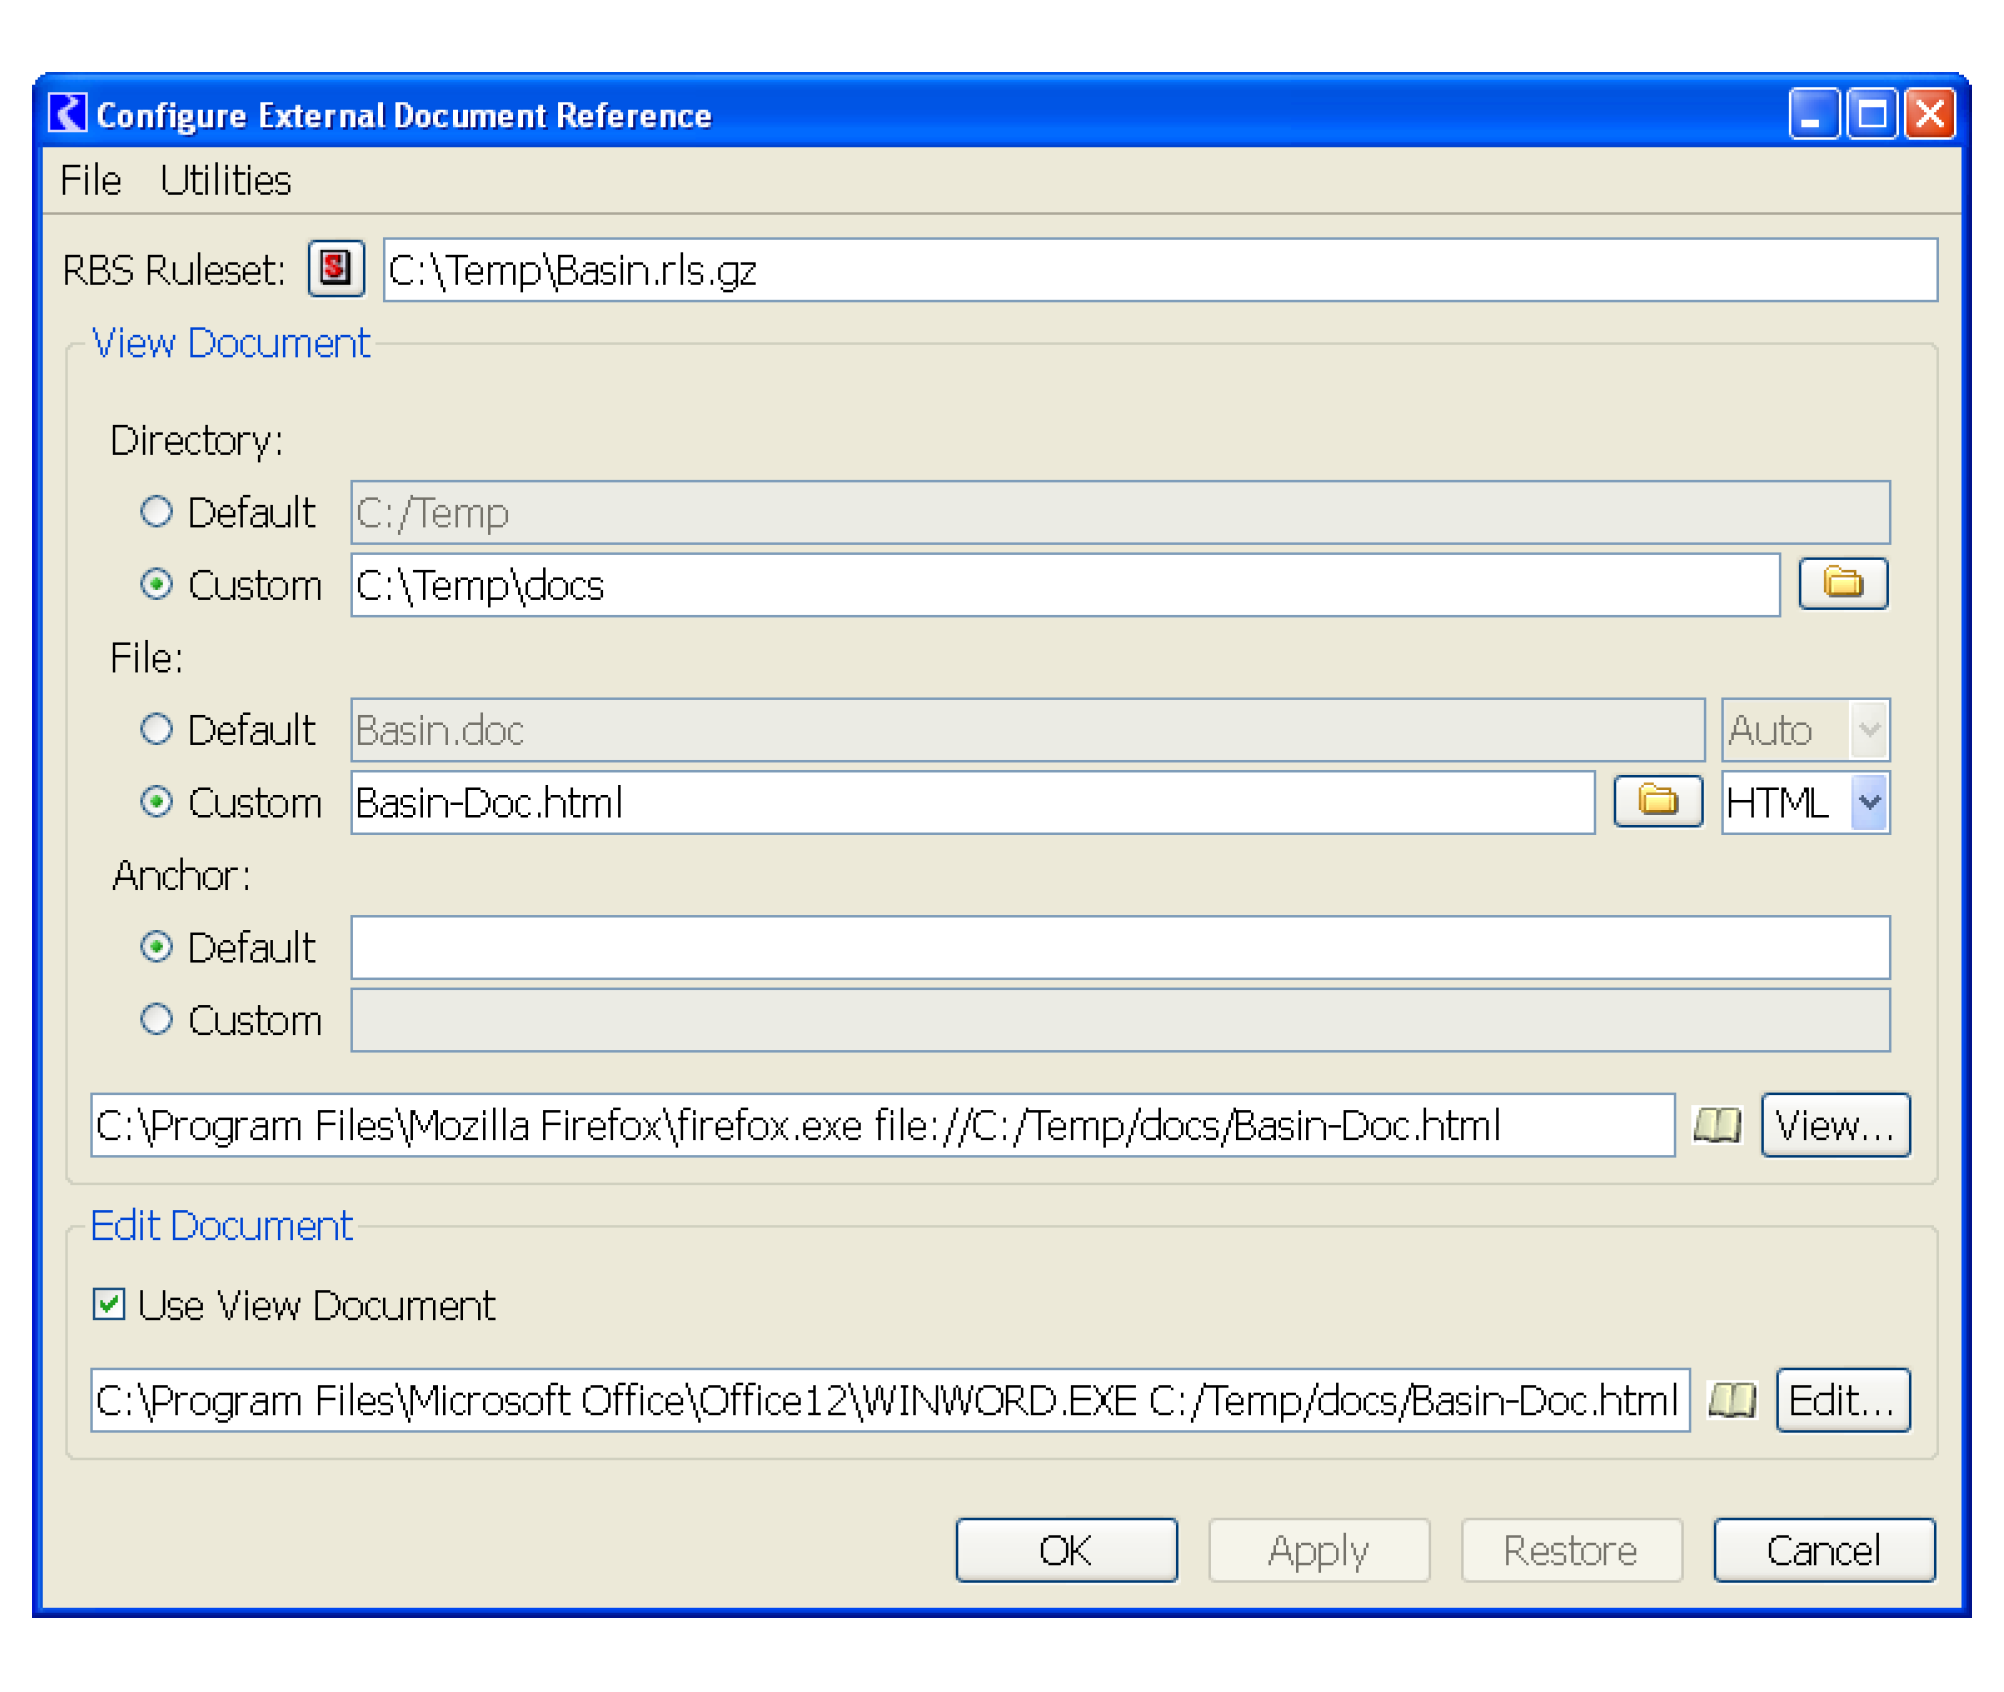
3. Now we select the View button and see the template file in Firefox.
We see that we have a pseudo table of contents with links, then each object is listed with the text that came from the description.
4. We select the Edit button and see the file open in Word.
5. We edit the document in Word by adding text, pictures, graphs, flowcharts, etc. We make sure to save it as the same name. We can edit the formats of the headings and text. When editing the headings, we make sure to use the Format, then Styles and Formatting menu in Work to change all instances at once.
6. Anytime we wish to see how this document looks in the browser. We can save the file from Word and switch back to the RPL set and select the External Documentation icon  . This takes us directly to that RPL Object section in the document.
. This takes us directly to that RPL Object section in the document.7. When editing is complete, we copy the final HTML to a web server.
8. Then we go back to the configuration menu for the RPL Set and change the View document. First we want to indicate that the Edit document is now different, so we toggle off the Use View Document option. We make sure the Edit document area is now correct.
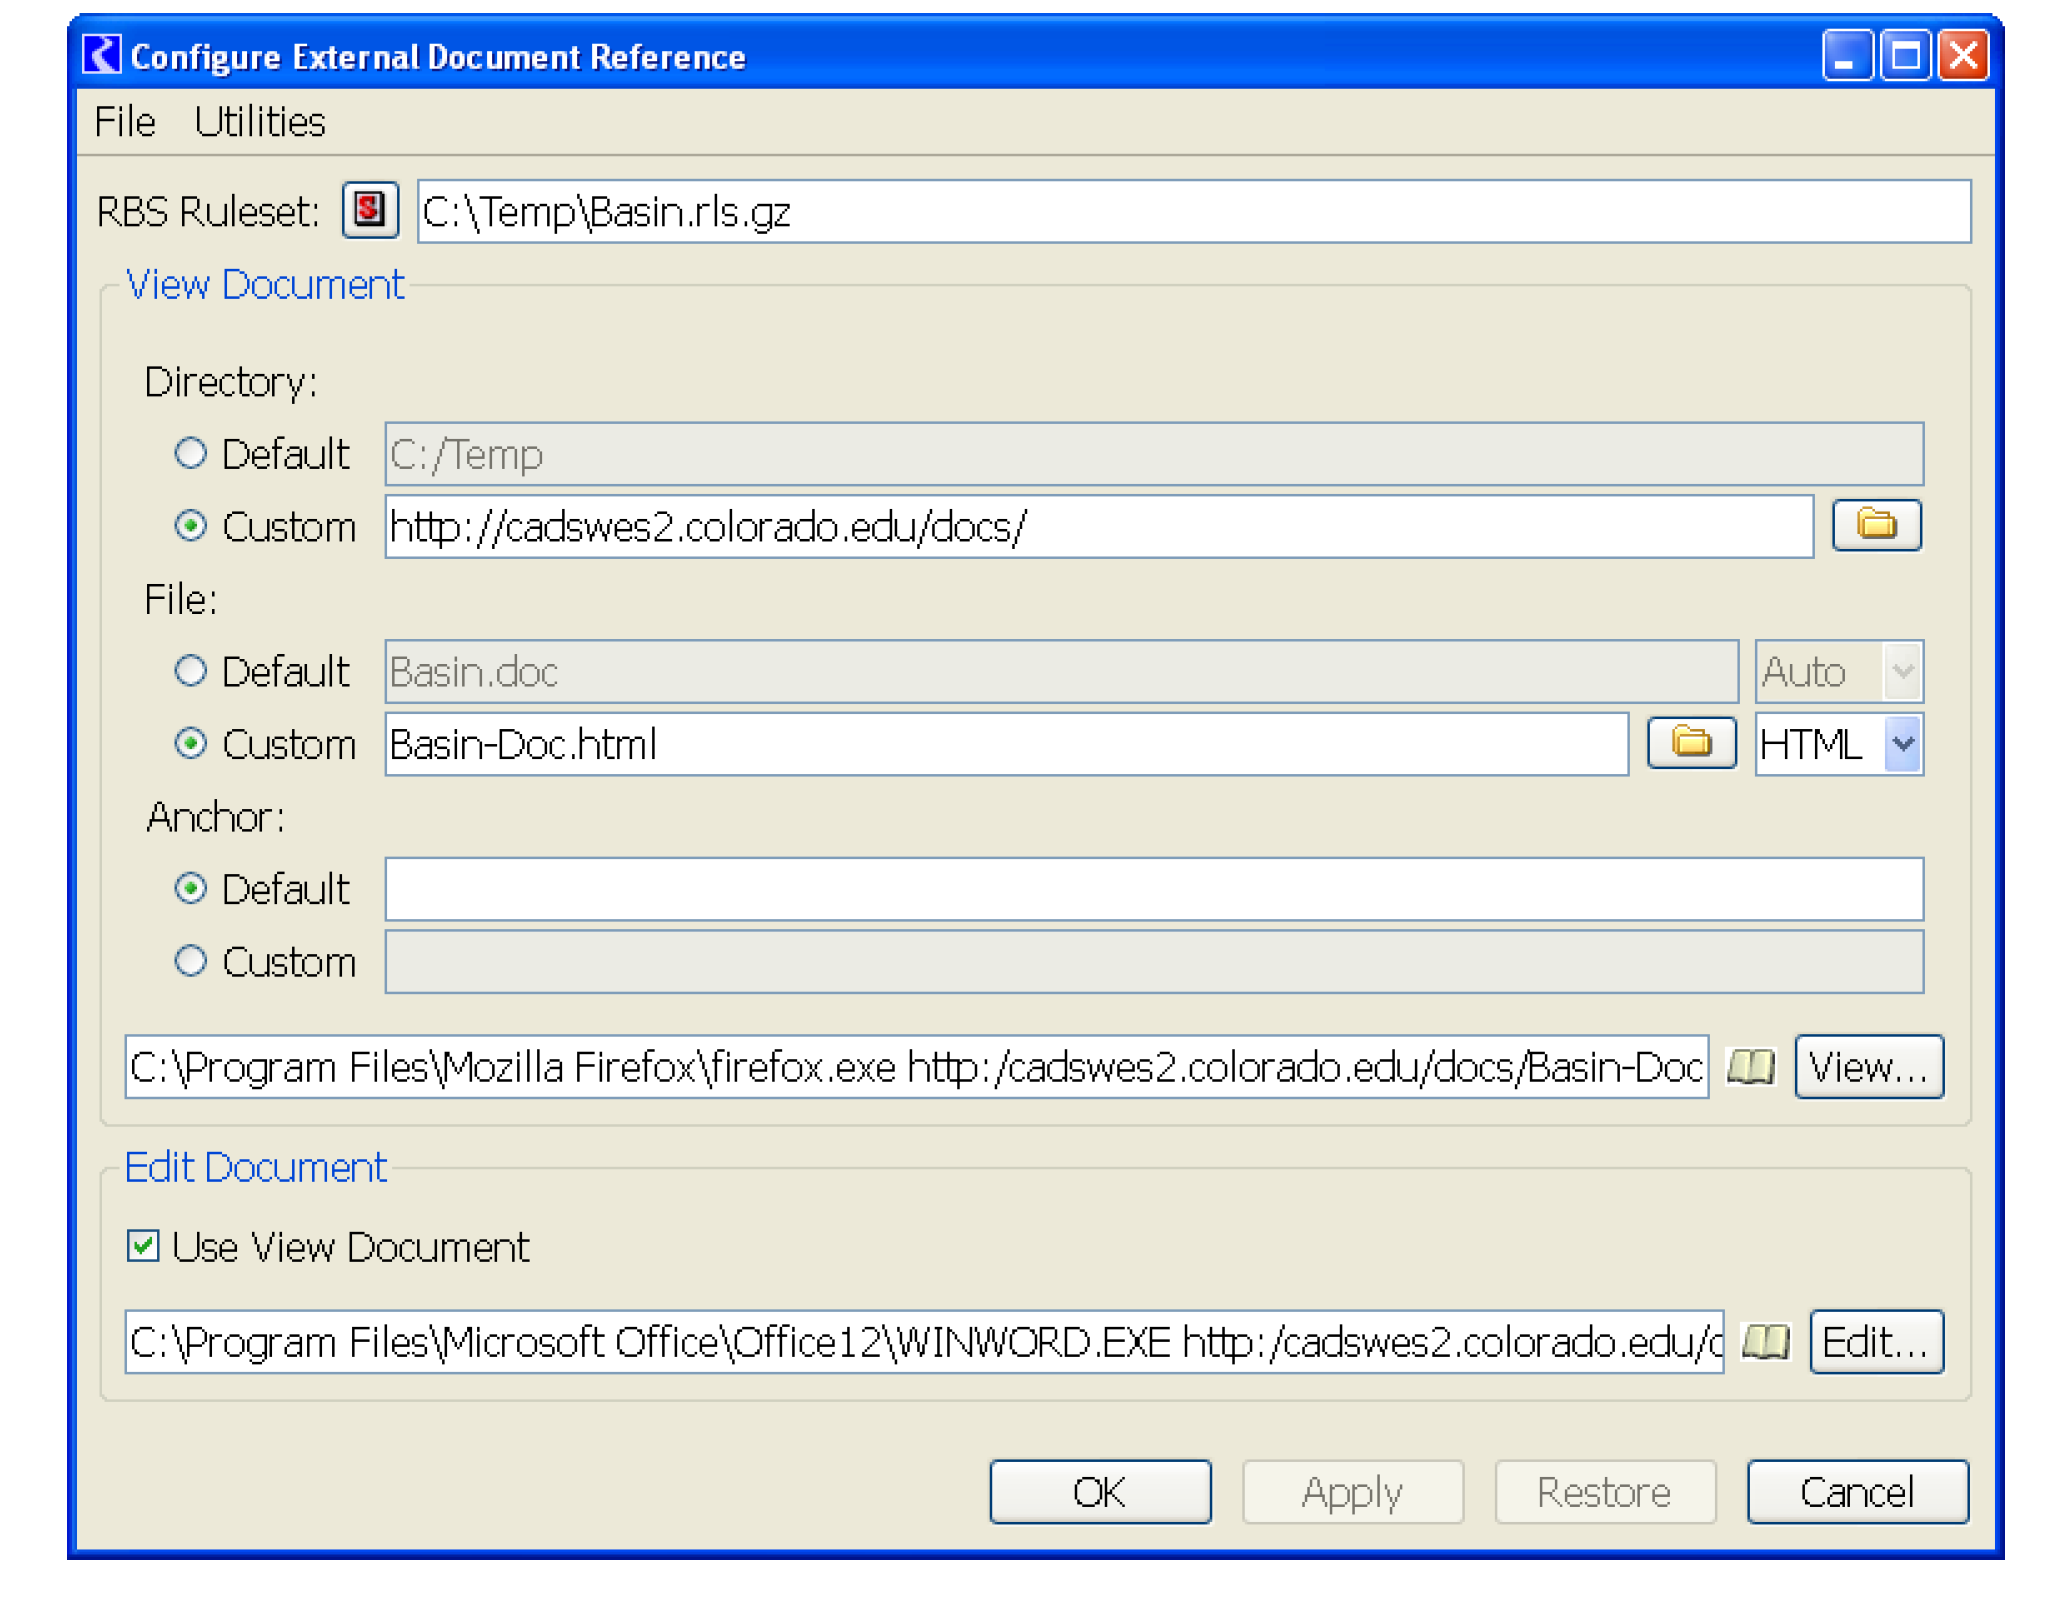
9. Now we want to change the View area to point the Custom Directory to a web server, such as:
http://cadswes2.colorado.edu/docs/
Figure 4.8 shows the configuration for this setup.
If we select the external documentation icon for any RPL object, it will take us to this web page and automatically scroll to the section related to that object. We now share our model and ruleset with our stakeholders.
Figure 4.8
Revised: 07/05/2022