
Baseline Model Creation
A baseline model must be created before any scenarios can be developed. The baseline model is generated by saving an existing model, with or without a ruleset, as a baseline model. Once a model has been saved as a baseline model, model topology, methods, rulesets, and non-scenario slots become protected from editing. The baseline model cannot be re-saved once it is created unless it is resaved as a non-baseline model. To maintain the integrity of the baseline model, we do not recommend re-saving the model as non-baseline. Following are the steps to create a baseline model from a regular model; these steps are described in detail in the remainder of this chapter:
1. Open a regular model and optionally the ruleset. Open the Scenario Manager.
2. Select the list of Slots to Modify (Input Slots).
3. Select the list of slots that represent the Results to Compare (Output Slots).
4. Enter Baseline comments.
5. Optionally create a Scenario Sandbox.
6. Run the model.
7. Save as Baseline.
Open a Model, Ruleset, and Scenario Manager
To create a baseline model, open the desired model (and ruleset). Open the Scenario Manager from the Utilities, then Scenario Management menu on the main RiverWare menu.
This will open the Scenario Manager dialog. At this point, the dialog is empty because no slots have been specified. The title bar of the Scenario Manager says “[Not baseline model]” because no baseline scenario slots have been specified or saved.
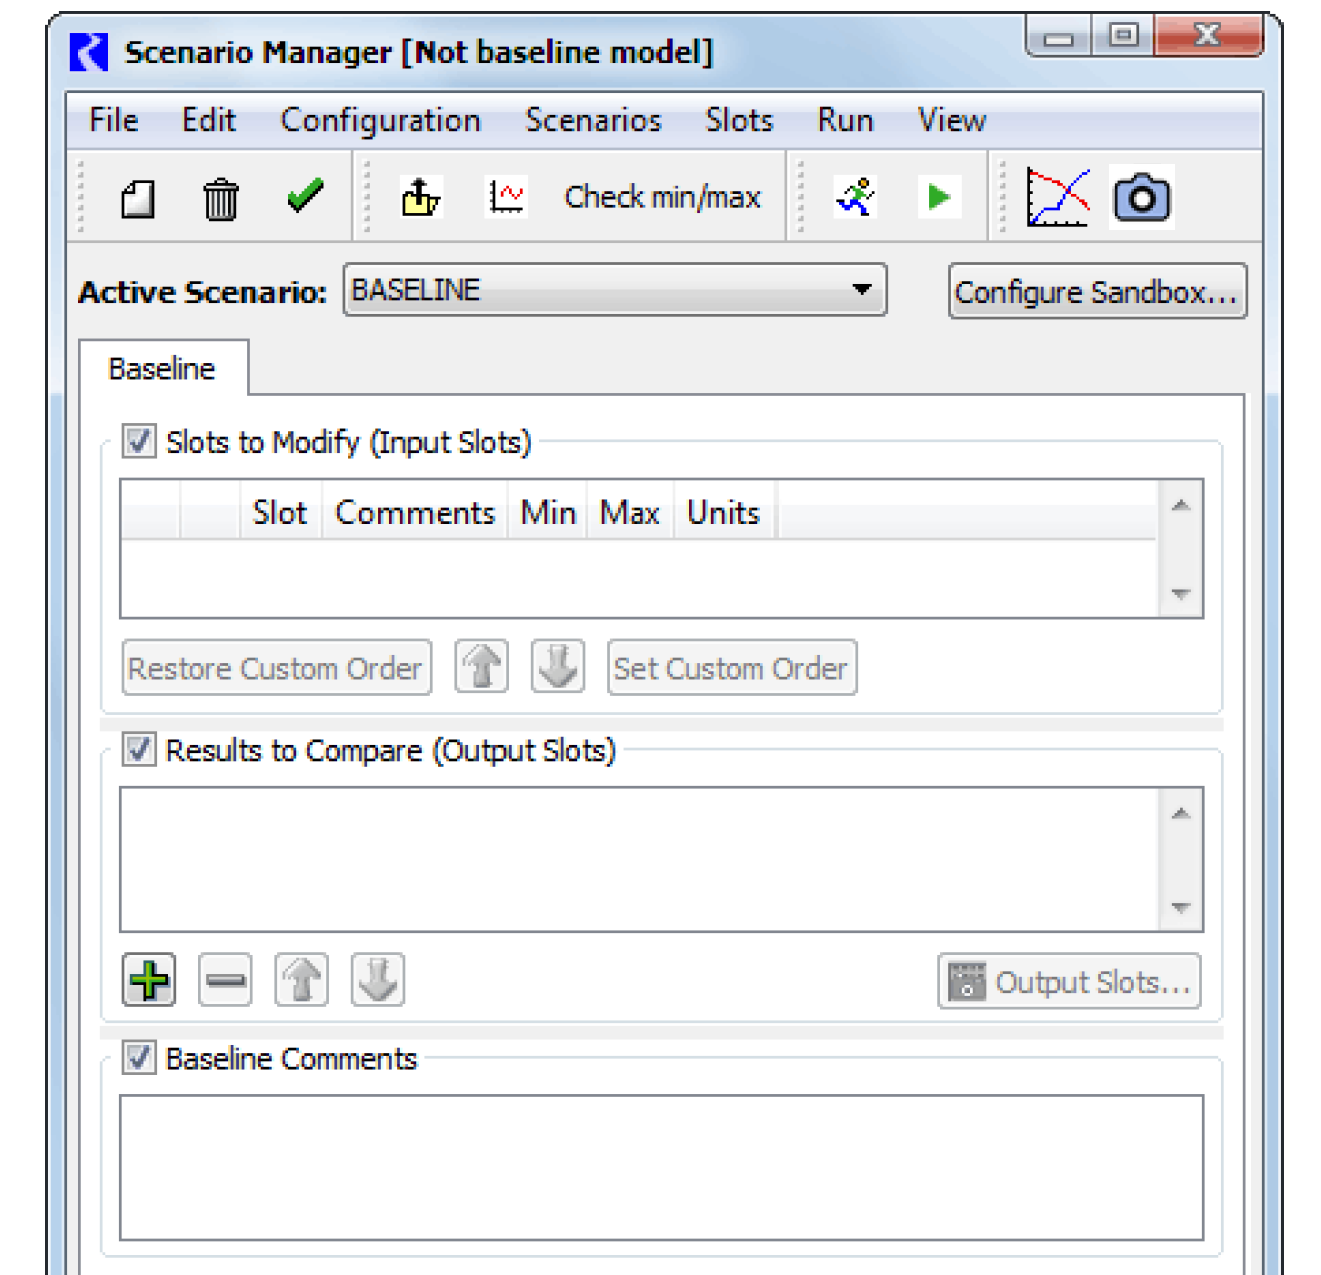
Specify Slots to Modify (Input Slots)
You will need to decide which slots are key to generating different scenarios. This subset of slots will be the only slots that scenario users are allowed to modify values or data to test various scenarios against the baseline scenario. To add the slots that form the baseline scenario select Configuration, then Add Input Slots.
Use the selector to choose the Scenario Input Slots. The added slots appear under the Slots to Modify (Input Slots).
As creator of the baseline, you can specify a minimum or maximum (or both) value that the slot is not allowed to violate in any scenario.
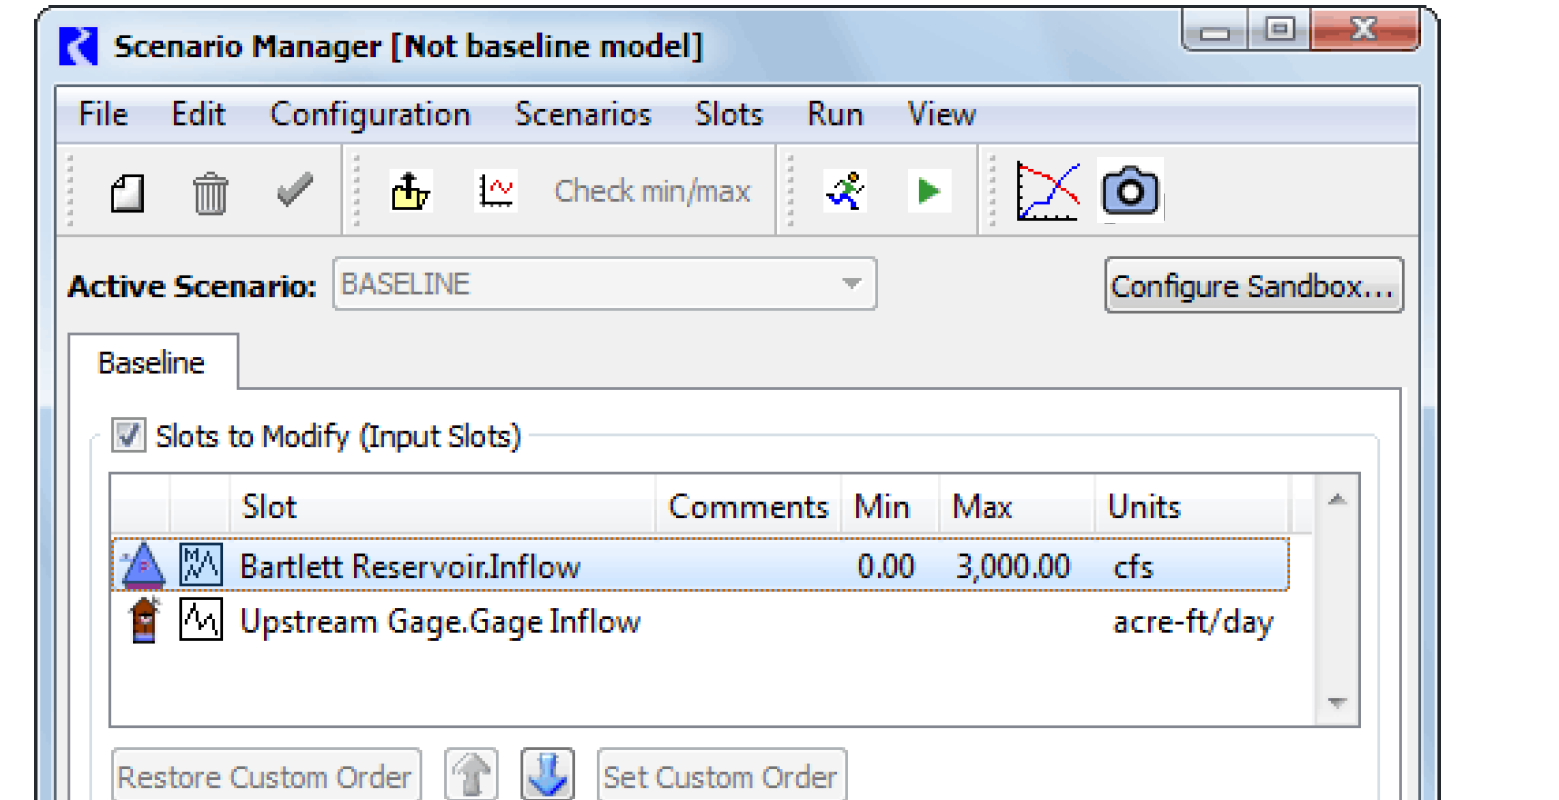
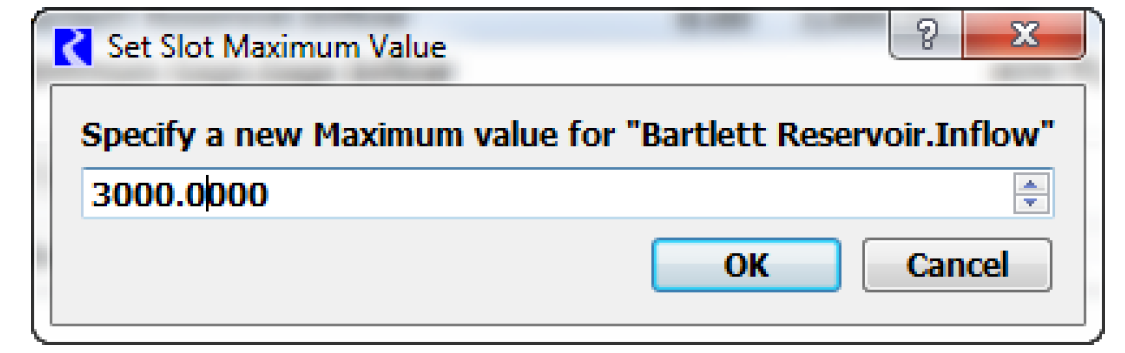
To specify a minimum or maximum slot value, highlight the slot and select Configuration, then Set Min Value or Configuration, then Set Max Value from the menu bar. A dialog window will appear. Enter a value and select the OK button. You can also use the Configuration, then Compute Min/Max Values from Baseline Slots to give you the existing bounds. Once this value is set, it cannot be altered by scenario users.
Comments can also be added to the individual slots in the comment field to the right of the slot name and to the scenario in the scenario comment field. To enter a slot comment, highlight the desired slot and single select the Comment field next to the slot name. A text cursor will appear. Enter the desired comment.
The list of slots can be ordered in several ways. The current ordering of slots is saved with the model.
• To sort the slots by slot name, object name, slot type (series slot, table slot), and subbasin membership select the Slots column header at the top of the slots list. Sorting by subbasin is based on an alphabetized list of the user-defined subbasins which the slot is a member of.
• To sort the slots by the comments, minimum, or maximum values select the appropriate column header at the top of the slots list.
• To specify a custom slot order, highlight a slot and use the up and down arrows.
Specify Results to Compare (Output Slots)
Next, specify which output slots you would like to compare against the baseline and other scenarios. When a scenario run is made, a snapshot will be taken of each of these slots. Define the list of slots in the Results to Compare (Output Slots) slot list. This list is saved in the baseline model and is not modifiable by the stakeholder.
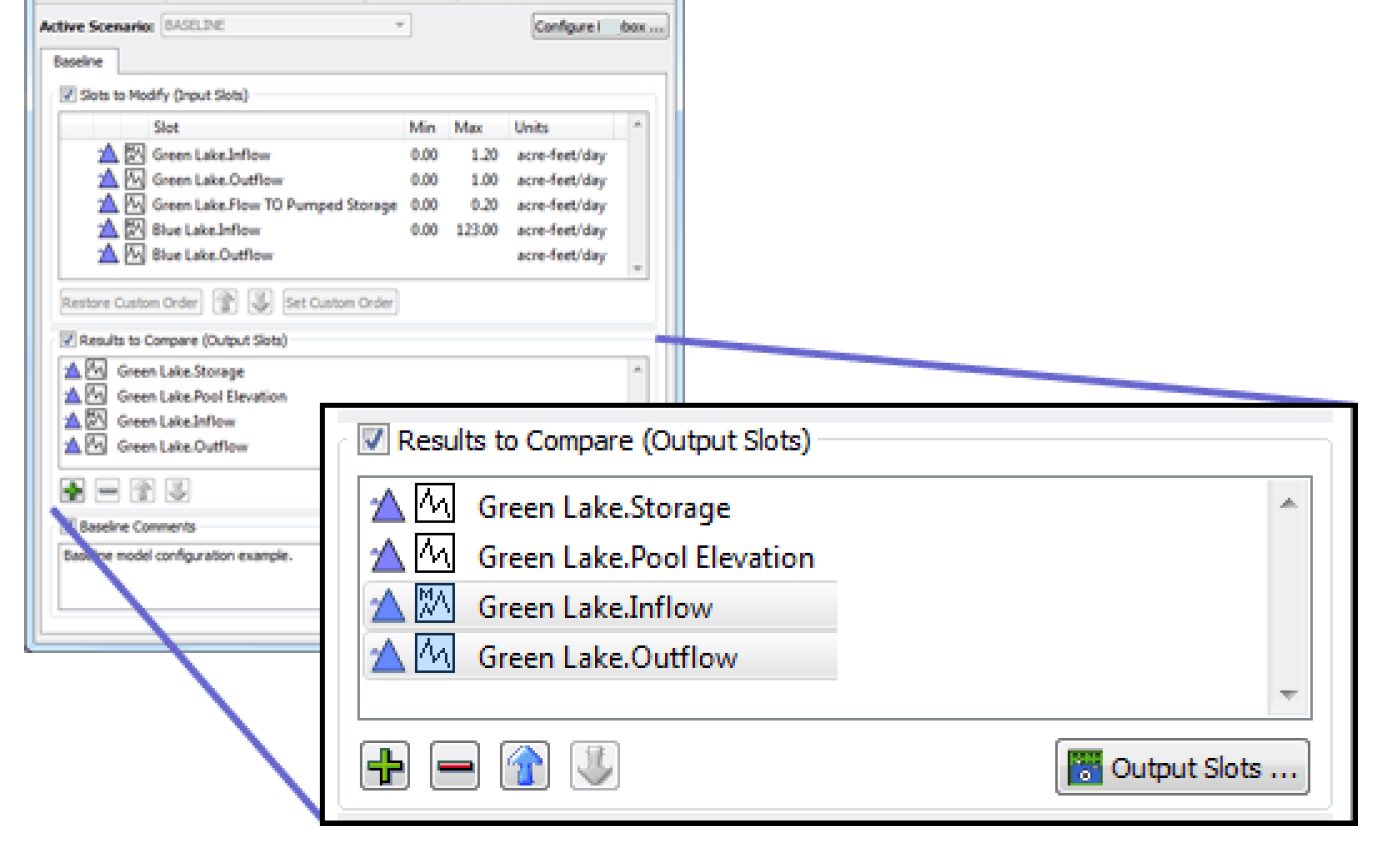
The green  button shows the general slot selector to pick more slots for this list.
button shows the general slot selector to pick more slots for this list.The red  button removes the selected slots from this list.
button removes the selected slots from this list.The blue  arrow buttons move the selected slot items up or down within the list. The order of the slots in the list will be the default order of slots within generated Scenario Output Snapshot Objects.
arrow buttons move the selected slot items up or down within the list. The order of the slots in the list will be the default order of slots within generated Scenario Output Snapshot Objects.The Output Slots button  opens the BASELINE snapshot object which is automatically generated at the completion of a non-scenario run. This button is enabled only when that snapshot object exists within the workspace. If it is not enabled, make a run.
opens the BASELINE snapshot object which is automatically generated at the completion of a non-scenario run. This button is enabled only when that snapshot object exists within the workspace. If it is not enabled, make a run.Enter Baseline Comments
To enter the baseline scenario comment, single select the Baseline Comment field and enter the desired text.
Create a Scenario Sandbox (Optional)
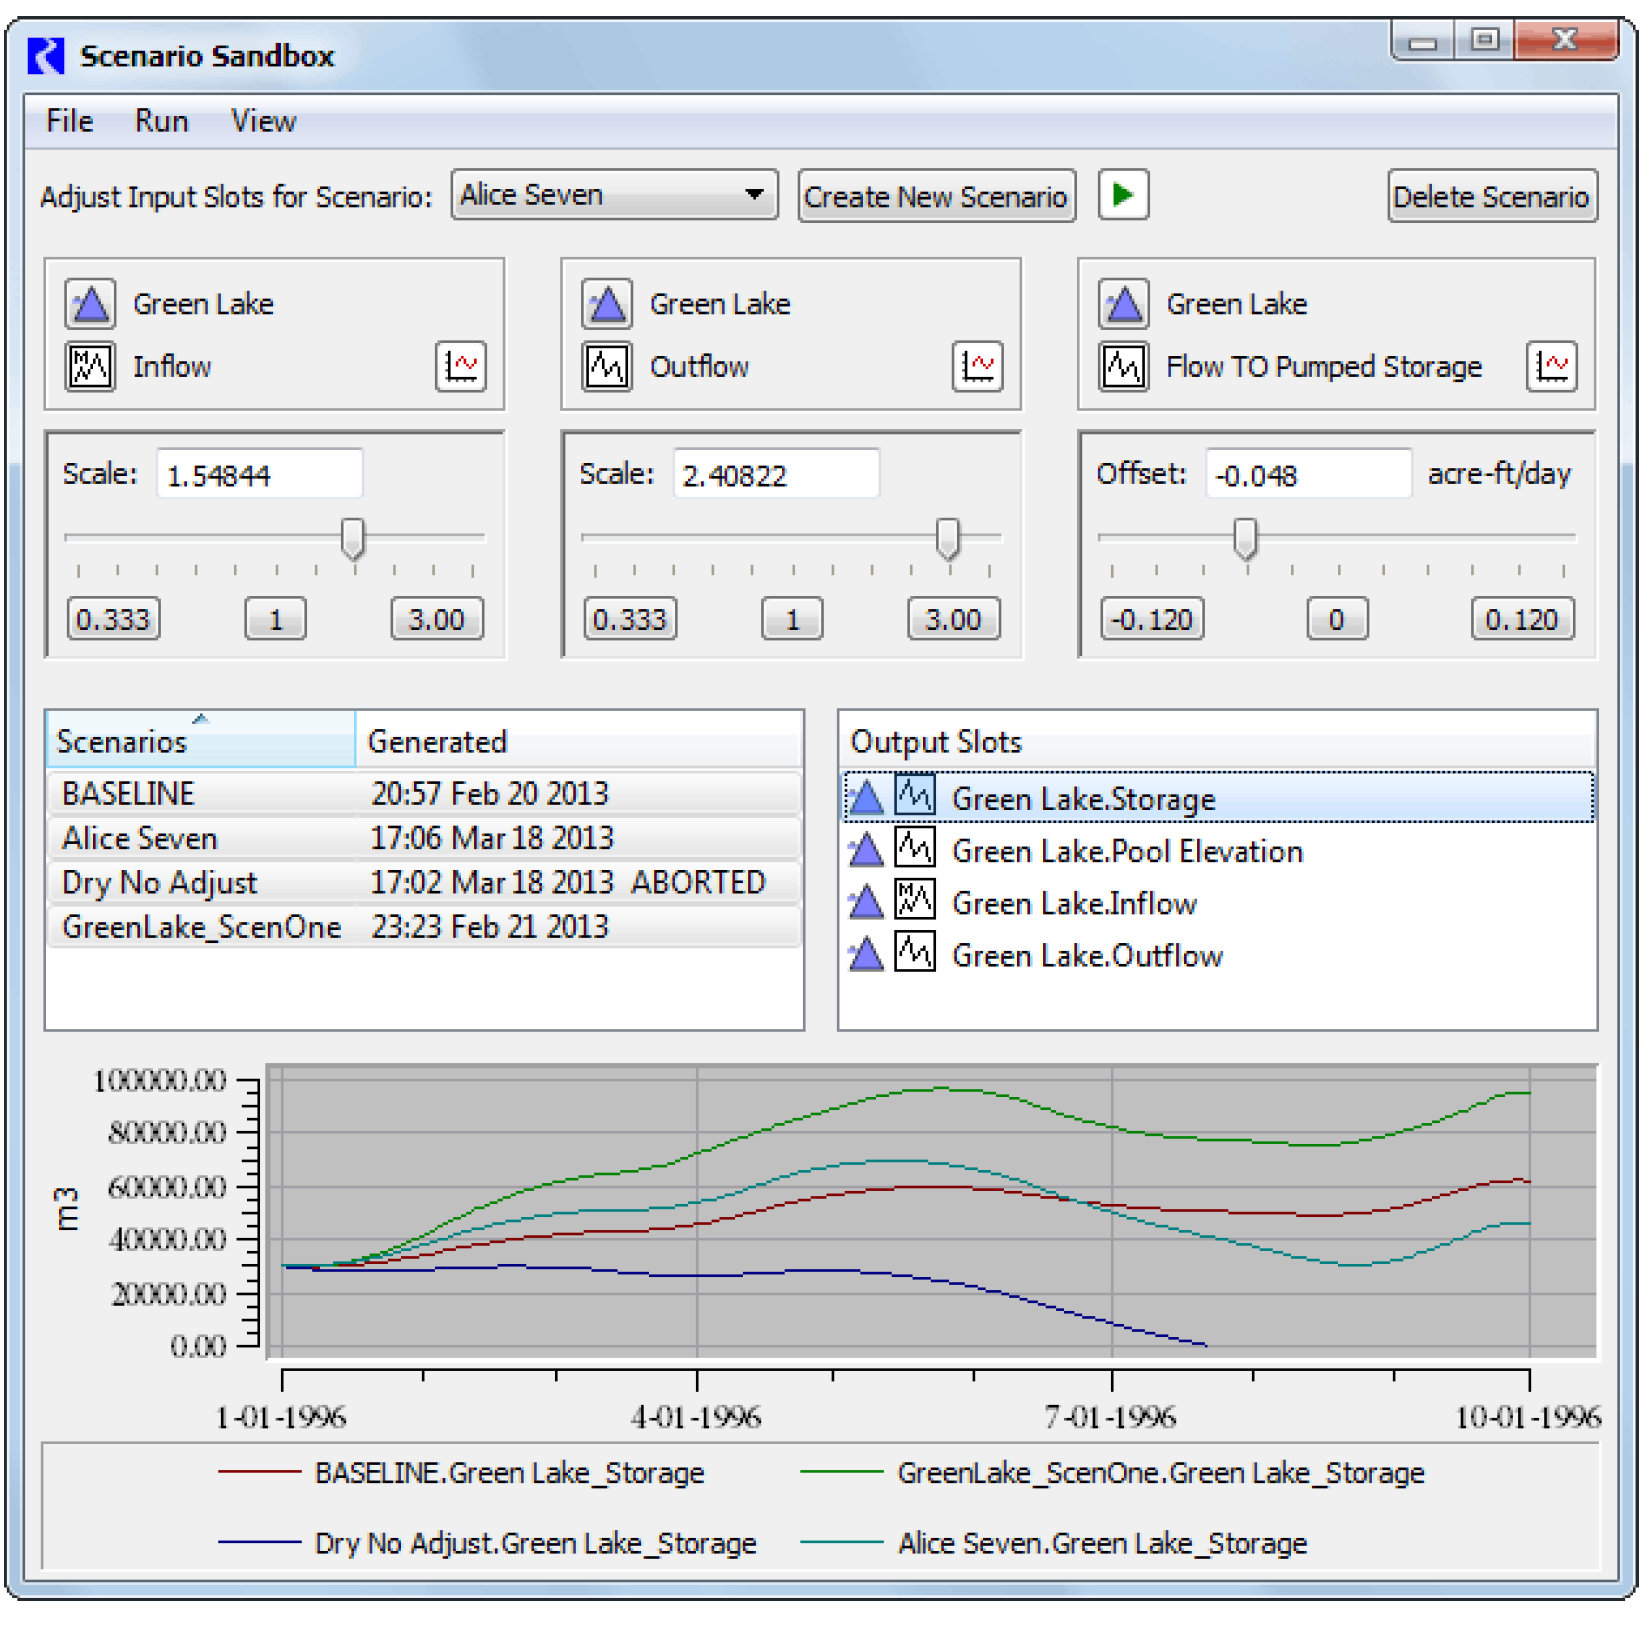
A Scenario Sandbox provides a convenient way for the scenario users (i.e. the stakeholders) to easily create and run scenarios and view results.
The configuration of the sandbox is defined by the baseline creator (i.e. scenario engineer) and the scenario user cannot change the configuration. The current implementation of the Scenario Sandbox supports the following functionality:
• A single sandbox configuration can be defined within a baseline model.
• Up to three input scenario slots can be adjusted by the stakeholder. Only series slots are supported.
• Slider controls are available to adjust the values of each of the three input scenario slots. Supported transformations from the baseline series values are as follows:
– Scaling: Multiplying by a factor
– Offsetting: Adding a positive or negative term specified in the display units for the slot
• The adjusted (scaled or offset) scenario values are automatically clipped at these minimum and maximum, if they are defined.
• Plotting of scenario output slots is shown in a plot panel within the sandbox. For a single selected slot among a set of scenario output slots, the plot panel shows the baseline series plus the generated scenario outputs for one or more selected scenarios.
Figure 8.1 shows a sample completed sandbox.
Figure 8.1
Use the Create Sandbox button in the Scenario Manager (available only in non-baseline models) to create a sandbox.
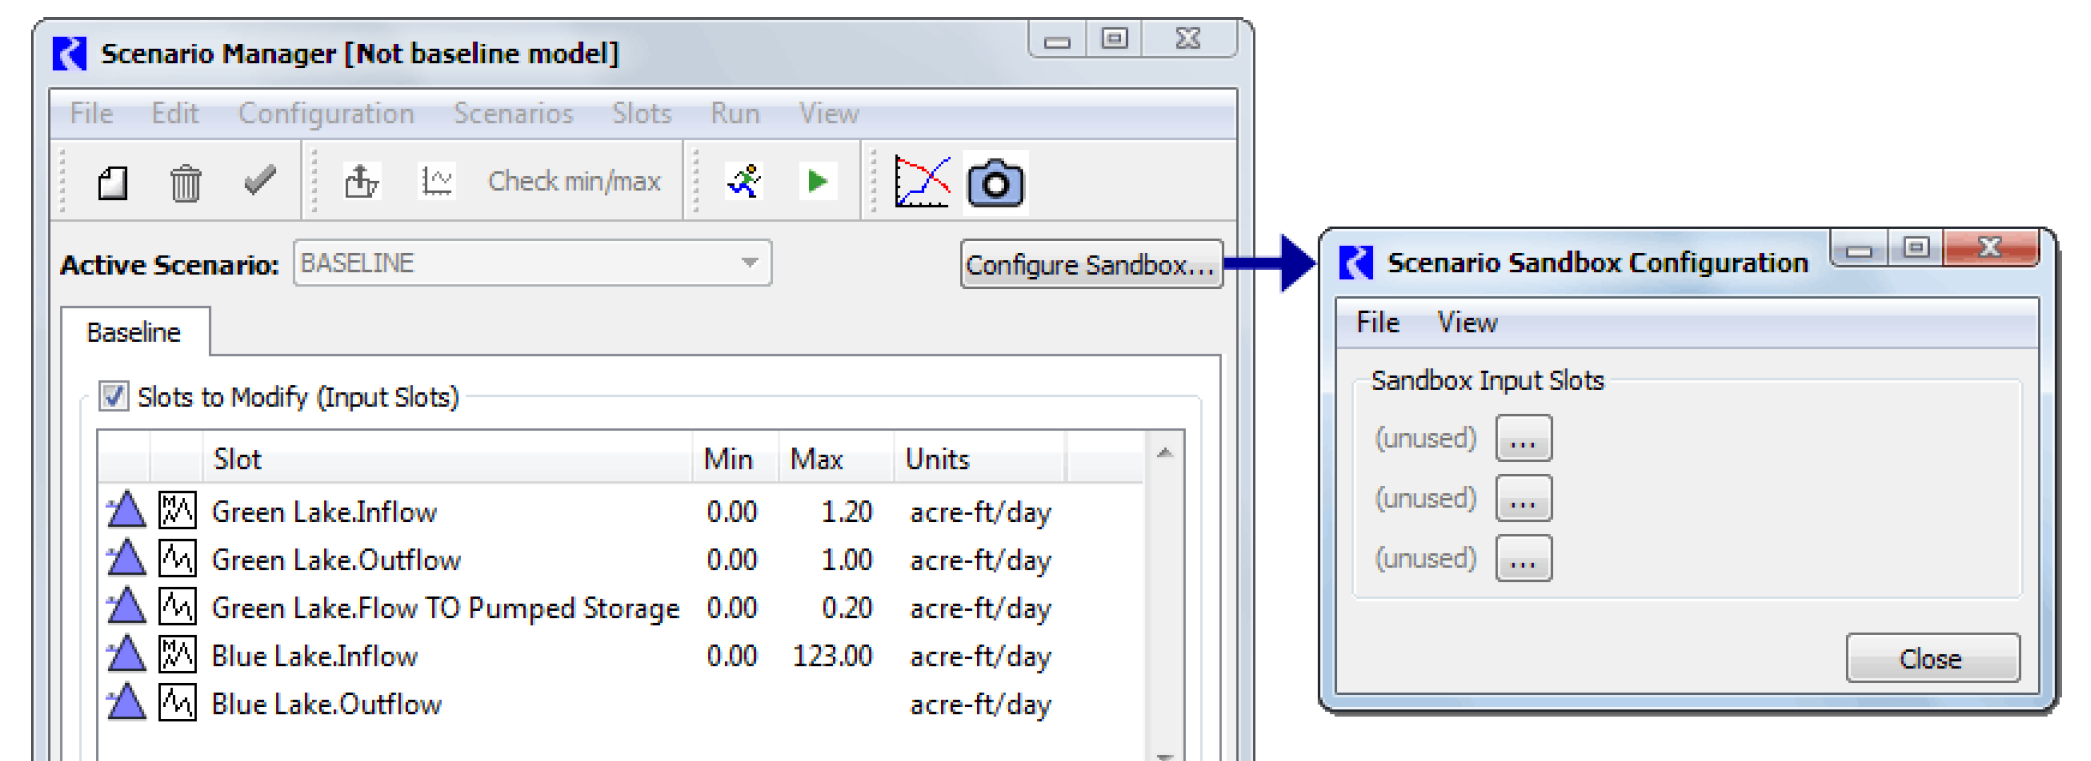
Configure the Scenario Sandbox by selecting up to three scenario input slots to be adjusted by the stakeholder in the sandbox. The configuration for each of these three slots consists of the following:
• Adjustment Mode. Whether the slot values are adjustable by scaling (multiplying by a factor) or by offsetting (increasing by a negative or positive amount).
• Limits for the adjustment parameters. These correspond to extreme ends of a slider control. The manner in which these limits are defined is devised such that the slider's mid-point represent no change.
– For scaling factor values, an upper limit (greater than 1.0) is specified; the lower limit will be the reciprocal of the upper limit.
– For offset term values, a positive upper limit is specified; the lower limit will be the negative of the upper limit.
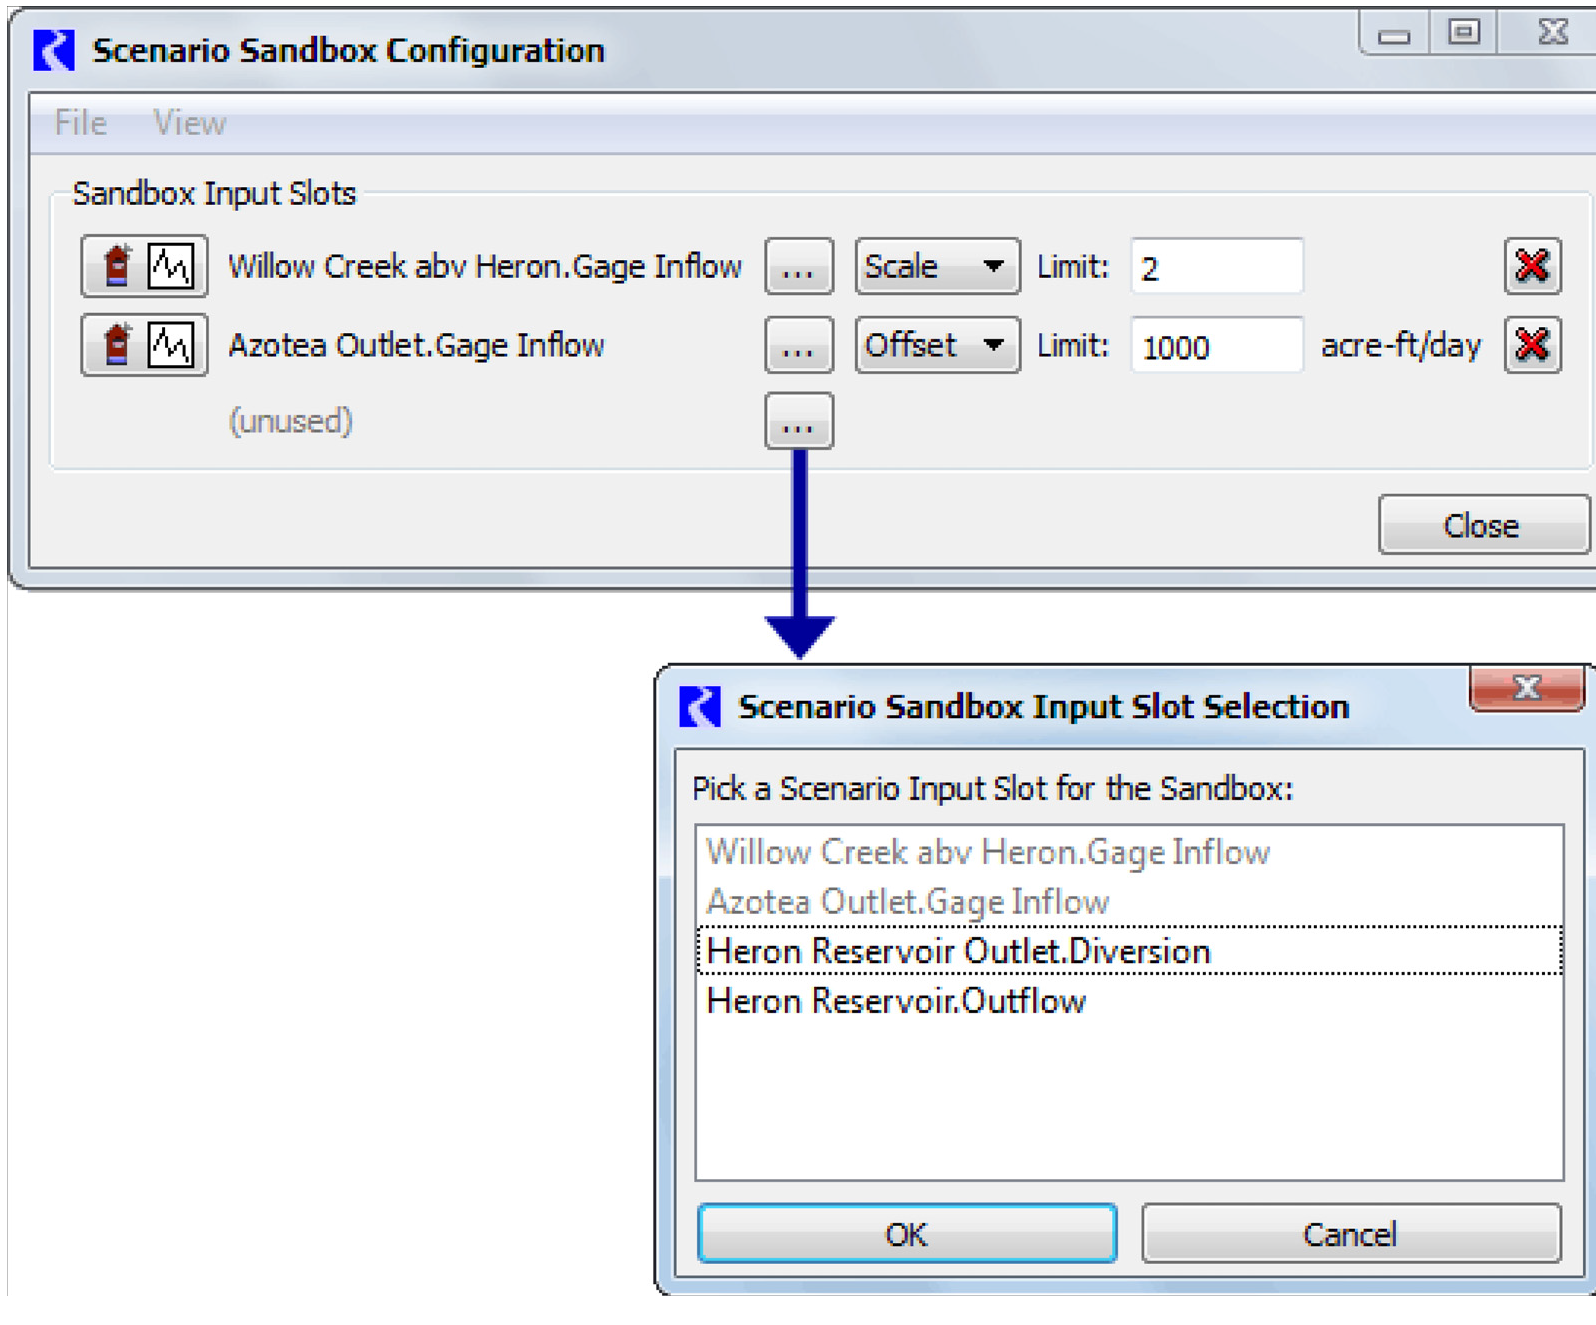
Note: When a scenario input slot has been included in a sandbox configuration, its values are no longer directly editable, e.g. in its Open Slot dialog or an SCT. (Such slots’ values will be “read-only” in those dialogs). This is necessary because the values of such a scenario input slot are computed using a linear function on its corresponding baseline slot. However, for individual scenarios within the RiverWare session, the sandbox adjustments can be disabled so that all Scenario Input Slots can be modified in the conventional way.
Run
After configuring the Scenario Manager and the Scenario Sandbox, it is critical that you run the model. This generates the BASELINE output and a new snapshot object is created. These are the data against which all scenario results are compared.
Note: To reiterate, run the model.
Save as Baseline
When you are finished with the configuration, save the entire RiverWare model as a baseline model. This will preserve the baseline scenario slots in the Scenario Manager and ensure that other users are not able to modify the model further, unless they specifically resave the baseline model as non-baseline.
• To save the model as a baseline model, select File, then Save As Baseline from the main RiverWare menu bar. This will preserve the scenario slot list and all configurations in the Scenario Manager.
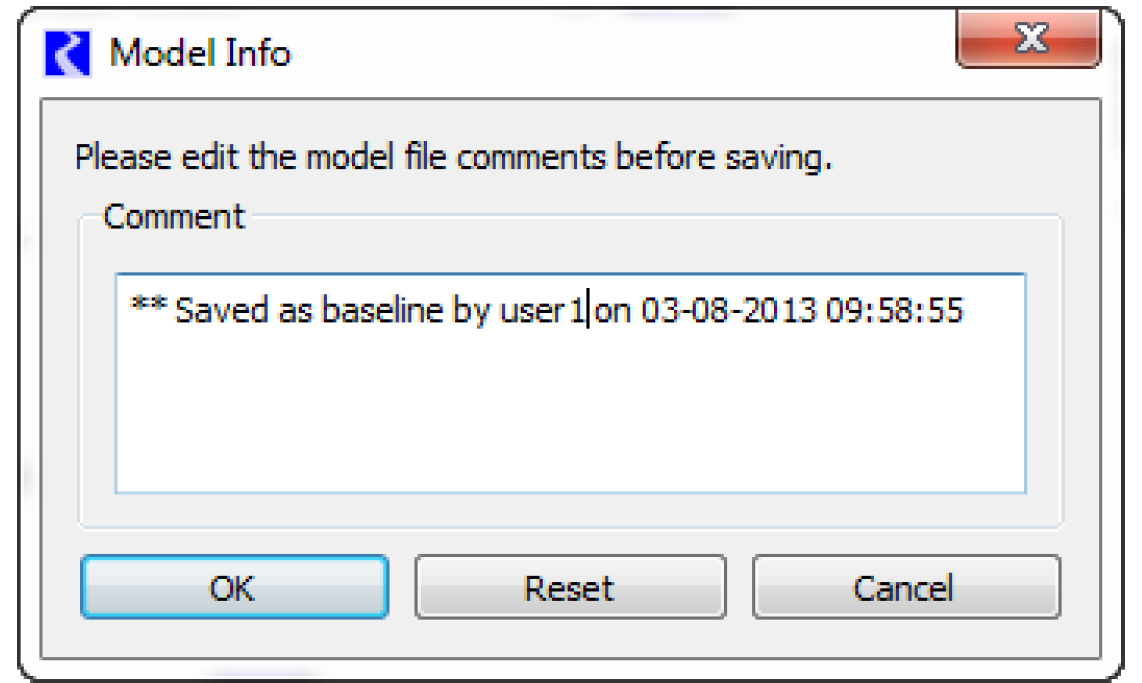
To help document the baseline model, you will be prompted with the Model File Info dialog. A comment about the date, time, and username saving the model as a baseline is added to the end of the comment by default. This comment field can be freely edited by the user before saving the model as a baseline.
Once the model has been saved as a baseline model, “[Scenario: BASELINE]” will appear next to the model name in the main RiverWare workspace. The Scenario Manager will also indicate that the model has been saved as a baseline model.
You can now distribute the model to stakeholder scenario users.
Revised: 07/05/2022