
Object Attributes
Object Attributes are user defined Object meta data that allow you to define an Attribute for one or more types of objects. You then define values and assign those value to specific objects. For example, you might have 300 water users in your system. With this functionality, you can define, for example, a “Use” attribute and a “Jurisdiction” attribute. Then you can specify for each water user, its Use, i.e. Municipal, Industrial, or Agricultural, and its Jurisdiction, i.e. “Local”, “State”, “Federal”, etc. Each Attribute and Value is user defined and customized, both the text that you use and which objects types and specific objects to which they apply.
You can use attributes and values in user defined RPL expression and data analysis. For example, you could write an expression that sums up all diversions that represent the Municipal, Local uses. Or compute all depletions by a particular State.
Following is a bulleted list of features of attributes:
• There can be many attributes defined in a model, each has one or more possible values. A particular object can have zero or more attributes, but for each attribute, only ONE value is possible.
• An Attribute can be specific to one or more classes of objects (reach, water user, storage reservoir) including all objects.
• Attributes and values are strings.
• Attributes and Values are defined in the Attribute Manager.
• Values can be assigned from either the Edit Attributes on Objects or the Open Object dialog.
• Attributes and values are displayed on the Open Object dialog.
• Attributes and values accessible from RPL.
• The Selector dialogs have a filter to assist with selecting objects: Has Attribute Value.
• You can export/import the attributes and values from one RiverWare model to another.
This document discusses the Object Attribute Manager and Edit Attributes on Objects dialogs.
Object Attributes Manager
The Object Attributes Manager is accessible from each Open Object dialog and from the Workspace, then Objects, then Object Attributes Manager menu. The purpose of this dialog is creating, deleting, and otherwise managing attributes and their values. The function of applying values to multiple objects is provided by the Edit Attributes on Objects dialog; see Edit Attributes on Objects for details.
Define Attributes and Values
The Object Attributes Manager is used to define attributes and their legal values. There is no limit to the number of attributes or number of values for a given attribute.
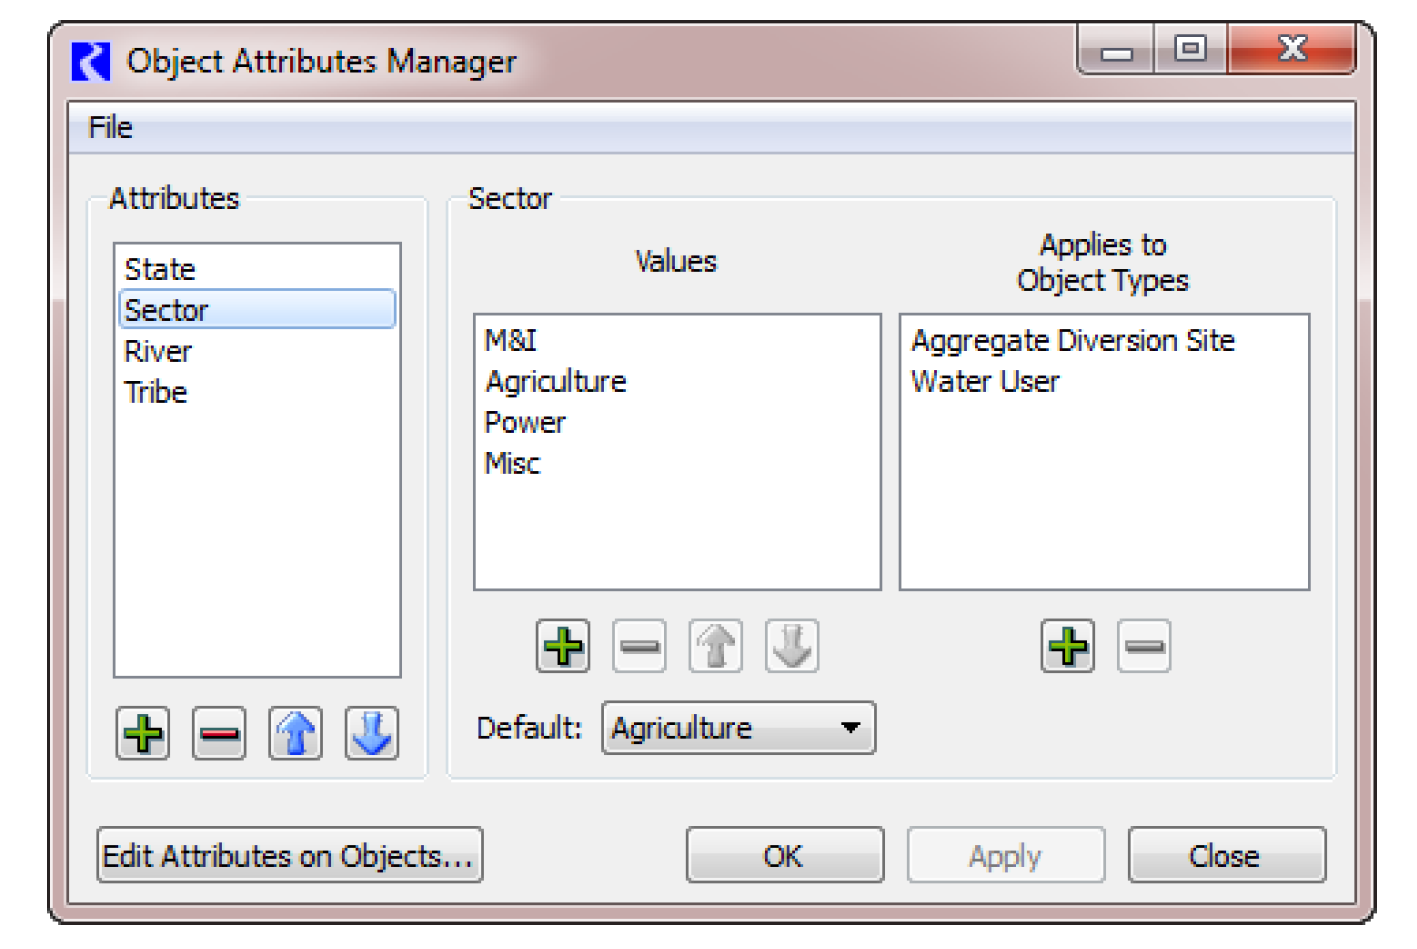
The dialog has three main areas as described right to left.
• Attributes. Add or delete an attribute using + and - buttons. Rename by double-clicking the name. Move the selected items up or down within the list with the arrow buttons.
• Values. Define the legal values for each attribute. For the selected attribute, the center list shows the legal values. Add or delete a value using + and - buttons. Rename by double-clicking the name. Move the selected items up or down within the list with the arrow buttons. The Default menu is used to specify the default value for new objects or the first time you apply the attribute to a set of objects. There is no automatic or predefined NULL or NONE value. You must create this if desired. The empty string is not allowed as a value.
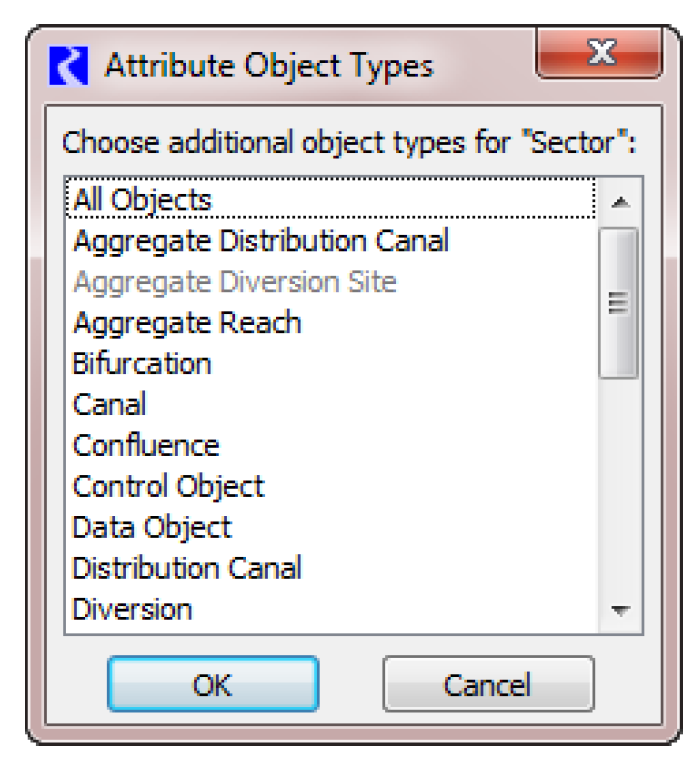
• Applies to Object Types. For the selected Attribute, add or remove the object types to which this attribute applies using the + and - buttons. Object Types are always listed in alphabetical order. The first one is All Objects.
Additionally, if any of the selected set of values (to be removed) are currently used on any objects, a warning message will be displayed indicating which values are used and the number of objects using them.
Right-click context menus allow you to add and delete functions, as well as copy and paste (for text to and from the system clipboard).
Import and Export Attributes and Values
Sometimes, you may wish to move attributes and values from one model to another. Use the Import and Export features on the Object Attributes Manager.
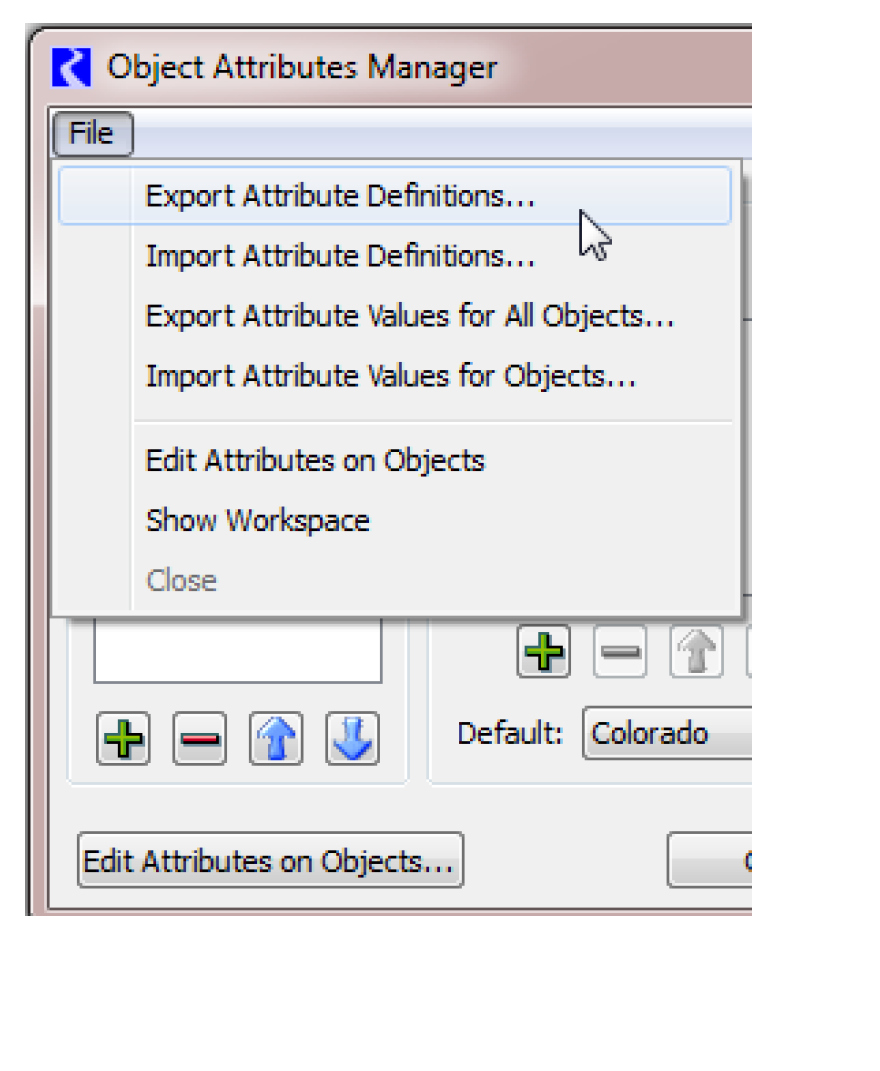
The following is a description of the actions in the File menu for importing and exporting.
• Export Attribute Definitions. Export only the attribute definitions including the Attributes, legal values, and the possible objects types on which they can be used.
• Import Attribute Definitions. Import the attribute definitions that were exported.
• Export Attribute Values for All Objects/ Export the Attribute values specified on each object. For example, this would export that LakeA has the value Colorado for the State attribute.
• Import Attribute Values for Objects. Import the attribute values that were exported.
To copy all attributes and values from one model to another model that has no attributes defined, you would need to export both the definitions and values. Then in the new model, import the definitions first and then the values.
Edit Attributes on Objects
The Edit Attributes on Objects dialog displays the attributes and value for a selection of objects, and supports applying new values to all or some of those objects. Figure 5.18 illustrates the tool.
Figure 5.18
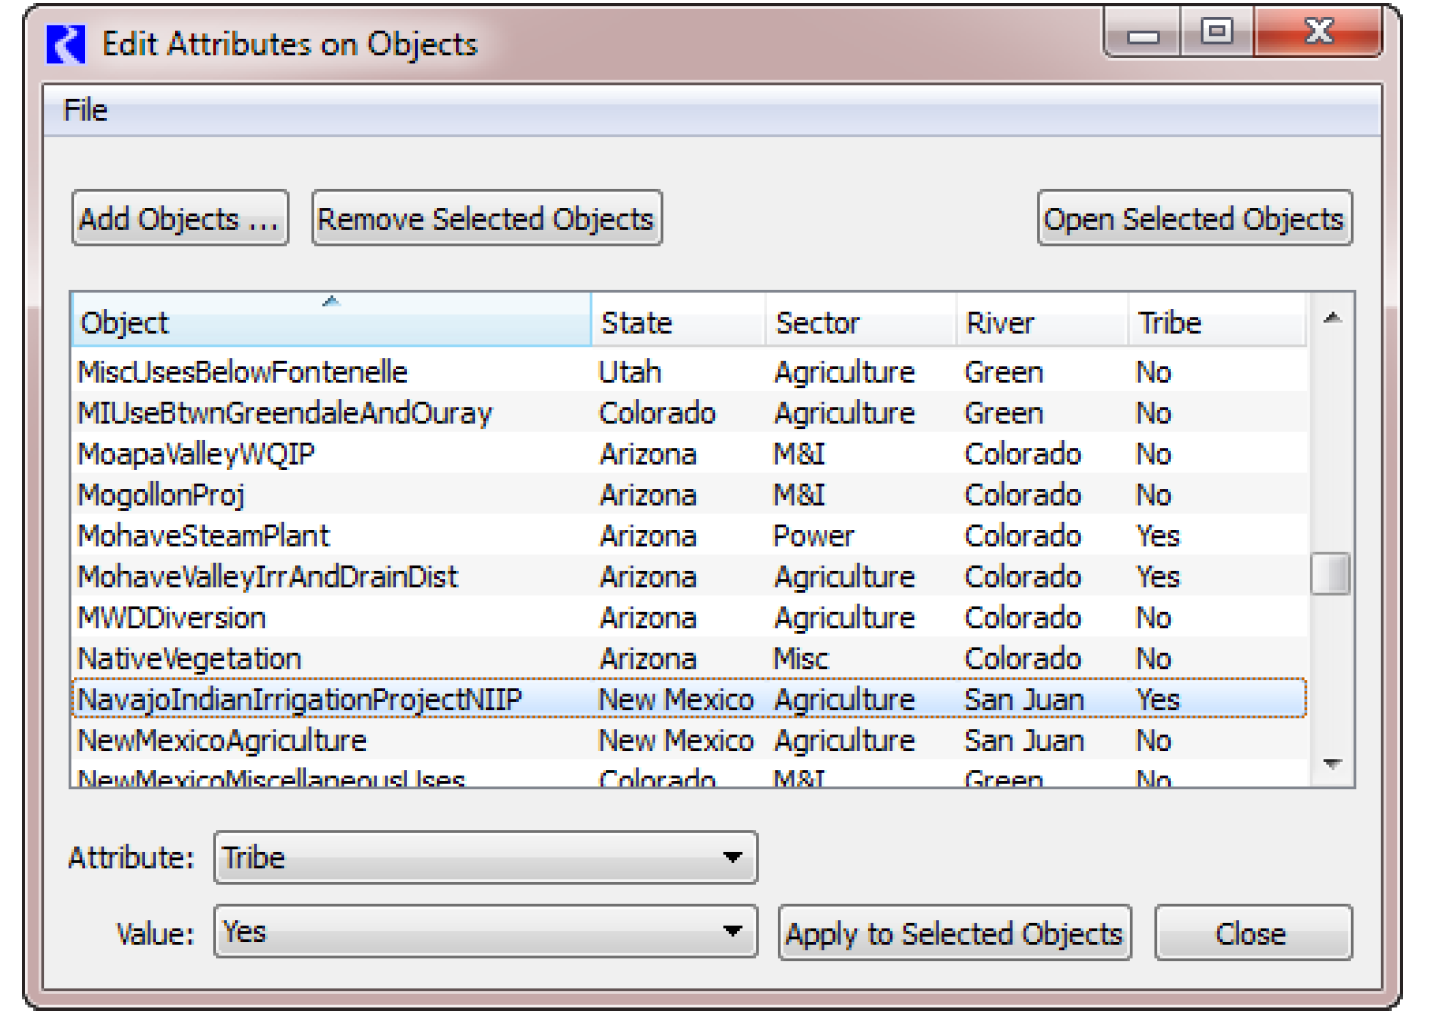
The following features are supported:
• Add objects to the list of objects by selecting the Add Objects button. Use the selector filter Has Attribute Value to find objects that already have the desired Attribute/Values. See Selecting Objects for details.
• Each object is added as a row in the table.
• Remove the selected objects in the list by selecting the Remove Selected Objects button.
• Use the Open Selected Objects button to open the selected set of objects to their Attributes tab.
• Each column represents an attribute defined in the model. The values are then shown on each row. If an attribute does not apply to a selected object, the cell is blank.
• Columns are sortable and rearrange-able.
• Use the right-click context menu to copy a list of objects, attributes, values to the system clipboard.
To change the value of a particular attribute for one or more objects shown in the dialog,
1. Highlight/select the desired objects.
2. Select an Attribute and the new Value from the menus at the bottom of the dialog. In this example screenshot, we have chosen the State attribute and want to assign the specified objects to have the Colorado Value.
3. Select Apply to Selected Objects to apply that value to those selected objects.
The change is immediate.

Accessing Attributes from RPL
To access Attribute and Value information from RPL, use the following predefined functions:
• ObjectAttributeValue - Get the value (as a string) for the specified Attribute on the specified Object. See ObjectAttributeValue in RiverWare Policy Language (RPL).
• ObjectHasAttributeValue - Return a Boolean of whether the particular Object has the specified Attribute Value. See ObjectHasAttributeValue in RiverWare Policy Language (RPL).
• ObjectsFromAttributeValue - Get a list of all of the objects that have the specified value for the specified attribute. See ObjectsFromAttributeValue in RiverWare Policy Language (RPL).
Revised: 06/04/2022