
Supplies Manager
The Supplies Manager dialog box displays supplies within the model. The main part of the Supplies Manager dialog box presents one Supply per row.
The Supplies Manager is accessed from the Accounting, then Supplies Manager menu on the main RiverWare workspace. There is only one Supplies Manager for a given model. Figure 3.19 shows the dialog with key areas highlighted.
Figure 3.19
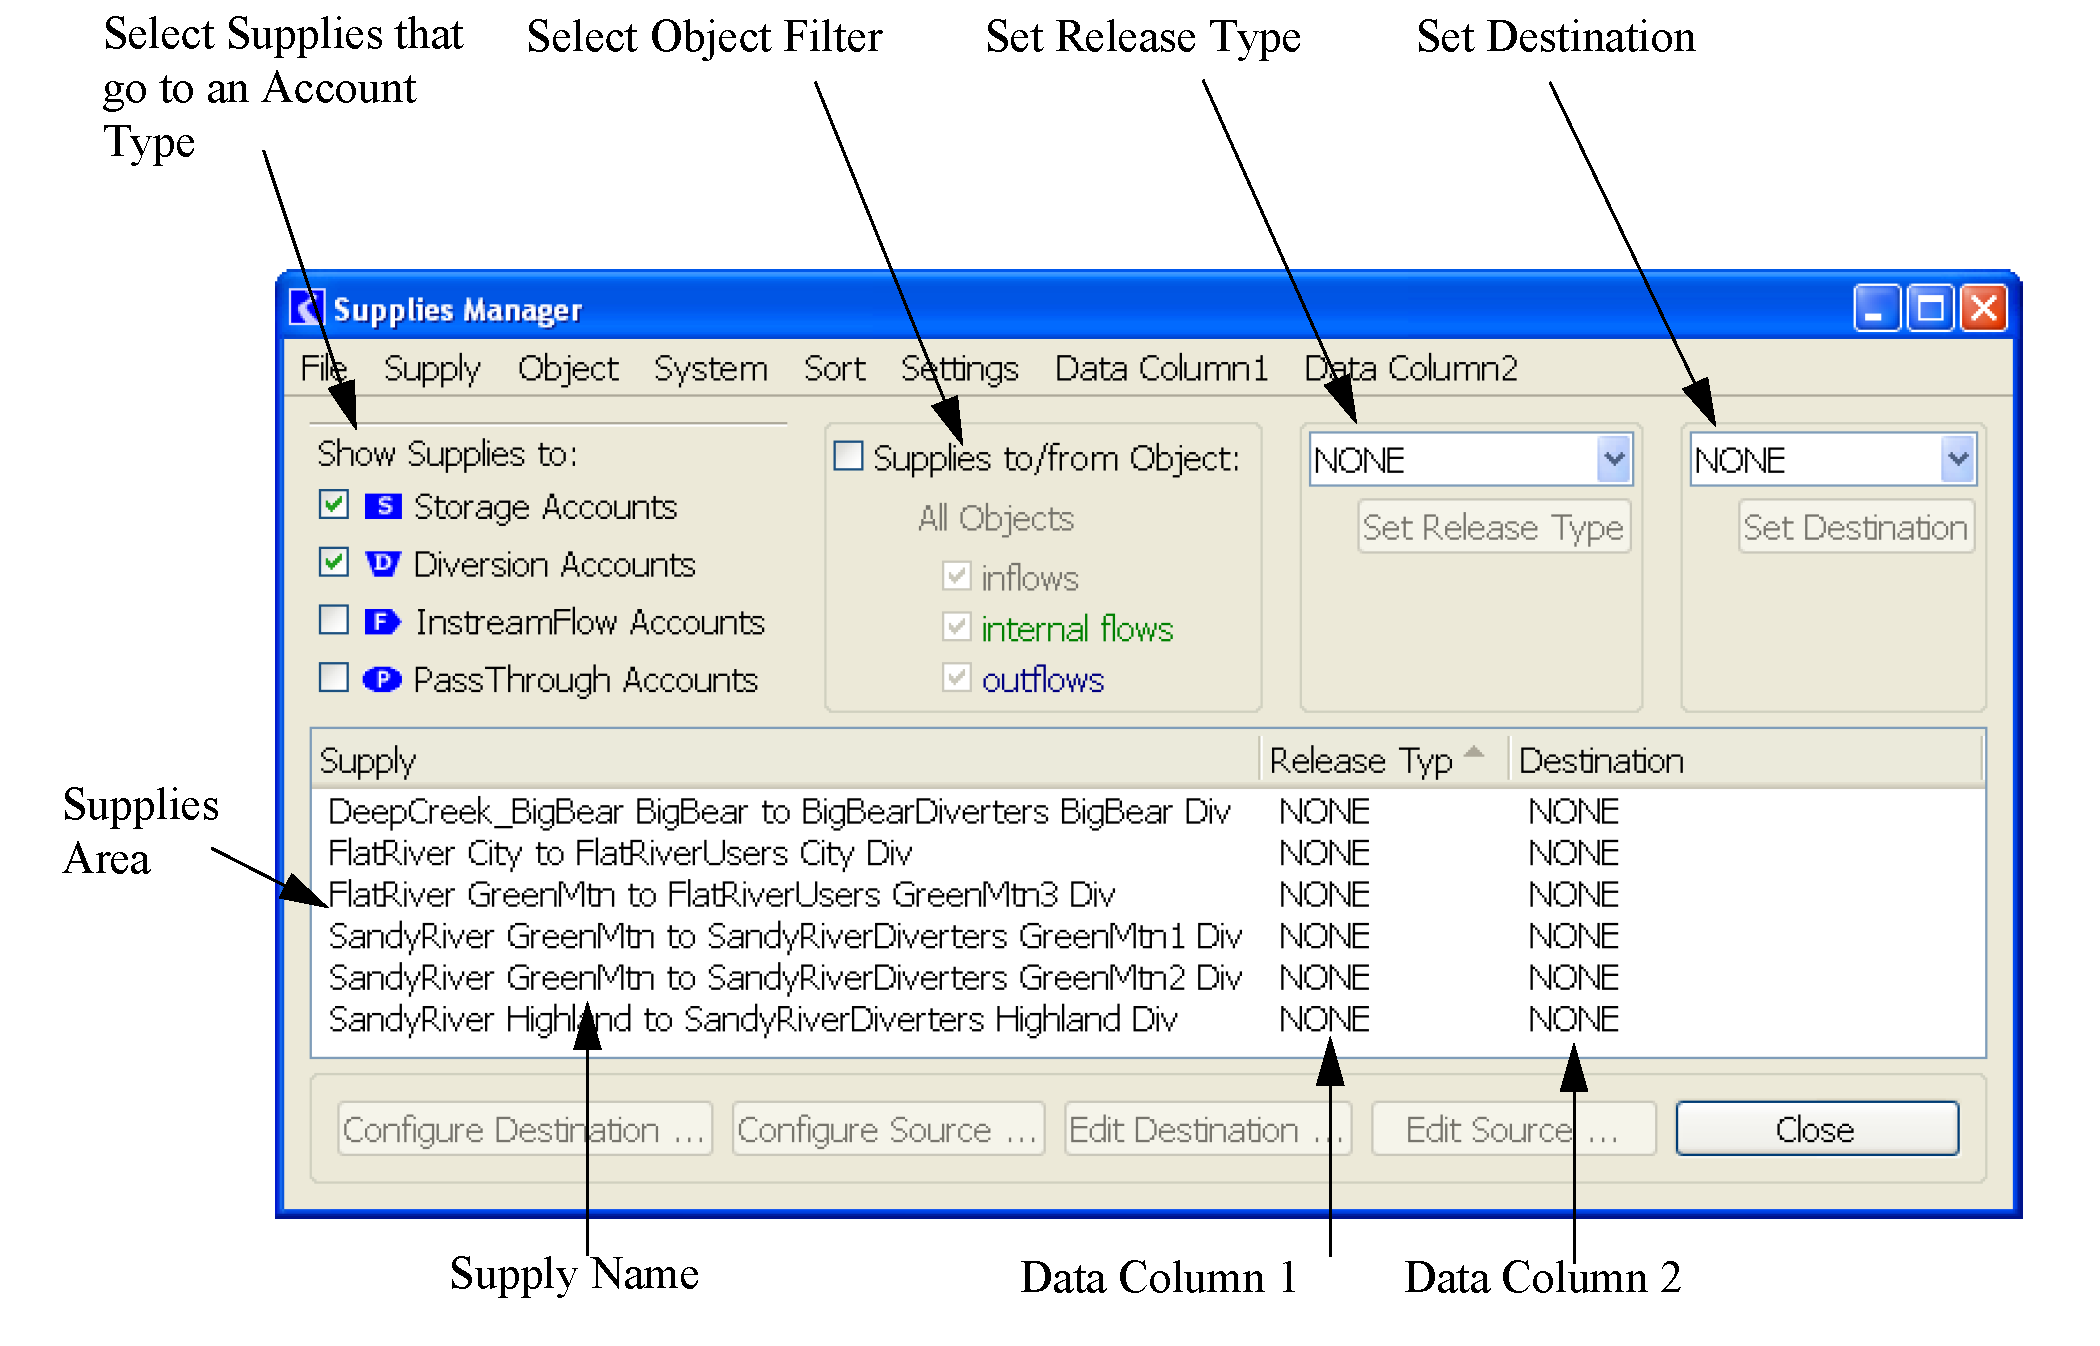
Supplies Manager Columns
The Supplies Manager List presents one Supply per row, with three columns of information about the Supplies. The width of the columns can be adjusted by dragging the line separating the column headings.
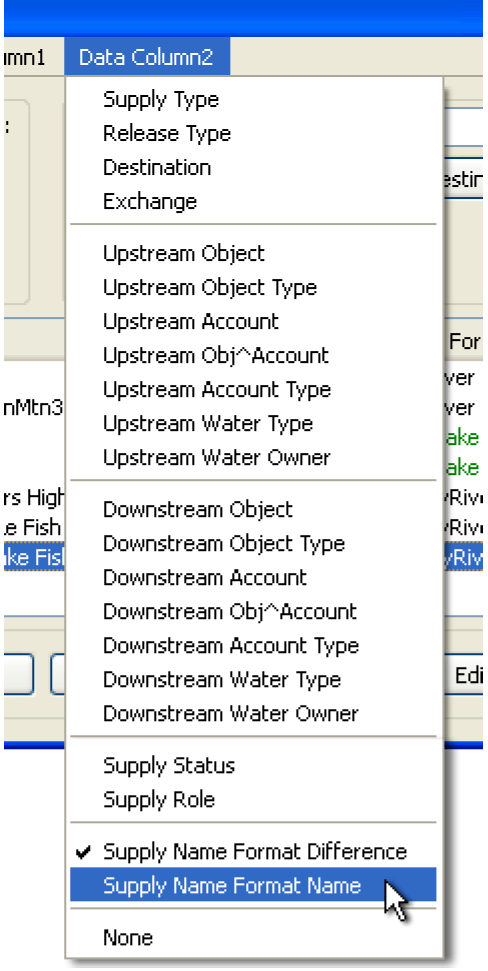
The first of the three columns is always the Supply Name (which can be quite long). The content of the other two columns is Configurable by the user through the Data Column1 and Data Column2 menu bar items. Within these two menus is the option to select the data display, as shown in Figure 3.20. The selected variable has a check mark next to it.
Figure 3.20
Color Annotation of Supply Rows
Supplies that represent internal transfers between two accounts on the same object are shown in Green text. Supplies between Accounts on different Objects which are not directly physically linked (technically, this is an error condition) are shown in Red text. Currently, if the upstream and downstream Objects are linked together on any slots, the Supply is shown to be normal (not Red), even if the slots used for the link(s) don’t make sense. (It is the user’s responsibility to insure that the links make sense).
When a particular Object is selected for filtering (see next section), Supplies that represent Outflows from that object are shown in Blue text. (Supplies which represent Inflows to the Object are shown in Black).
Supply Filtering
The Supplies Manager can show all the Supplies in a model or a filtered subset of Supplies. The user can filter supplies by the type of the destination account. This is done using the Show Supplies to toggle area and selecting one or more of the following types: Storage, passthrough, instream flow, and/or diversion accounts.
Also, the Supply Manager can present only the Supplies related to a particular simulation object. If filtering by an object is specified by checking the Supplies to/from Object, the list of Supplies shown is limited to those which represent inflows (into the object) and/or outflows (from the object) and/or internal flow (between two accounts on the object). The internal flow toggle and the outflows toggle are shown respectively in Green and Blue to correspond to the color annotation of supply rows.
The first time the user toggles on the Supplies to/from Object, an object selector dialog appears. The user can also select Object, then Select from the menu bar to select a different object using the selector.
Note: Only one object can be selected. When the Supplies to/from Object is off, the object label reads “All Objects” and the inflows/internal flows/outflows toggles are turned on, but the controls are dimmed.
Supply Sorting
The supply rows can be sorted based on any of the column headings. The user can sort the rows by any of the three displayed columns by selecting the column header. Also, the user can sort the supply rows by selecting any of the criteria under the Sort menu item. This can be useful because the user can sort by a variable but it is not necessary to show that variable as one of the data columns. In general, these values are self explanatory, except for Supply Status. The sort by Supply Status operation sorts the Supply Rows in three or four groups, and by supply name within each of those groups:
• Supplies between Accounts on distinct Objects which do not have a direct physical link are shown in Red. See Color Annotation of Supply Rows for additional information.
• Supplies between Accounts on the same object are shown in Green.
• Other supplies between accounts on distinct objects (having a direct physical link) are shown in Black or Blue. Only if a particular object is selected for filtering, the remaining supplies are separated into two groups:
– Supplies which represent inflows into the object (shown in Black).
– Supplies which represent outflows from the object (shown in Blue).
Operations on Selected Supplies
Double-clicking a row in the Supply Manager will open the Edit Supply dialog for that Supply. This dialog, shown in Figure 3.21, can be used to change an individual supply’s name, release type or destination.
Figure 3.21
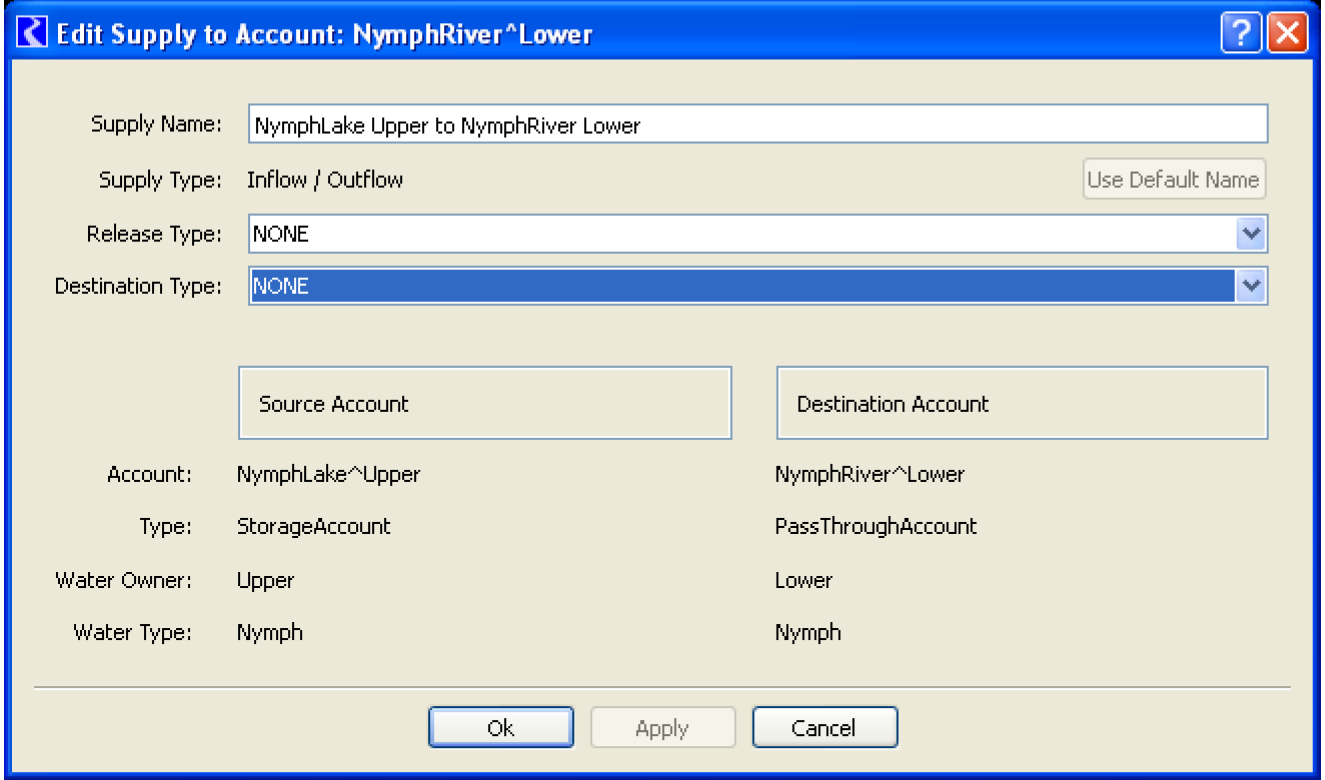
Selecting a row in the supplies area causes it to be selected. Multiple-row selection are also supported for operations that can apply to more than one supply, e.g. deletion or setting the Release Type or Destination.
Set Release Type
This button is used to set the Release Type of one or more supplies. Highlight the desired supply(ies), select a Release Type from the pull down menu, and select Set Release Type to make the change.
Set Destination
This button is used to set the Destination of one or more supplies. Highlight the desired supplies, select a Destination from the pull down menu, and select Set Destination to make the change.
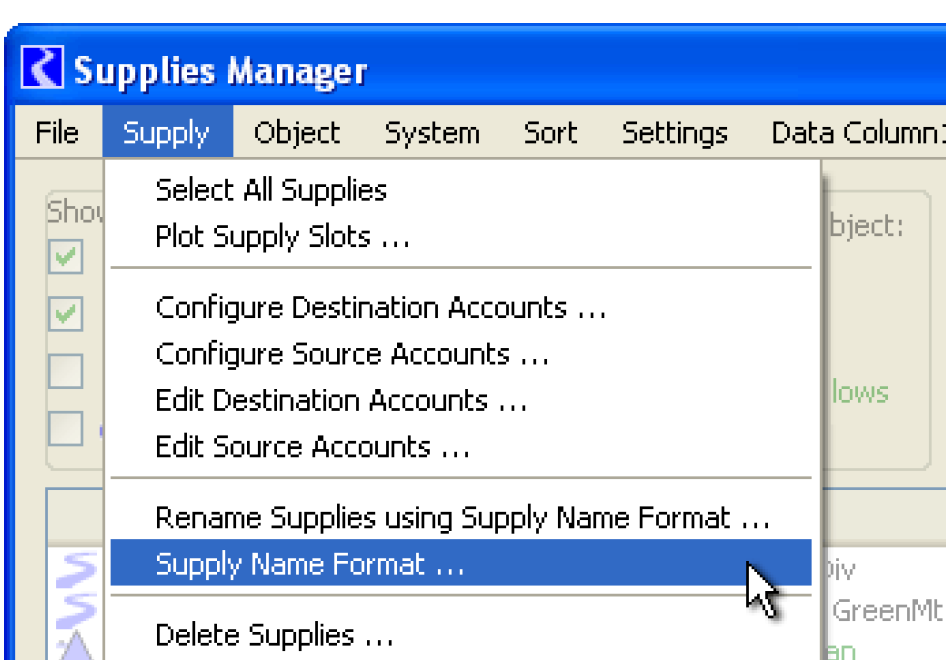
Several operations are also available as buttons in a row along the bottom of the dialog box. Currently these are the Configure Destination, Configure Source, Edit Destination, Edit Source and Close (dialog box) operations. The operations on Supplies are accessed from the Supply menu. They are defined as follows:
• Select All Supplies. Select all supplies listed in the dialog.
• Plot Supply Slot. Creates a plot of the selected supplies.
• Configure Destination Account. Open up the Open Account dialog for the supply’s destination (downstream) account, for each of the selected supplies.
• Configure Source Account. Opens the Open Account dialog for the supply’s source (upstream) account for each of the selected supplies.
• Edit Destination Account. Opens the account editor for the supply’s destination (downstream) account for each of the selected supplies.
• Edit Source Account. Opens the account editor for the supply’s source (upstream) account for each of the selected supplies.
• Supply Name Format. Configured the format to use for supply names. See Supply Name Format for additional information.
• Rename Supplies using Supply Name Format. Rename the selected existing supplies using the currently defined Supply Name Format. Use the menu Edit Supply Name Format to configure the format. Then choose this menu to apply that format. A confirmation dialog box is shown when the user selects the Rename Supplies using Supply Name Format operation.
• Delete Supply. Deletes the selected supplies; the user is given a dialog box to confirm the action.
Operations on Objects
From the Object menu, operations are available on the destination object of the selected supply. The user can bring up either the Object Viewer (or Open Object) dialog box (in the Accounts tab) or the Object Account Summary dialog box (showing the sums of series slots across a set of Accounts on a single object) for the selected object. In addition, accounting system dialogs can be accessed using the System menu including: Account System Configuration, Exchange Manager, Accounts Manager, and Object-level User-defined Accounting Method set editor.
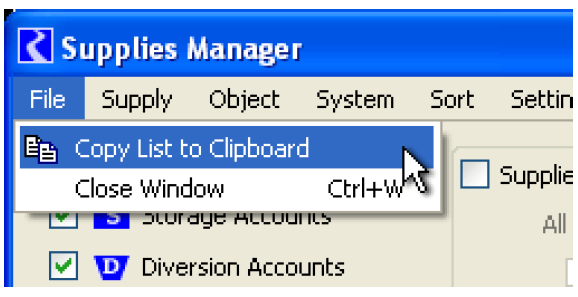
Copy List to Clipboard
The menu operation File, then Copy List to Clipboard copies a tabular string representation of the currently displayed Supply list to the System Clipboard. Fields are delimited with Tab characters, Lines are delimited with New Line characters -- suitable for importing into a spreadsheet, such as Microsoft Excel.

Revised: 06/04/2022