
Tour of a RPL Set
In RPL sets there is an upper-level construct specific to the RPL set. For example, in a ruleset, a rule is the construct; in an object level accounting method set, a method is the upper level construct. In this document, a block refers to the upper level construct for each of these sets and will be used in all descriptions. Table 2.2 lists the block for each type of set and the term used for the numbering.
RPL Set | Upper-level Block | Block Numbering | |
|---|---|---|---|
 | Expression Slot Set | N/A | N/A |
 | Global Function Set | N/A | N/A |
 | Initialization Rules Set | Rule | Index |
 | Iterative MRM Ruleset | Rule | Index |
 | Object Level Accounting Method Set | Method | Index |
 | Optimization Goal Set | Goal | Priority |
 | RBS Ruleset | Rule | Priority |
Note: Expression Slot and Global Function Sets do not have the paradigm of a block. For Expression Slot Sets, the analogous upper level construct is the expression slot itself. Global Function Sets do not have the concept of a block as they contain only global utility groups and functions.
This remainder of this section describes the components of a RPL set when using the RPL set editor.
RPL Set Elements
A RPL set includes the following general elements:
• Policy Groups: Policy groups are containers for blocks and functions. The functions within a policy group are available only to blocks and functions within that policy group.
• Utility Groups: Utility groups are containers for functions. The functions within a utility group are available to blocks and functions within any policy group.
• Blocks: Blocks (Rules/Goals/Methods) are prioritized expressions of policy which assign slots and/or generate diagnostic messages.
• Functions: Functions are subroutines called from blocks or other functions, which evaluate to a value in one of the expression data types.
• Report Groups: Report groups provide an organizational grouping of related RPL and workspace objects.
• Report Items: Report items refer to blocks or functions in the RPL set or to workspace objects.
Table 2.3 shows all the RPL elements and their icons. The icons are shown in grey, but each set has its own color that is used for the letter.
Letter | Icon | Item | Letter | Icon | Item | |
|---|---|---|---|---|---|---|
G |  | Goal | R |  | Rule | |
M |  | Method | S |  | Set | |
P |  | Policy Group | = |  | Statement | |
 | Report Group | F |  | User-defined Function | ||
 | Report Item | U |  | Utility Group |
Predefined functions use the F icon but always have the light blue color.

RPL Set Editor View
Information about a RPL set is displayed in the RPL Set Editor dialog. Each policy group, utility group, block, and function is represented in the RPL Set Editor on a different line. Figure 2.5 illustrates.
Figure 2.5
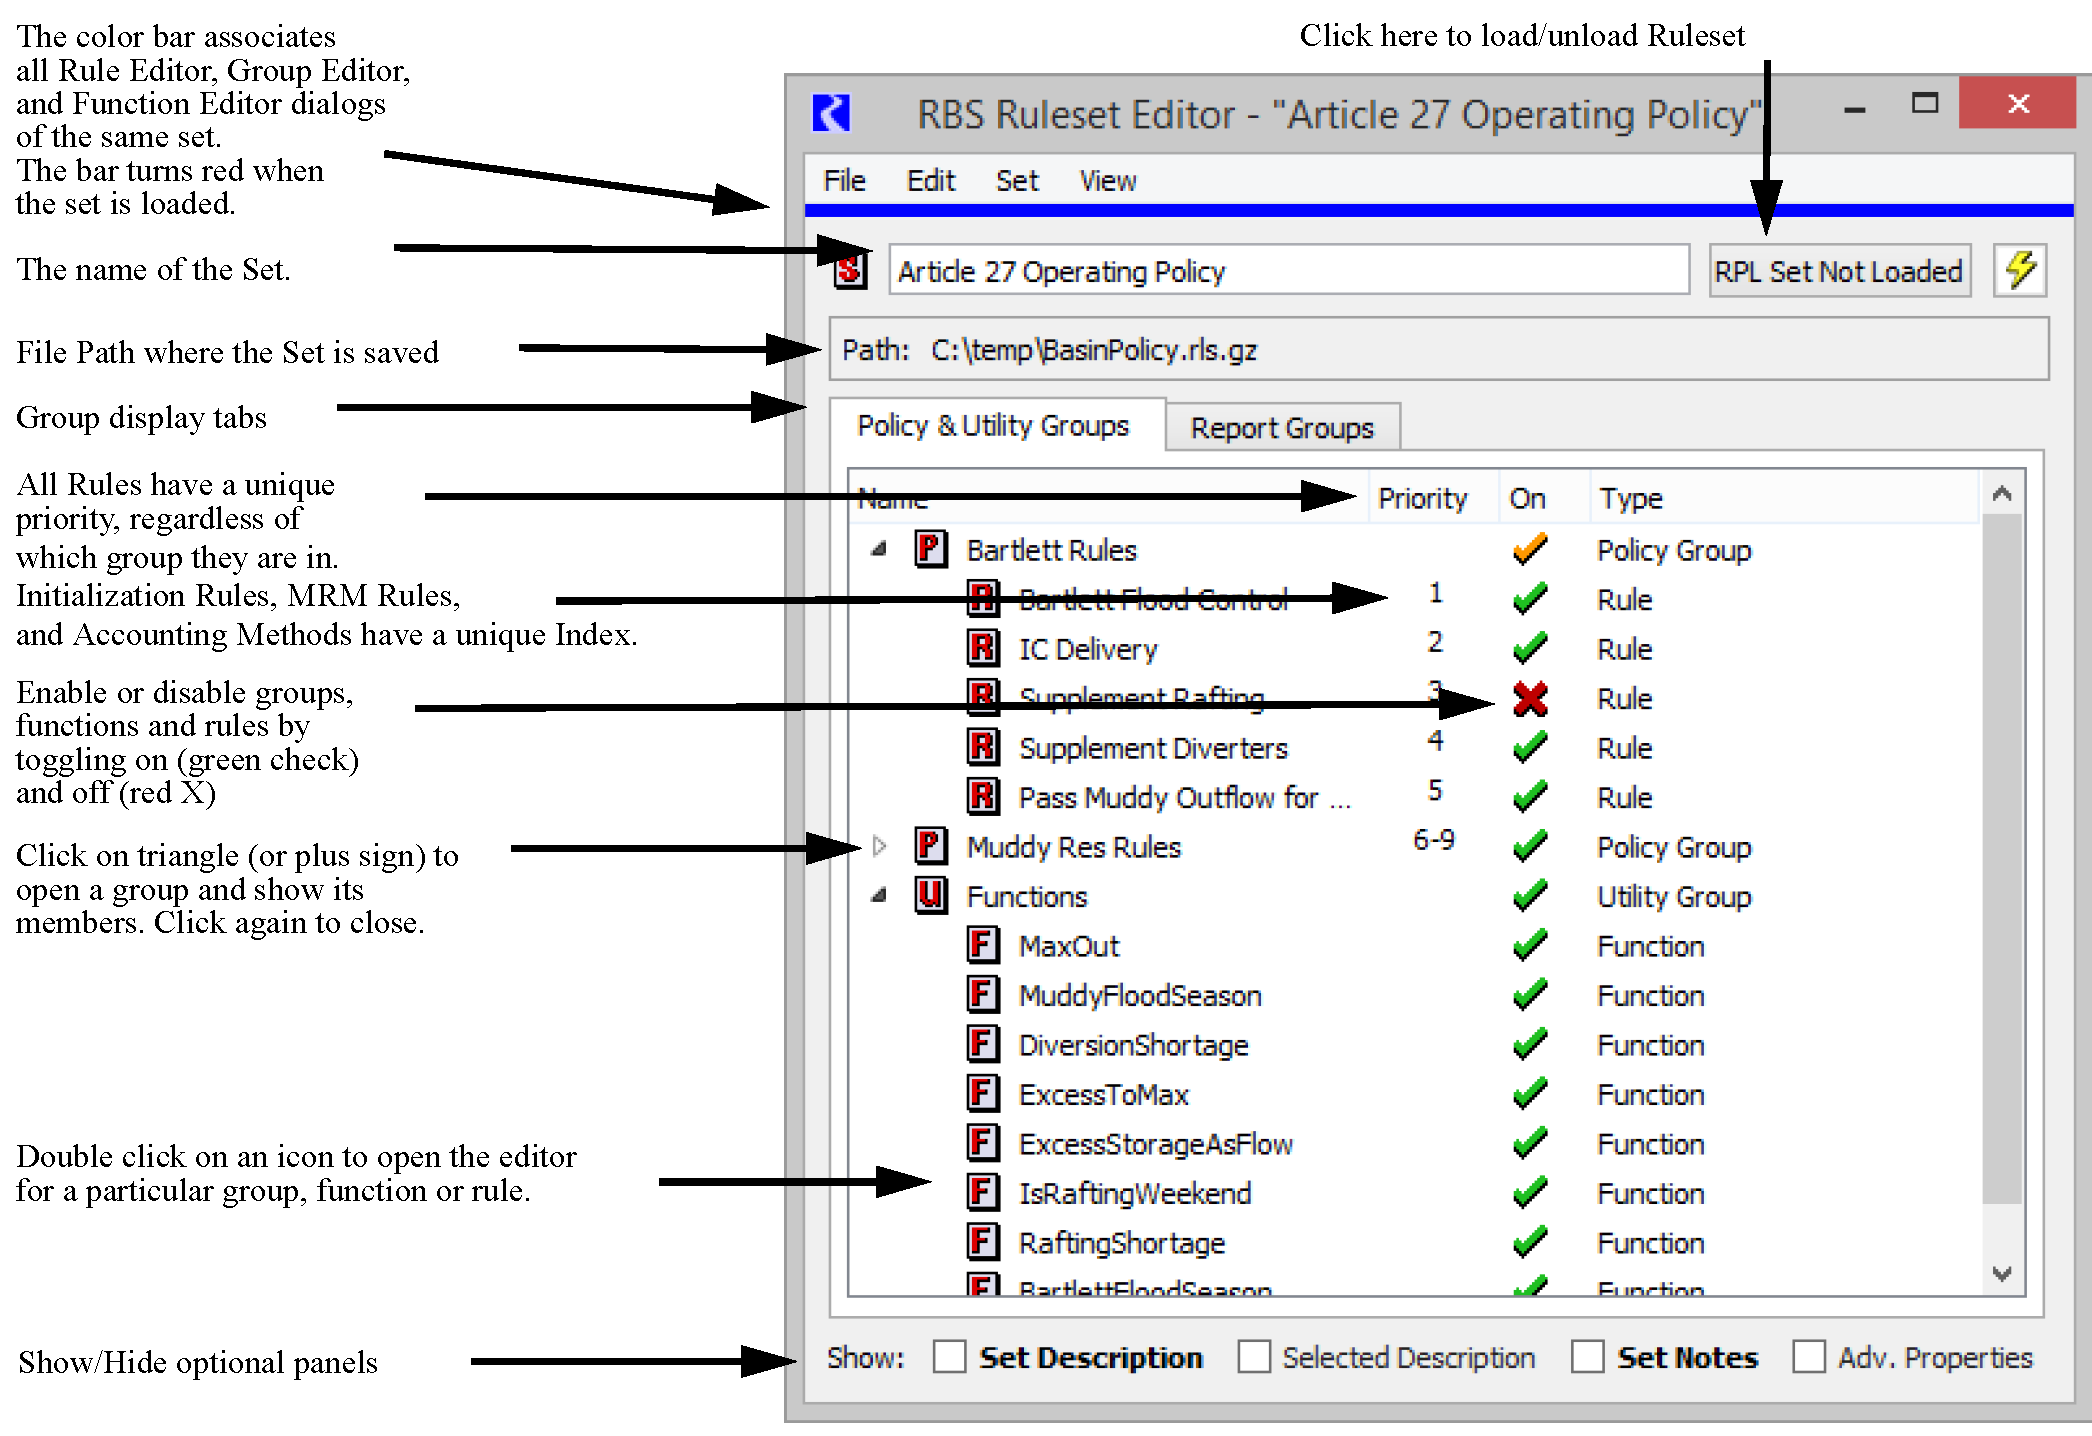
Each line includes the following information:
• Name: The name column contains an icon representing the type of the element and its name. All elements are assigned a default name when created.
• Priority: A priority is shown to the right of an element name, when appropriate. Policy groups, utility groups, and functions do not have priorities but policy groups display the range of priorities of its member rules. Priorities number indicates the relative importance of the block.
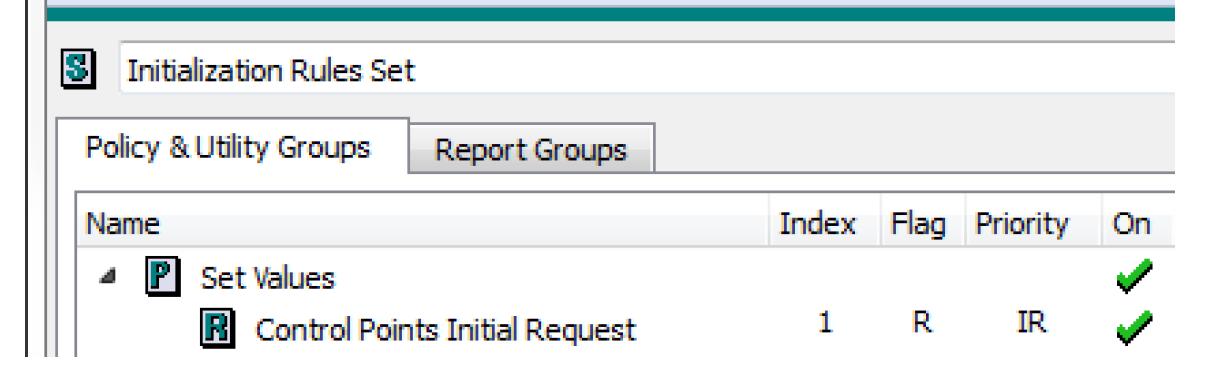
• Index: For Initialization Rulesets, Object Level Accounting Method Sets, and MRM Rulesets, the Index column is shown. The priority column may not be shown. Rules or methods have a unique Index which is how the rules and methods are referenced.
• Flags: Initialization Rules allow you to specify the flag that is set. For initialization Rulesets, a Flags column is shown.
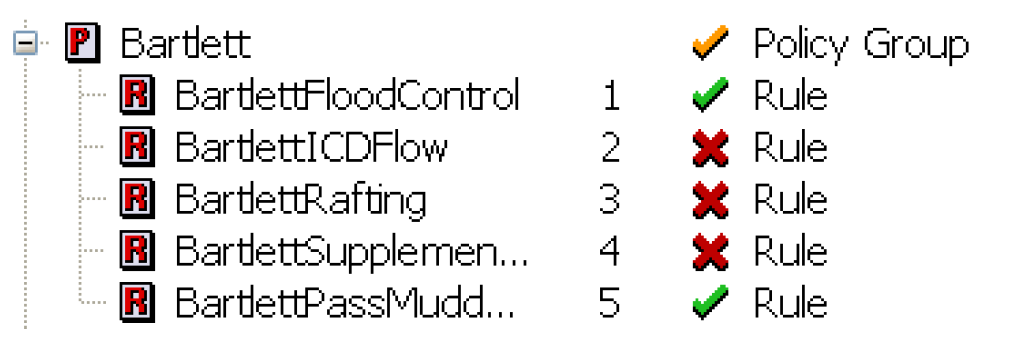
• On/Off Status: All elements may be turned on or off independently by selecting the green check mark or red X in their line, unless mouse editing has been disabled. If mouse editing has been disabled, a block or function can be enabled or disabled by right-clicking. This will bring up a menu to enable or disable the element. A green check mark indicates that an element is enabled. A red X indicates that an element has been disabled. An element that is disabled cannot be used during the model run. Disabling a policy group or utility group disables all of the blocks and functions within that group. Selecting a group’s red X now enables the entire group without making any changes. This prevents you from inadvertently changing the status of an item in a group that is disabled, only to find that it is now different when the entire group is re-enabled. If all items in a group are disabled (red X), then the entire group is considered disabled and the group will also have a red X. If you select the group’s red X, a warning message will appear to indicate that at least one item in the group should be enabled. An orange check mark on a policy or utility groups specifies that one or more items in that group is disabled, as shown in Figure 2.6. As before, you can select the orange check to disable the entire group. Selecting it again, restores the previous state thus showing an orange check.
Figure 2.6
• Type: The type of each item in a set is shown in the Type column.
There are several additional pieces of information that can optionally be shown from a RPL set as accessed from the View menu.
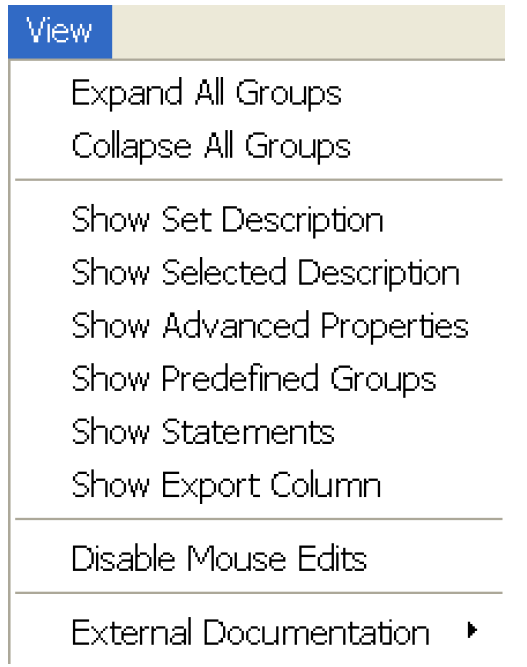
Expand or Collapse All Groups
A RPL set’s contents may be viewed with all groups expanded, some groups expanded, or all groups collapsed. Use one of the following methods to expand or collapse all groups simultaneously:
• Select View, then Expand All Groups or Collapse All Groups item in the RPL Set Editor menu bar.
• To expand or collapse a single group, select the triangle next to the group name.
Note: The following four items can be shown using the View menu or selecting the toggle in the Show: row. If there is an entry in these panels (or a non-default value) the text is bold. For example, in the following screenshot, the Set Description and Set Notes have a non-default entry.

Show RPL Set Description
A description of the RPL set may be typed into the RPL Set Description: text frame and saved in the RPL set file. The description may contain any combination of letters, numbers, spaces and punctuation, except double-quotes (“ ”). The area is opened and closed by toggling the View, then Show RPLSet Description in the menu bar or using the Set Description toggle at the bottom of the window.
Show Selected Description
A special expanded area of the RPL set is used to enter a description of any specific block. The area is opened and closed by toggling the View, then Show Selected Description in the menu bar of the RPL Set Editor dialog or using the Selected Description toggle at the bottom of the window. Select a block name to view the description of that specific block.
Show Set Notes
Notes about the RPL set may be typed into the Set Notes text frame and saved in the RPL set file. The Notes may contain any combination of letters, numbers, spaces and punctuation, except double-quotes (“ ”). The area is opened and closed by toggling the View, then Show Set Notes in the menu bar or using the Set Notes toggle at the bottom of the window. Notes are often used for commenting on development practices; they provide a place to annotate when/why/who changed the set.
Show Advanced Properties
The Advanced Properties are accessed from the View, then Show Advanced Properties menu or using the Adv. Properties toggle at the bottom of the window The Advanced Properties area has the following components.
• Agenda Order. Rulesets can be configured to execute in either ascending or descending Priority/(it called Index in Initialization Rulesets) order. Descending order executes the highest priority block first, then each of the lower priority blocks (1,2,3,...). Ascending order executes the lowest priority block first, then each of the higher priority blocks (...,3,2,1). Ascending Priority (...3,2,1) is the default selection and the recommended priority order. The agenda order is only applicable and shown for RBS rulesets, initialization rules, iterative MRM rulesets and optimization goal sets. Also, optimization goal sets always must execute in the 1,2,3... order and cannot be changed.
• Precision. The precision spinner determines the number of digits after the decimal which are displayed for numbers in blocks and functions. 8 is the default value. The displayed precision has no effect on the 17 significant figures of internal precision used for calculations.
Show Predefined Groups
In the View, then Show Predefined Groups menu, you can choose to show the groups for the predefined functions. When you also show Selected Description above, the documentation for that predefined function is shown in the description panel.
Show Statements
In the View, then Show Statements menu, you can choose to show statements (assign, print, etc) as another level in the RPL dialog tree-view. You can also change the name of statements once shown. To do this, right-selects that item to show the context-sensitive menu. Then, selecting Rename will open an inline name editor and you can enter a new name. In addition to the RPL Set view, this statement name will be shown in the RPL debugger and RPL Analysis Tool.
Show Export Columns
The View, then Show Export Column menu allows you to specify if the selected row should be exported. See Exporting and Importing RPL Sets for details on Import and Export of RPL sets.
Disable Mouse Edits
It is easy to rename a group, block or function, change the priority of a block, and turn a block on or off. To prevent accidental changing of a block priority or turning the block on or off in the Set Editor as a result of mouse clicks, select View, then Disable Mouse Edits. This will prevent editing with mouse clicks in the RPL Set Editor. To edit a block or group after mouse editing is disabled, double-click or right-click the block, function, or group name to bring up an editor dialog. We highly recommend disabling mouse editing to prevent accidental changes to a RPL set.
External Documentation
View, edit, or configure the external documentation; see RPL External Documentation for details.
Revised: 01/04/2021