
Printing and Exporting Plots
You can print or export plots to image files from both the Plot Page dialog and the Plot Page Editor in the same manner. You can print or export either individual plots or entire Plot Pages.
Print Preview
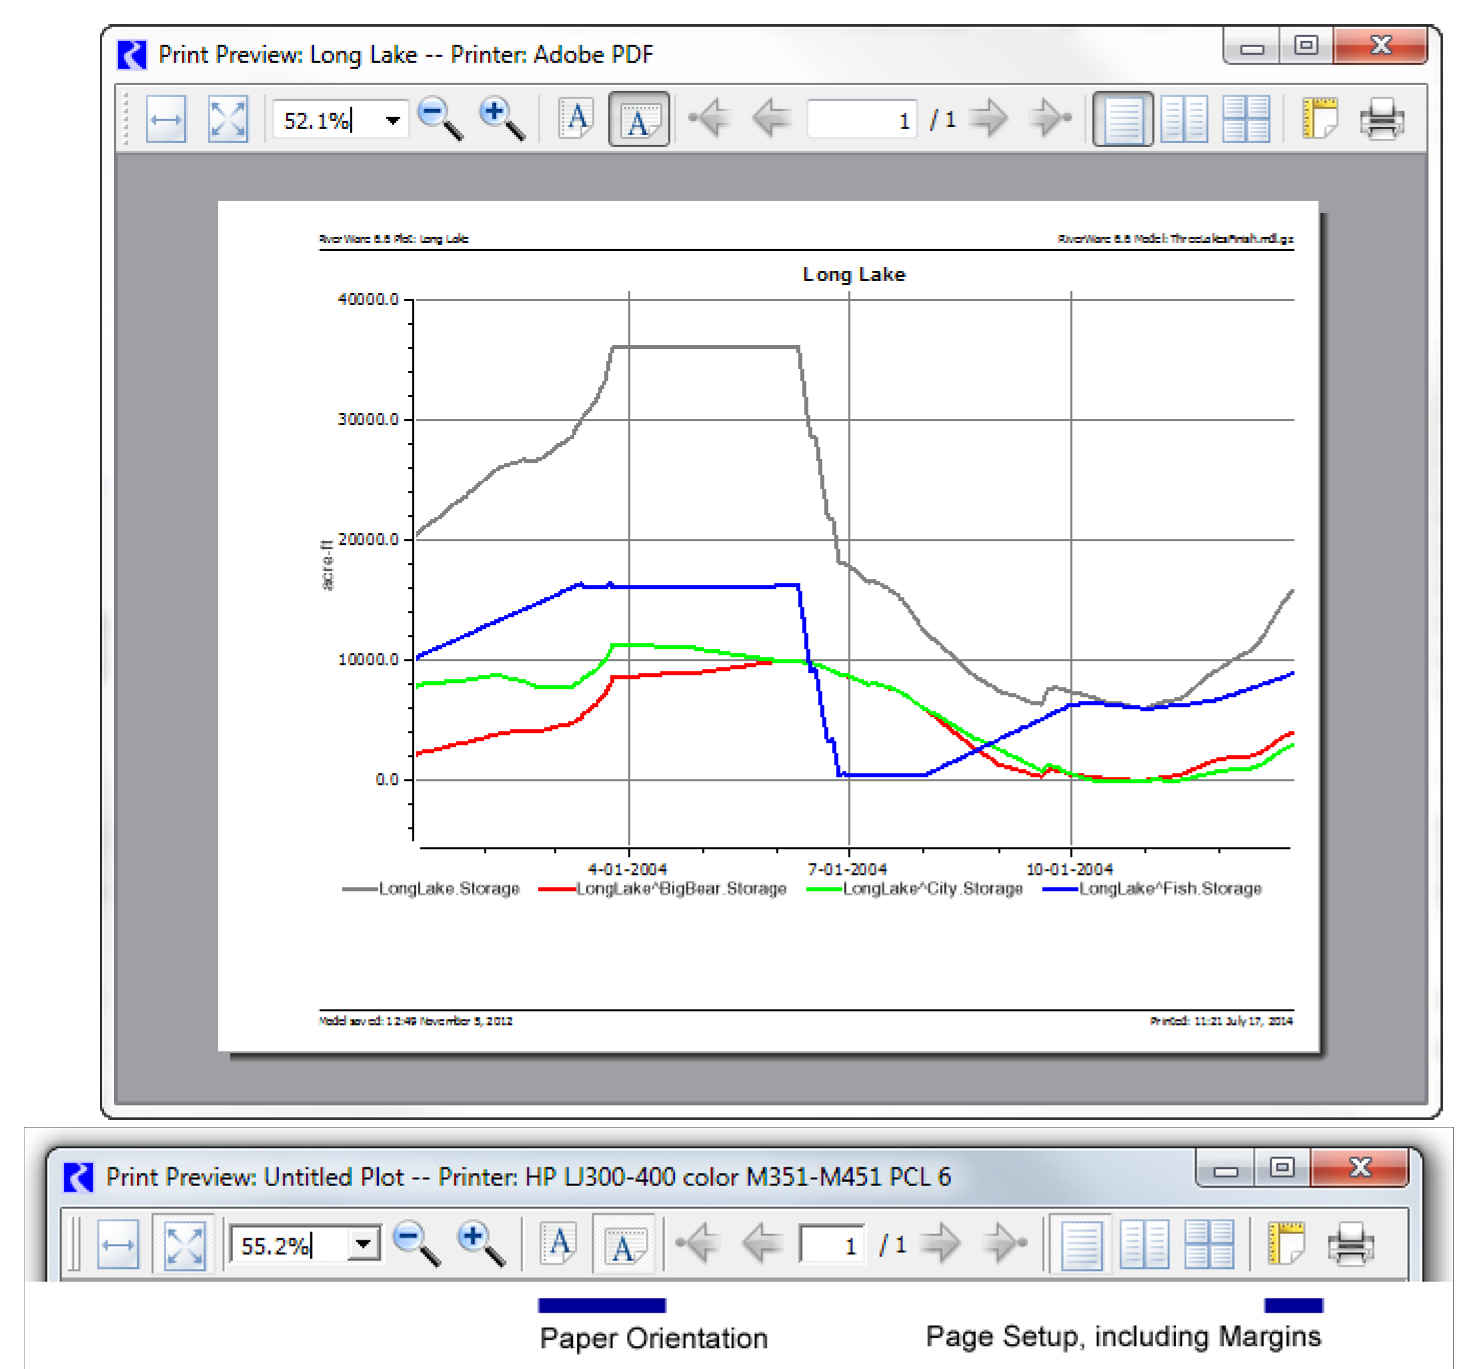
To preview a plot from either the Plot Page dialog or the Plot Page Editor, select File, then Print Preview, then All Plots. (or Selected Plots). This will preview a plot as it would appear using the specified printer. Selecting All Plots will show all plots on the Plot Page. Selecting Selected Plots will only show the single selected plot. You can change the printer by selecting File, then Print Preview, then Choose Printer. The print preview shows a preview of the plot, as shown in Figure 2.33.
Figure 2.33
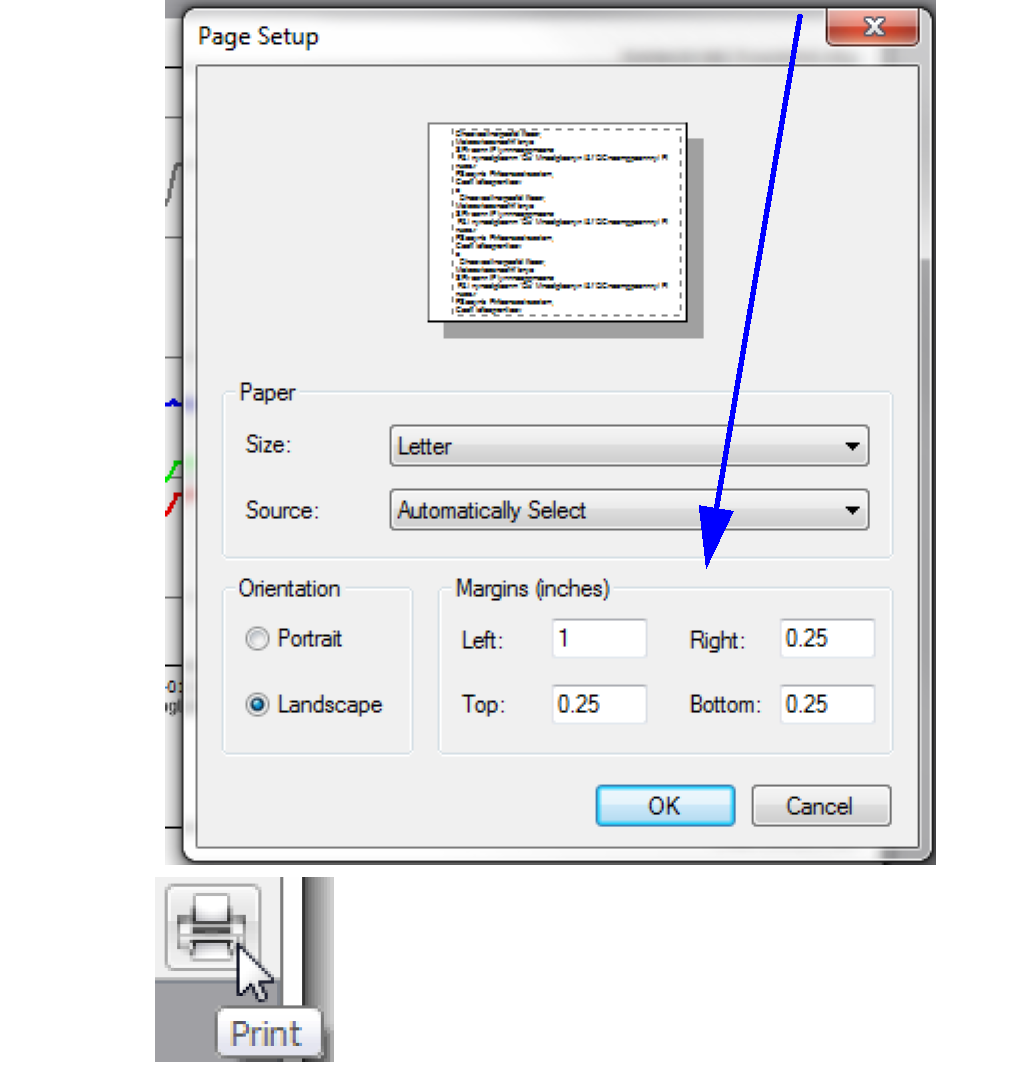
The following printer settings can be made within the Print Preview dialog.
• Paper Orientation (Portrait or landscape)
• Margins
This is the only place where print margins can be configured. The margin settings made in the Page Setup dialog will persist—including to subsequent RiverWare sessions—and apply to all printer use within RiverWare.
Note: The relative curve line thicknesses shown in the plot preview image may not exactly match that of the actual printed page.
Note: Printing from the Plot Print Preview dialog using its Print button does not apply the curve line thicknesses for printed output. When printing from the Plot Print Preview dialog, curves and markers will generally be too thin to clearly see. Select File, then Print, then All/Selected Plots to use the thickness adjustment. See Plot Page Settings for details.
Figure 2.34
Printing
Plots can be printed from the Plot Page dialog or the Plot Page Editor in the same manner. To print a single plot, either right-select the desired plot and select Print from the context menu, or select File, then Print, then Selected Plot. To print all plots select File, then Print, then All Plots. The Printer dialog lets you select the desired printer and host. It also offers such basic page layout configuration capabilities as color/grayscale prints, paper format and size, and the printing range.
Note: The widths of lines printed is based on the specified width and the Print Line Width Factor. See Plot Page Settings for details.
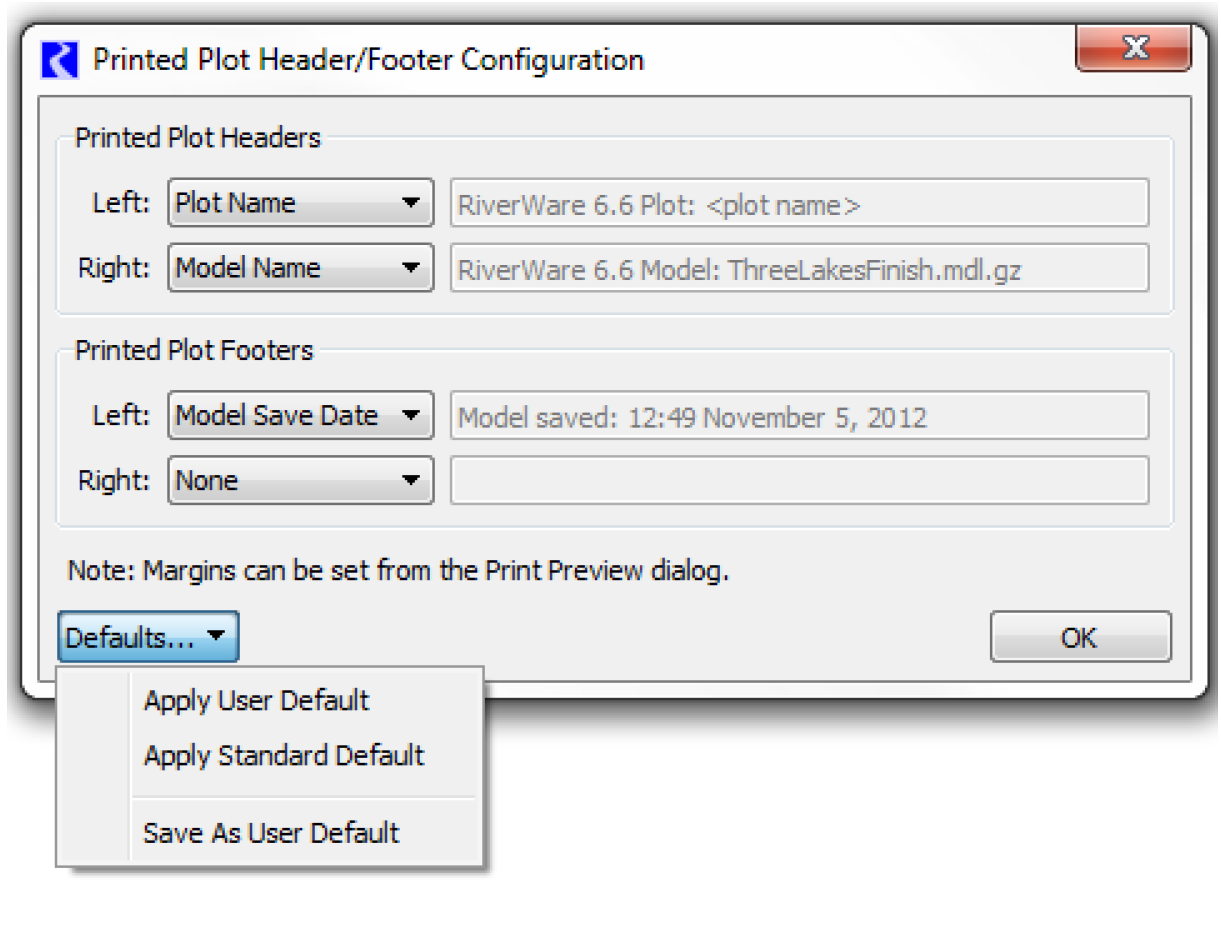
Also, you can define the headers and footers to be used on the printed plots. Select File, then Print, then Printed Header/Footer Configuration. In this dialog, you can specify the items to show for the Left and Right Headers and Footers. Choose from the available items or specify Custom and enter your own text.
Select Defaults to save the current settings as User Default (saved with your user settings). Apply your custom defaults or the standard defaults as desired to other plots. The header and footer configuration are saved with the Plot Page and thus can only be modified from the Plot Page Editor.
Copy Plot as an Image
Select Edit, then Copy Plot Image, then All/Selected Plots to copy all or selected plots as an image to the system clipboard. Then you can paste the image into a document or email. The size of the copied plot is taken directly from the size of the dialog on the screen in terms of pixels.
Exporting
To export a single plot, either right-select the desired plot and select Export Image from the context menu, or select File, then Export Image, then Selected Plot. To export all plots on the Plot Page, select File, then Export Image, then All Plots The resulting dialog allows you select the export image file extension, size, resolution, and destination. The available file type extensions are: *.bmp, *.jpeg, *.pbm, *.pgm, *.png, *.ppm, *.xbm or *.xpm.
Note: The image resolution affects only file formats that use compression. In general, you should use the highest resolution. Also, the Export Image dialog does not automatically append the file extension. When you type the target file name, you must assign the appropriate extension.
Revised: 01/04/2021