
User Interface
Subbasins
Subbasins are user-defined sets of objects that can be referenced by name. Subbasins are typically defined to represent connected parts of the basin network, such as “Reservoirs above Powell” or “Holston System.” The objects in the Subbasin can be referenced as a group in RPL sets including Expression Slots, Optimization Constraints, and Rules. The subbasin manager is used to create and edit subbasins.
Subbasin Manager
To open the Subbasin Manager dialog, select Workspace, then Edit Subbasins. The Subbasin Manager has the following tabs:
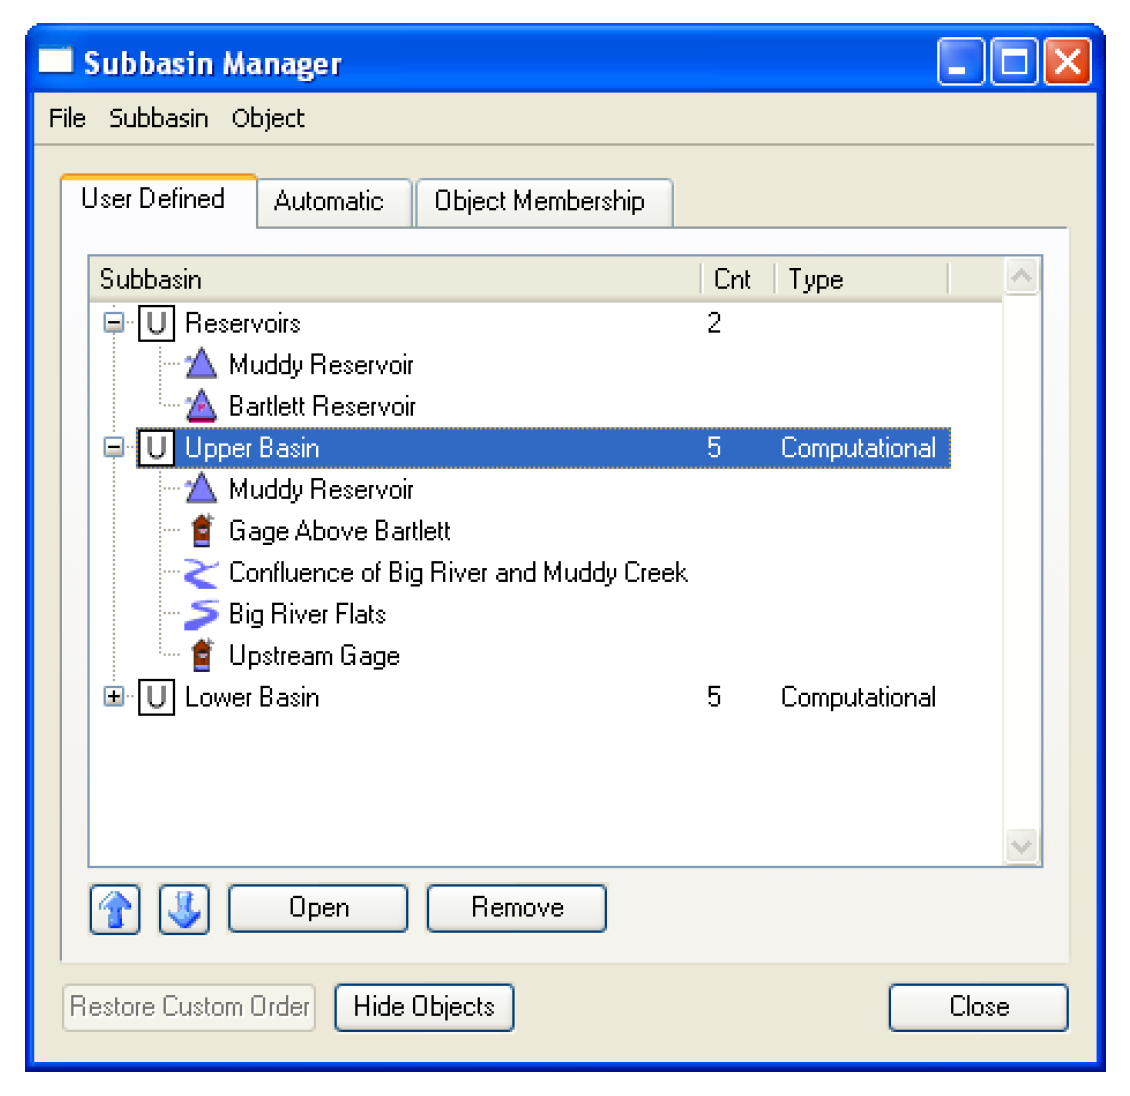
• User Defined. Allows the user to show/create/edit subbasins defined by the user. User Defined Subbasins are displayed with a “U” icon next to their name.
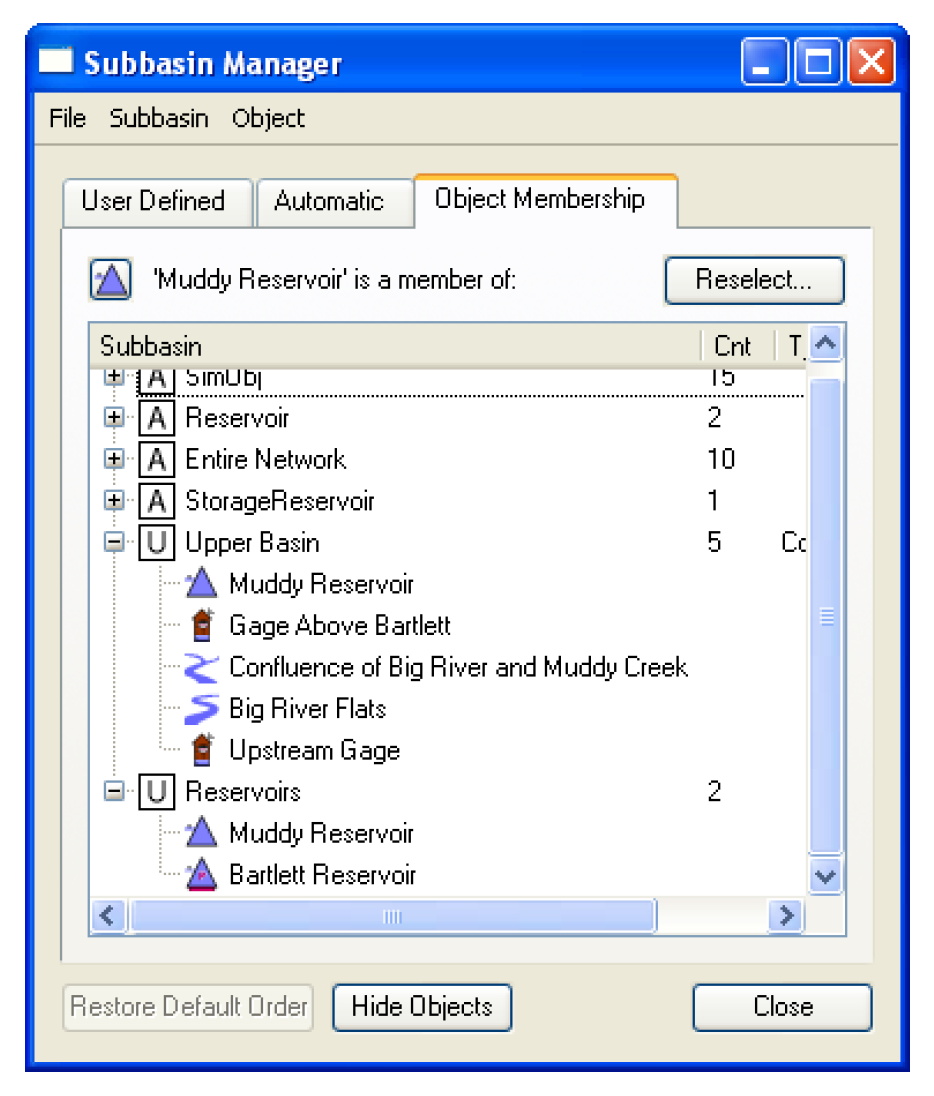
• Automatic. Allows users to show fundamental Subbasins which are automatically defined by RiverWare, and may be used in expressions and constraints in the same manner. These include groups such as “Entire Network”, “Reaches”, “Reservoir”, “DataObj”, etc. Automatic subbasins are displayed with an “A” icon next to their name.
• Object Membership. Allows the user to show all of the subbasins to which an object belongs.
Creating New Subbasins
To create a new user-defined subbasin, first select the desired objects on the workspace. In the subbasin manager, make sure you are in the User Defined tab. Next select Subbasin, then Append New Subbasin. A new subbasin is created that contains the selected objects on the workspace. The name of the subbasin can be modified by selecting the name and entering a new name (or using the right-click Edit Subbasin Name menu). Alternately, you do not need to select the objects before creating the subbasin. Instead, create an empty subbasin and then add objects to it using the selector; see “Adding and Removing Subbasin Members” for details. Additional subbasins can be created or removed using the menu options in the Subbasin menu to append or insert a new subbasin.
An additional menu option, Append Typed Subbasin allows the user to add a subbasin that has a special classification. These include
• No-Optimization
• Smooth-Energy
• Preferred-Customer
• Allocated
• Computational
The first four types are used in optimization. A Computational Subbasin can also be added using the Subbasin, then Append Computational Subbasin menu. See “Computational Subbasin” for details.
Adding and Removing Subbasin Members
Objects are added to the subbasin through either the Subbasin menu or the right-click context menu. There are two general methods to add objects to an existing subbasin. Highlight the desired subbasin on the User Defined tab, then taking one of the following actions:
• Select Subbasin, then Append Objects using the Object Selector or right-click Append Objects with Object Selector to open the Selector dialog. You can use filtering or other tools on the selector to choose the desired objects.
• Highlighting the object on the workspace, then select either Subbasin, then Append Objects from Workspace Selection or Subbasin, then Replace Objects from Workspace Selection.
Note: These options are only available if the subbasin is selected on the subbasin manager, not the objects in the subbasin.
Objects and entire subbasins are removed from the Subbasin Manager by highlighting them and selecting the Remove button on the bottom of the subbasin manager dialog (or through the right-click context menu). Objects and subbasin can be moved up  or down
  in the list using the appropriate buttons. In addition, subbasins can be sorted by selecting any of the column headings: Subbasin, Cnt or Type. To return to the previous custom order, user the Restore Custom Order button. Computational subbasins can be opened by highlighting the subbasin then selecting the Open button or double-clicking the subbasin name. On other subbasins, if you double-click a subbasin, it will toggle the tree-view displaying the objects. If at any time in the Subbasin Manager you wish to close all the tree-views of the objects, select the Hide Objects button.
or down in the list using the appropriate buttons. In addition, subbasins can be sorted by selecting any of the column headings: Subbasin, Cnt or Type. To return to the previous custom order, user the Restore Custom Order button. Computational subbasins can be opened by highlighting the subbasin then selecting the Open button or double-clicking the subbasin name. On other subbasins, if you double-click a subbasin, it will toggle the tree-view displaying the objects. If at any time in the Subbasin Manager you wish to close all the tree-views of the objects, select the Hide Objects button.Aggregate objects (Aggregate Reach and Aggregate Diversion Site) have special behavior because their elements are objects themselves.
• When an aggregate object is added to a subbasin using a workspace selection, then all elements are also added to the subbasin. Any new elements will be automatically added to that subbasin. But if an element is removed from the subbasin, it is not automatically added back when the model is saved and loaded (as happened in previous versions of RiverWare). Also, once an element is removed, any new elements will not be automatically added to the subbasin.
• When the object selector is used to add objects to a subbasin, aggregate elements are only added to the subbasin if they are explicitly selected. Then, adding new elements to the aggregate will not automatically add them to the subbasin.
Viewing an Object’s Subbasin Memberships
From the subbasin manager User Defined or Automatic tabs, the membership of an object can be viewed by highlighting a single object then selecting Object, then List Subbasin Membership. The subbasin manager automatically switches to the Object Membership tab. Displayed are the subbasin to which that object belongs, both automatic (A) and user defined (U). You can also access this tab directly and use the Select or Reselect button to bring up the object selector.
Water Users have another way to display subbasin membership. Each Water User object contain a List Slot called Water User Groups that has a list of all of the subbasins to which the Water User is a member. See “Water User Groups” in Objects and Methods for details of this slot.
This slot was added to provide access to the subbasin membership from the object itself. Thus, the user can go into the object itself and see that a particular Water User belongs to subbasin A, B, and C, all from the object.
Selecting Objects Belonging to a Subbasin
From the Object menu, you can also choose to Select Objects on Workspace. This option will highlight and select the object on the workspace. Double-click an object in the subbasin manager to open the object directly. The right-click context menus have the following options:
• Select Objects on Workspace. Select the object on the workspace. No scrolling is performed.
• Select Objects and Show Workspace. Select the objects, then brings the workspace to the front of the screen. No scrolling is performed.
• Scroll to Object on the workspace. Scroll the workspace the selected objects.
Similarly, with a subbasin selected, use the Subbasin, then Select Member Objects on Workspace menu to select all of the objects on the workspace for the selected subbasin or selection. In addition, if you double-click a subbasin in the manager, it will select all the objects on the workspace.
Computational Subbasin
The Computational Subbasin supports computations that involve more than one object, so-called “global” solutions, though they need not encompass the entire network. A Computational Subbasin is created through the same dialogs as other typed subbasins, but it, like simulation objects, contains slots and other attributes that you can inspect and change, by “opening” the subbasin. To open a computational subbasin from the main workspace use the Workspace, then Open Computational Subbasin and select the desired basin from the list. To open a computational subbasin from the subbasin manager, select the subbasin, then select the Open button or double-click the subbasin name. Computational subbasins contain no general slots; all slots are dependent on user-selectable methods. See “User Methods” in Objects and Methods for details on the available methods and their slots.
Revised: 11/11/2019