
Display and edit series slot notes
Use this procedure to display and edit series slots notes. Notes are short text strings associated with a series slot at a timestep.
Note: This procedure is a summary of actions you can perform on notes from the SCT. See Notes on Series Slots in User Interface for details.
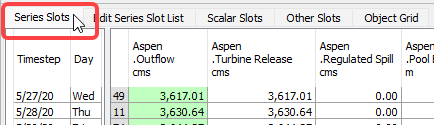
1. Go to the Series Slots tab.
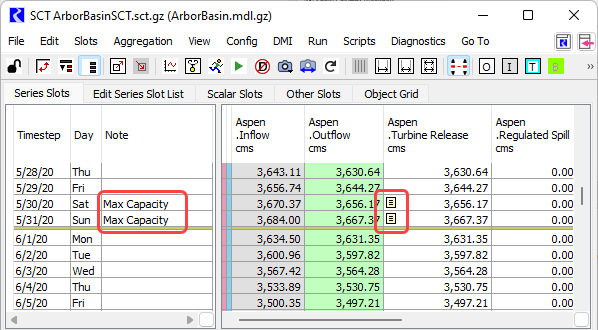
Each note is indicated by a Note icon in the corresponding cell.
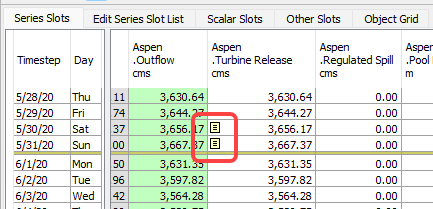
a. Hover over a note icon to see the note text in a tooltip.
b. Click on the cell with the note to see the note text in the status bar at the bottom of the SCT.
2. Optionally, in vertical timestep orientation, you can add the Note column, which displays the text of all notes at each timestep. Proceed as follows:
a. Switch to vertical timestep orientation, if necessary.
b. In the SCT menu, select Config, then Vert Time.
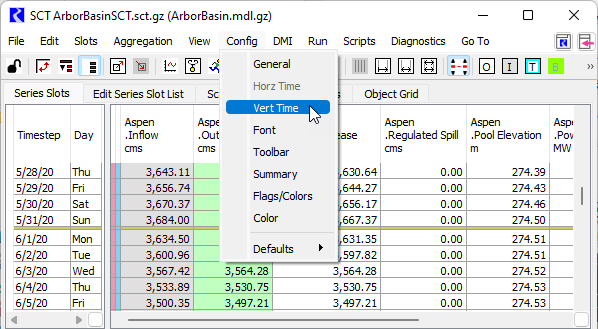
The SCT Configuration window opens at the Vert Time tab.
c. Select the Show Column: Notes checkbox, then select Apply or OK.
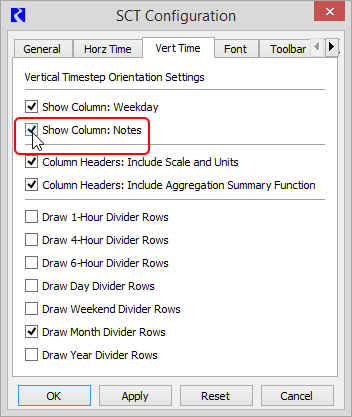
The Note column is added to the row header. The text of all notes is displayed in this column.
3. To add a new note, proceed as follows:
a. Select any cells with values you want to annotate.
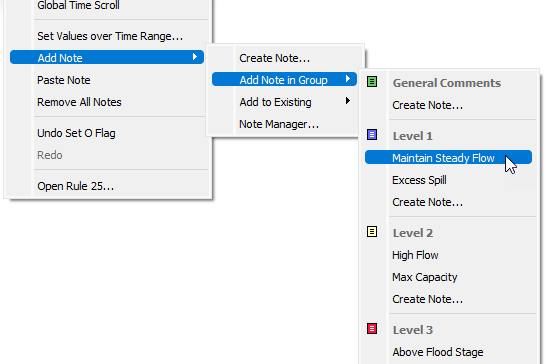
b. Right-click and move the cursor over Add Note in the shortcut menu. Four options will appear.
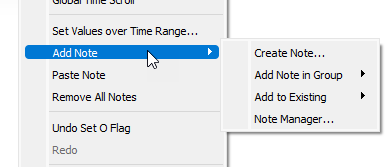
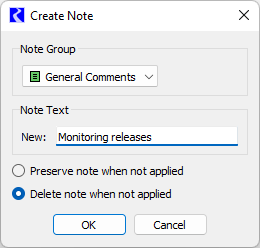
• Create Note—opens the Create Note dialog; you can type the desired note text, and select the Note Group to which you want to assign the note. Note Groups are configured in the Note Manager. See Notes on Series Slots in User Interface for details. If no Note Groups have been configured, a Default Note Group will be available. When the Create Note dialog is opened from the SCT, the option to Delete note when not applied will be selected by default. If you want the note to remain in the Note Manager even if it is no longer applied for any note instances, so that it can be selected for later use, select the option for Preserve note when not applied. When you select OK, the note is added on the selected timesteps, and the note gets added to the Note Manager.
• Add Note in Group—allows you to select from notes already configured in the Note Manager (see Notes on Series Slots in User Interface for details), organized by Note Group. You can also choose to create a new note within the specified group. When you select a note, it is immediately applied on the selected timesteps.
• Add to Existing—allows you to select from notes already configured in the Note Manager (see Notes on Series Slots in User Interface for details), but instead of applying the selected note directly, it opens the Create Note dialog to allow you to add to or modify the selected note. When the Create Note dialog is opened from the SCT, the option to Delete note when not applied will be selected by default. If you want the note to remain in the Note Manager even if it is no longer applied for any note instances, so that it can be selected for later use, select the option for Preserve note when not applied. When you select OK, the note is added on the selected timesteps, and the note gets added to the Note Manager as a new note.
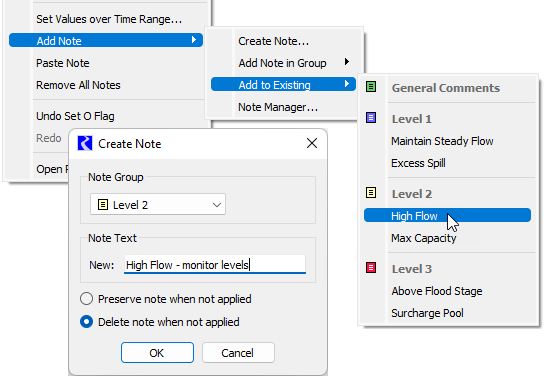
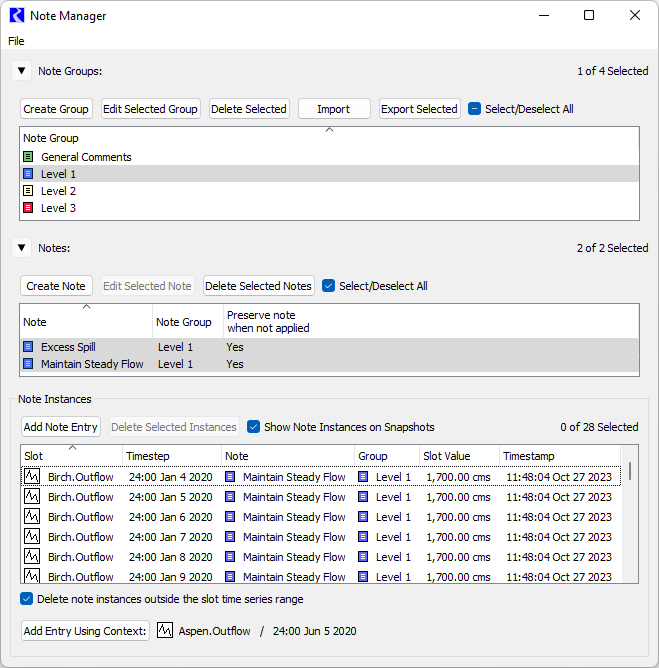
• Note Manager—opens the Note Manager window. From there you can add or edit notes and apply them to specified slots. See Notes on Series Slots in User Interface for details.
When a note is added a Note icon appears in the cell.
4. To edit an existing note, proceed as follows:
a. Select the cells where the Note icon appears.
Note: For a multiple selection, all of the selected cells must have the same notes applied for the note editing options to be available.
b. Right-click a cell in the selection, select the note in the shortcut menu, and then select one of the following options:
• Copy Note—copies the note to the RiverWare clipboard; you can paste the note multiple times to other slots.
• Edit Note—opens the Note Manager window, allowing you to edit the note.
• Replace with New Note—opens the Create Note dialog to allow you to add to or modify the selected note. When you select OK, the modified note replaces the note on the selected timesteps, and the note gets added to the Note Manager as a new note.
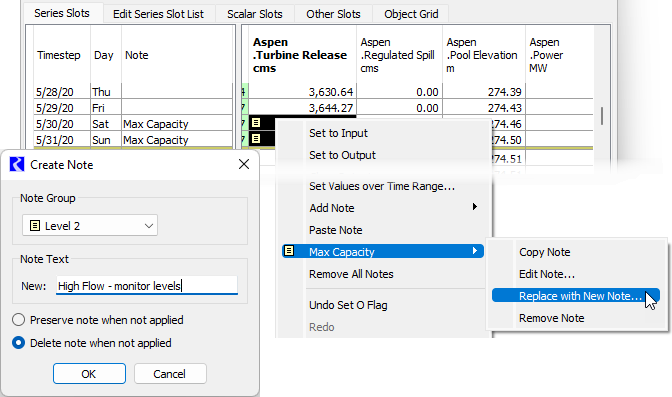
• Remove Note—immediately removes the note from the slot on the selected timesteps. No confirmation message is displayed.
5. To remove all notes from a selection, proceed as follows:
a. Select the cells from which you want to remove all notes.
b. Right-click a cell in the selection. Then in the shortcut menu, select Remove All Notes.
c. A confirmation dialog will appear asking if you want to remove all notes. Select Yes. The notes will be removed.
Related topics
Revised: 01/09/2026