
Example: Creating a New RBS Ruleset
This section presents an example of how to build a new Rulebased Simulation (RBS) ruleset. Similar actions can be used to build any of the other types of RPL sets.
1. Select Policy, then Ruleset, then New from the main menu bar. This will bring up a blank RPL Set Editor dialog.
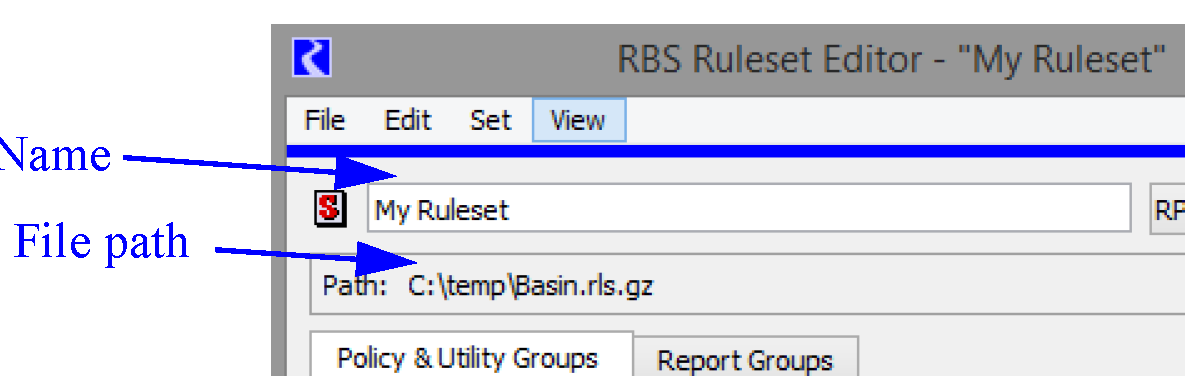
2. Enter the desired Ruleset Name.
3. Save the ruleset to the desired directory by selecting File, then Save or File, then Save As from the menu bar of the Ruleset Editor dialog.
Adding Groups, Rules, and Functions
To begin the ruleset, use the following steps to add the desired number of policy groups and utility groups.
1. From the Set menu in the RPL Set Editor’s main menu bar, select either Add Policy Group or Add Utility Group.
2. Name the Policy or utility Group by double-clicking its icon to open the Policy Group Editor or Utility Group Editor and replace the default name at the top with the desired name.
Policy groups are used to organize rules and functions. Utility groups are used to organize functions. Although an entire set can be created entirely within a single policy group, it is not recommended. Rules should be split up into different policy groups according to object, geography of the model, operation type, and/or priority of operations. Supporting functions which are common to several rules should be placed in utility groups. Functions within a policy group are only available to rules and functions within that policy group.
Use the following steps to add a rule or function.
1. Select the Policy or Utility Group so that it is highlighted.
2. From the Set menu, select Add Rule or Add Function.
To view the elements in the policy or utility group, select the tree-view triangle left of the group name.
Unspecified expressions are portions of the rule that have not yet been set when building a rule. These expressions are represented as the expression data type.
To add an Assignment, from the Statement menu, select Add Assignment.
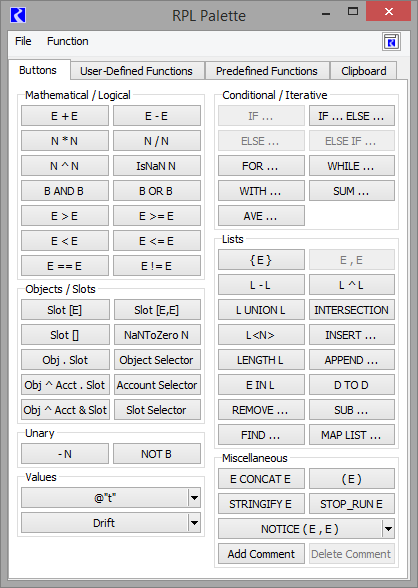
Expressions are built using the RPL Palette. The RPL Palette contains most of the expression elements needed to build a block, including logical operators, slot and object access expressions, flow operators, list operators, predefined and user made functions. See RPL Palette for details. Depending on the data type of the expression highlighted in a block, the RPL Palette only enables buttons for expressions of that data type. See Expression Data Types for details on the data types.
To open the RPL Palette, select Rule, then Palette from the menu bar of the Rule Editor dialog.
Use the following steps to finish building the rule.
1. Highlight the left <numeric expr>. This will be the slot to which the rule will assign a value.
2. In the Objects/Slots section of the RPL Palette, select the Slot[] button. This replaces the unspecified numeric expression with a series slot expression.
The square braces following a slot expression refer to the timestep or the row and column of the slot. There are three slot expression possibilities:
– Slot [ E ] A series slot at the timestep indicated by E.
– Slot [ E, E ] A table slot at the row and column indicated by E and E, respectively. Table slot column references are zero based, i.e. the first column is referred to as column 0.
– Slot [ ] A series slot at the current controller timestep or a scalar slot value
3. Highlight the unspecified portion of the series slot expression, <expr>, and select the Slot Selector button in the Objects/Slots section of the RPL Palette. This will bring up the slot selector dialog.
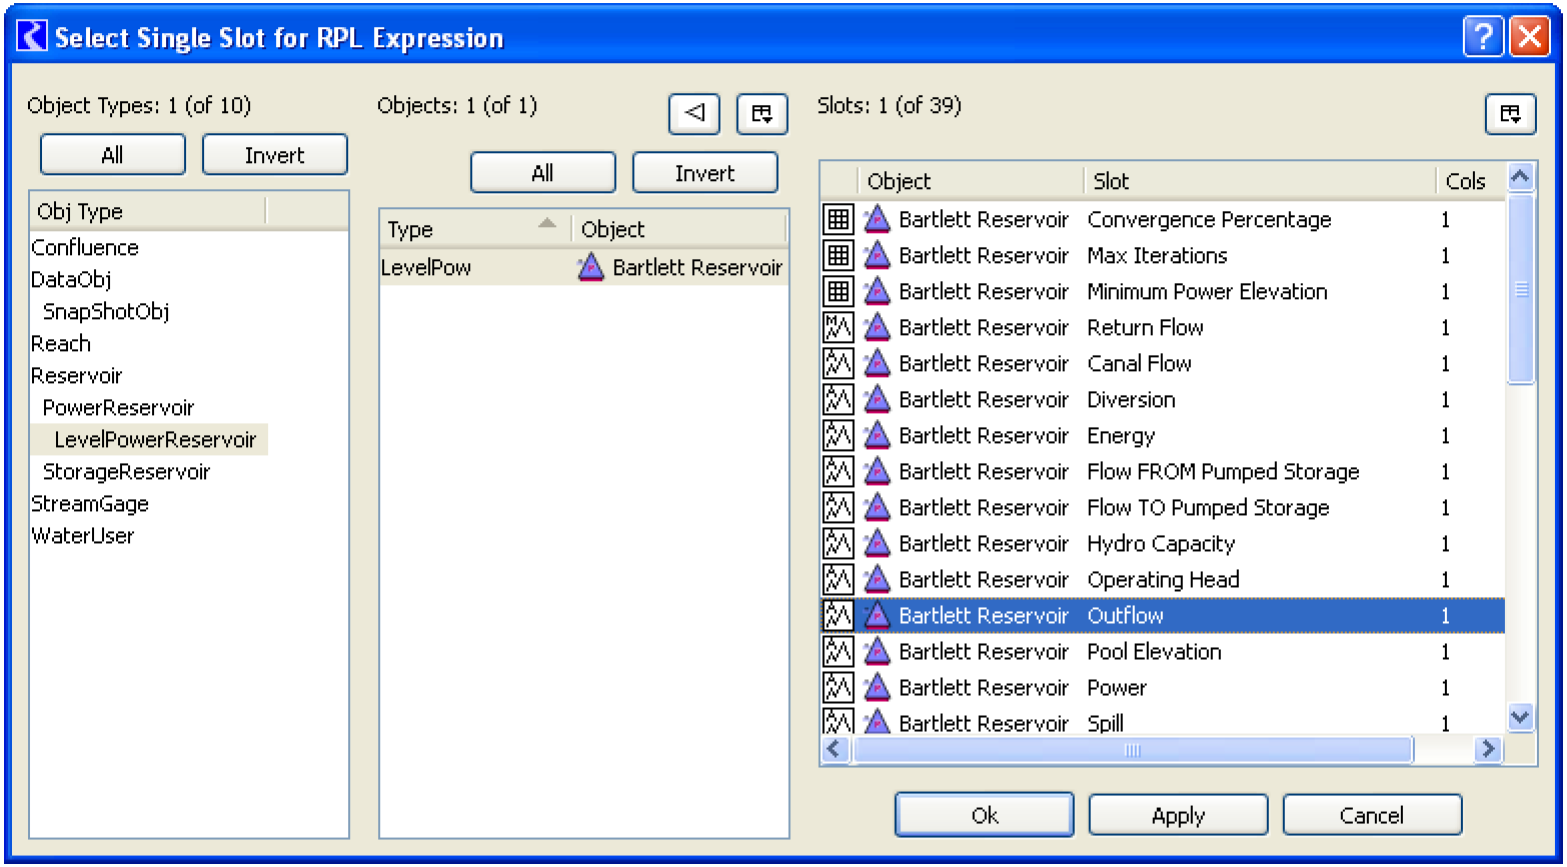
4. In the Single Slot Selector, select the appropriate Object Type, Object, and Slot. Then select OK.
5. Finish building the rule by building the right-hand side of the rule. The RHS should return a numeric value and units that are to be set on the slot specified on the left-hand side.
Revised: 01/11/2023